Tucked in behind Gloriavale, the Haupiri Valley is probably better known by hunters than trampers. Nevertheless, it's a beautiful setting with expansive river flats, some nice huts and gentle adjacent tops.
Access to the valley is through Gloriavale's land on the true left of the river. You will need to request permission in advance (at least a few days), to allow their office staff to liaise with their stock manager around whether permission will be given. I had no issues with passing through in May (and by all accounts they are generous with access), but you might be less successful in spring due to calving. Office contact details are listed on their website, noting that the phone number provided by DOC is different and historically didn't go anywhere.
If successful, their reception staff will provide information around access protocols. You'll likely have to sign in at their office, there is some signage on the access road (Heaphy Road) and there is a sign on the building itself. If worst comes to worst, there are ~500 people in the community and someone will be able to point you in the right direction. Note that about half the population of Gloriavale are children, so extra care needs to be taken when driving around the populated areas. There is a carpark provided near the river-adjacent lodges shown on the map.
Setting out, the route initially follows the 4WD track for a few kilometres. The track is in good condition and passes through pastoral paddocks, so you may encounter cattle as you head through. It's a scenic and easy introduction to the valley, which closes in near pt. 369.
Half an hour in, the track junction with the Brian O'Lyn Route is reached. The final bit of river flat travel here did not used to be well marked, though the marked line on the topo is accurate. The opening few hundred metres are kind, comfortable travel on a shallow face. 

Travel on the lower faces of the Brian O'Lyn Route.

The route does briefly kick up for a few hundred metres, making for more arduous travel. Despite it being described as "near vertical" by a popular magazine, it's of comparable steepness to a lot of alpine approach routes (like the Cons and Mt Aicken tracks in Arthur's Pass) and reasonably well formed. One challenge with it being face travel is that there's no defined crest to handrail off, but there was a lot of flagging tape present in 2021. By the 600m contour, most of the steep travel is done.

The upper section of the Brian O'Lyn Route.

The upper section largely meanders, the ridge broad and shallow. A bit of care does need to be taken to follow the sporadic waratahs and there is some degree of encroachment, but the bush eventually opens out to easy travel. It's probably not worth scratching about if you cannot locate the individual markers, picking open lines up towards the ridge crest is  a good start.

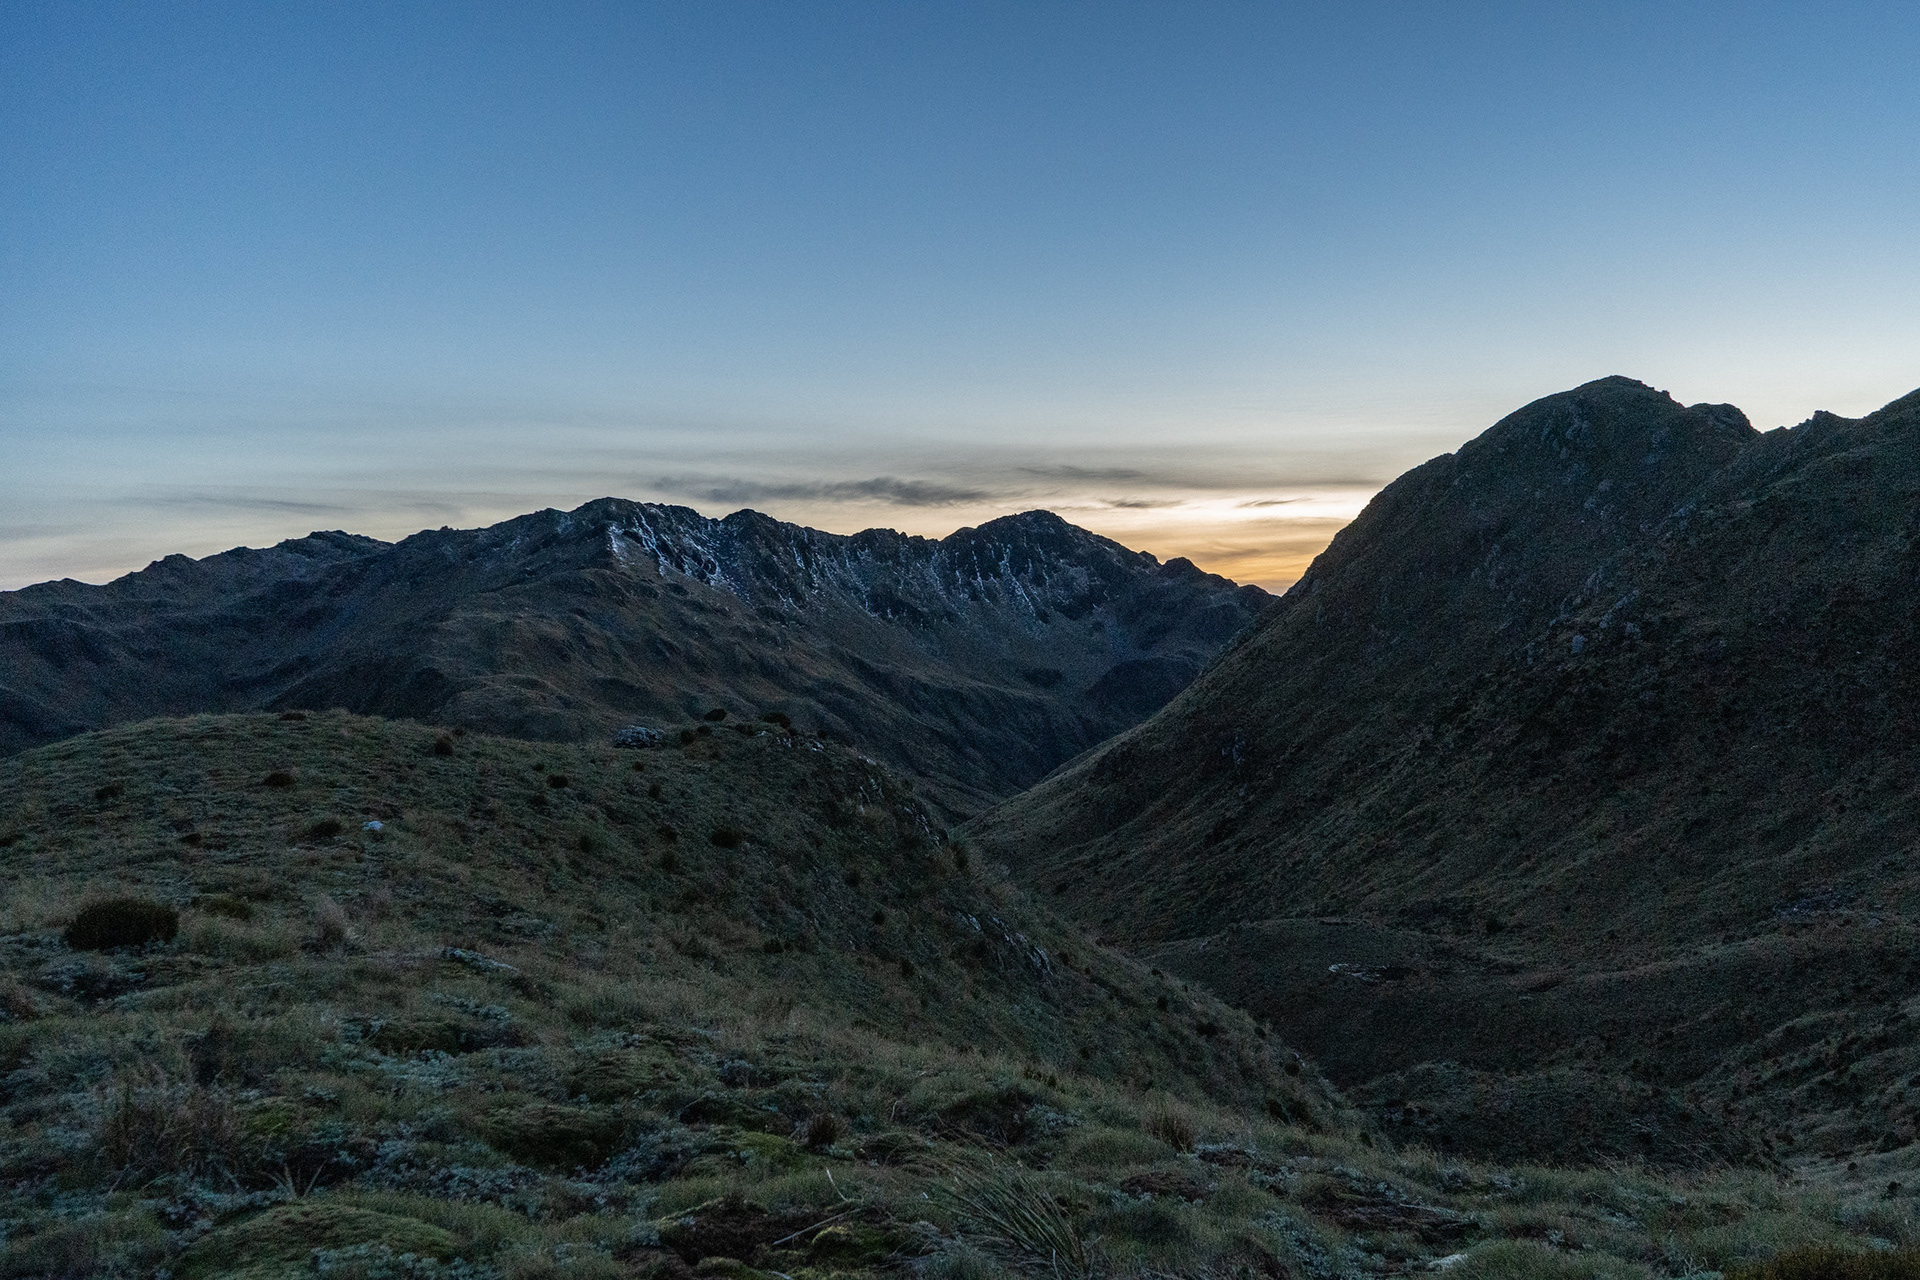
Back into the Haupiri catchment from the Brian O'Lyn tops, Mt Elizabeth at the far right.

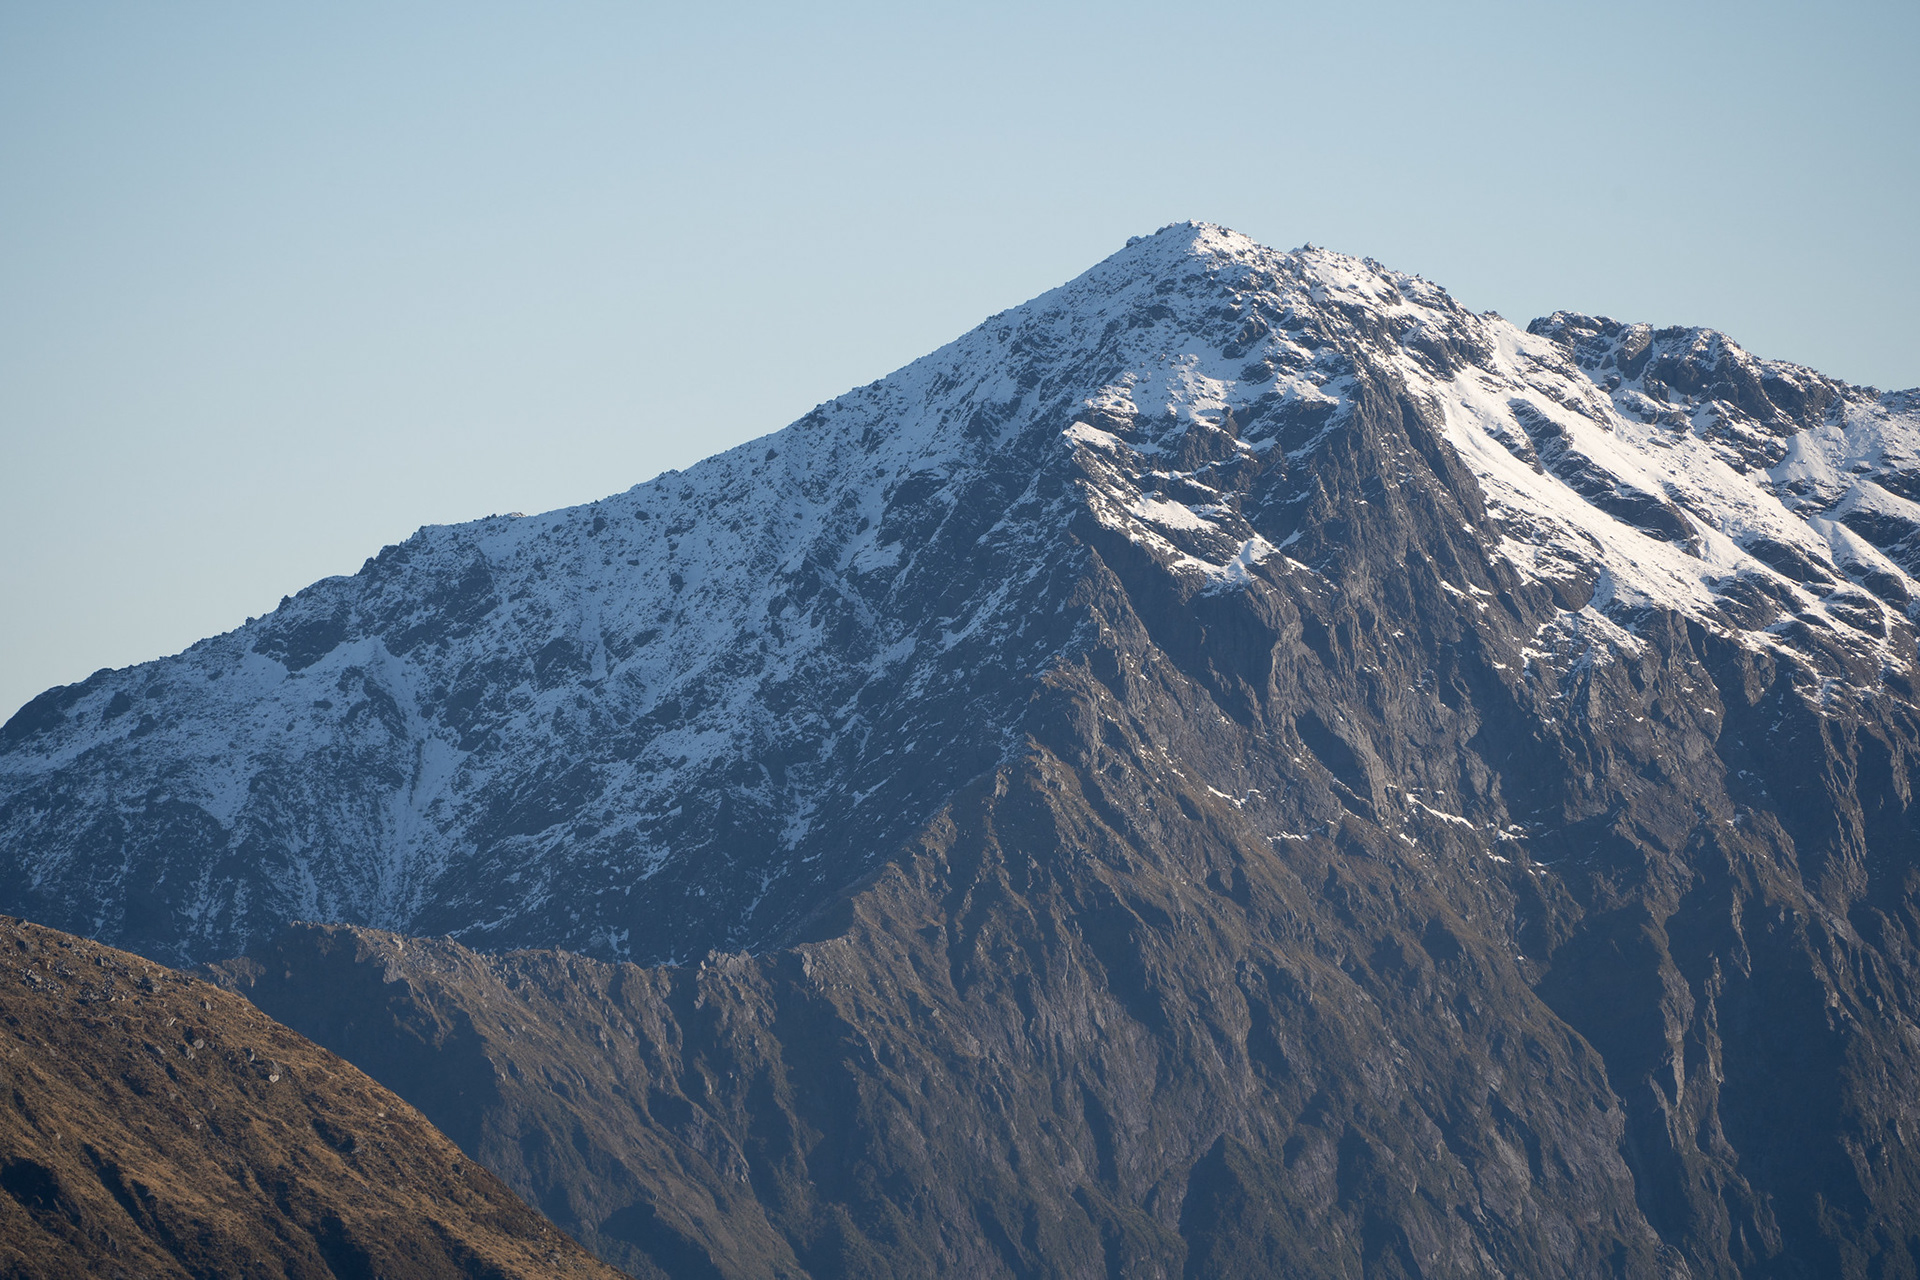
The open faces of the range, Mt Alexander in the background and pt. 1251 on the right foreground.

A short amount of climbing takes you to pt. 1218, which is known as Brian O'Lyn hence the track name. I'm not completely sure why this is a named peak, especially given its lack of prominence and stature compared to the adjacent pt. 1251. Nevertheless, it has a trig and potentially good views over the coast were it not for the adjacent clag.

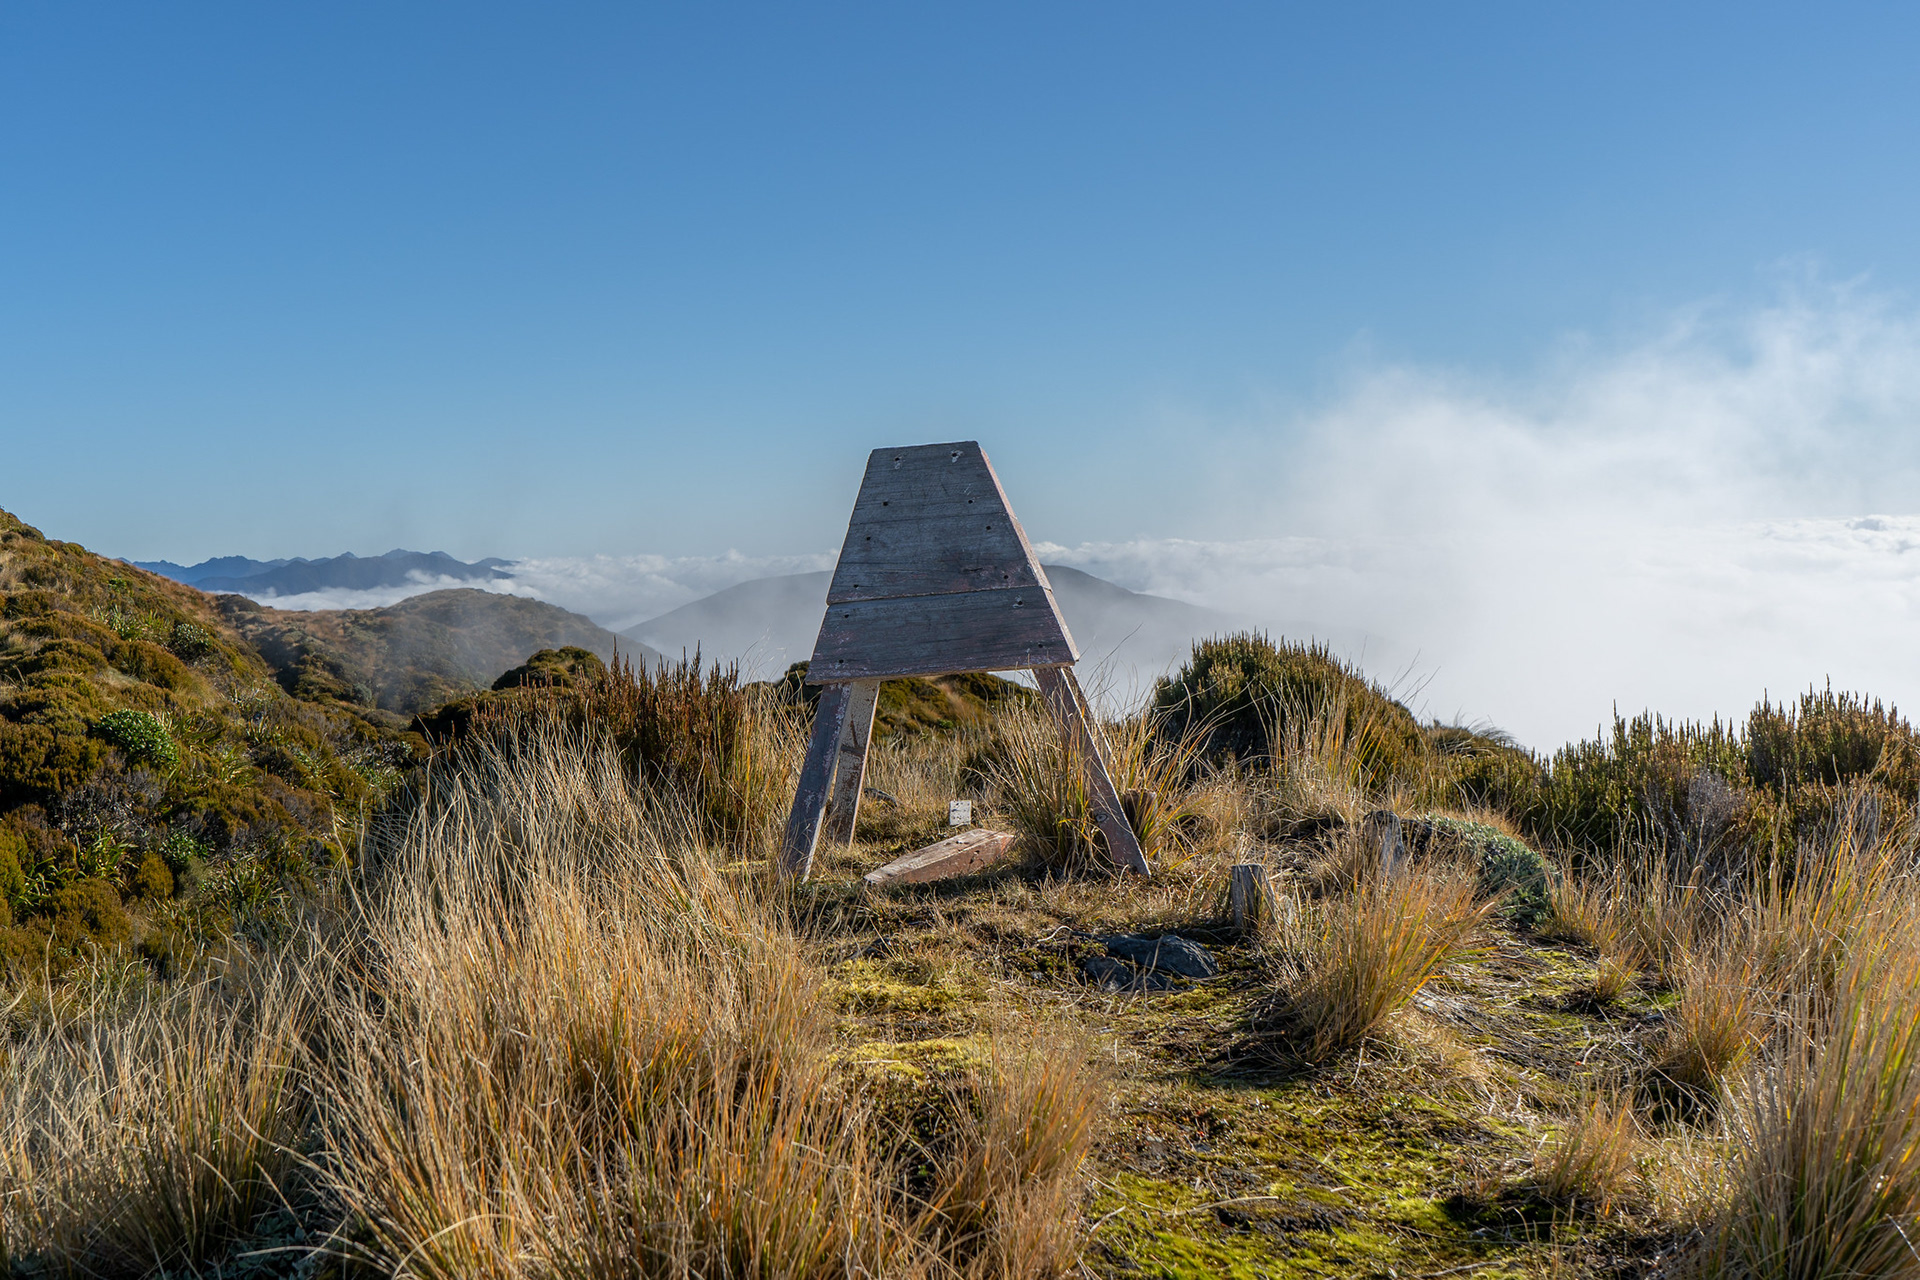
The trig on pt. 1218 (Brian O'Lyn).

From Brian O'Lyn, you can head along the range crest easily before needing to take a descending traverse towards the obvious saddle between pts. 1251 and 1196. I don't know if there's a coherent footpad here, I bumbled my way through pocketed tussock but perhaps smarter people than me have done better. From the saddle, a coherent track (and even some marker poles!) provide a way through the scrub and towards Mt O'Shanessy.

Looking back to pt. 1196, the sun already getting low in the short May days.

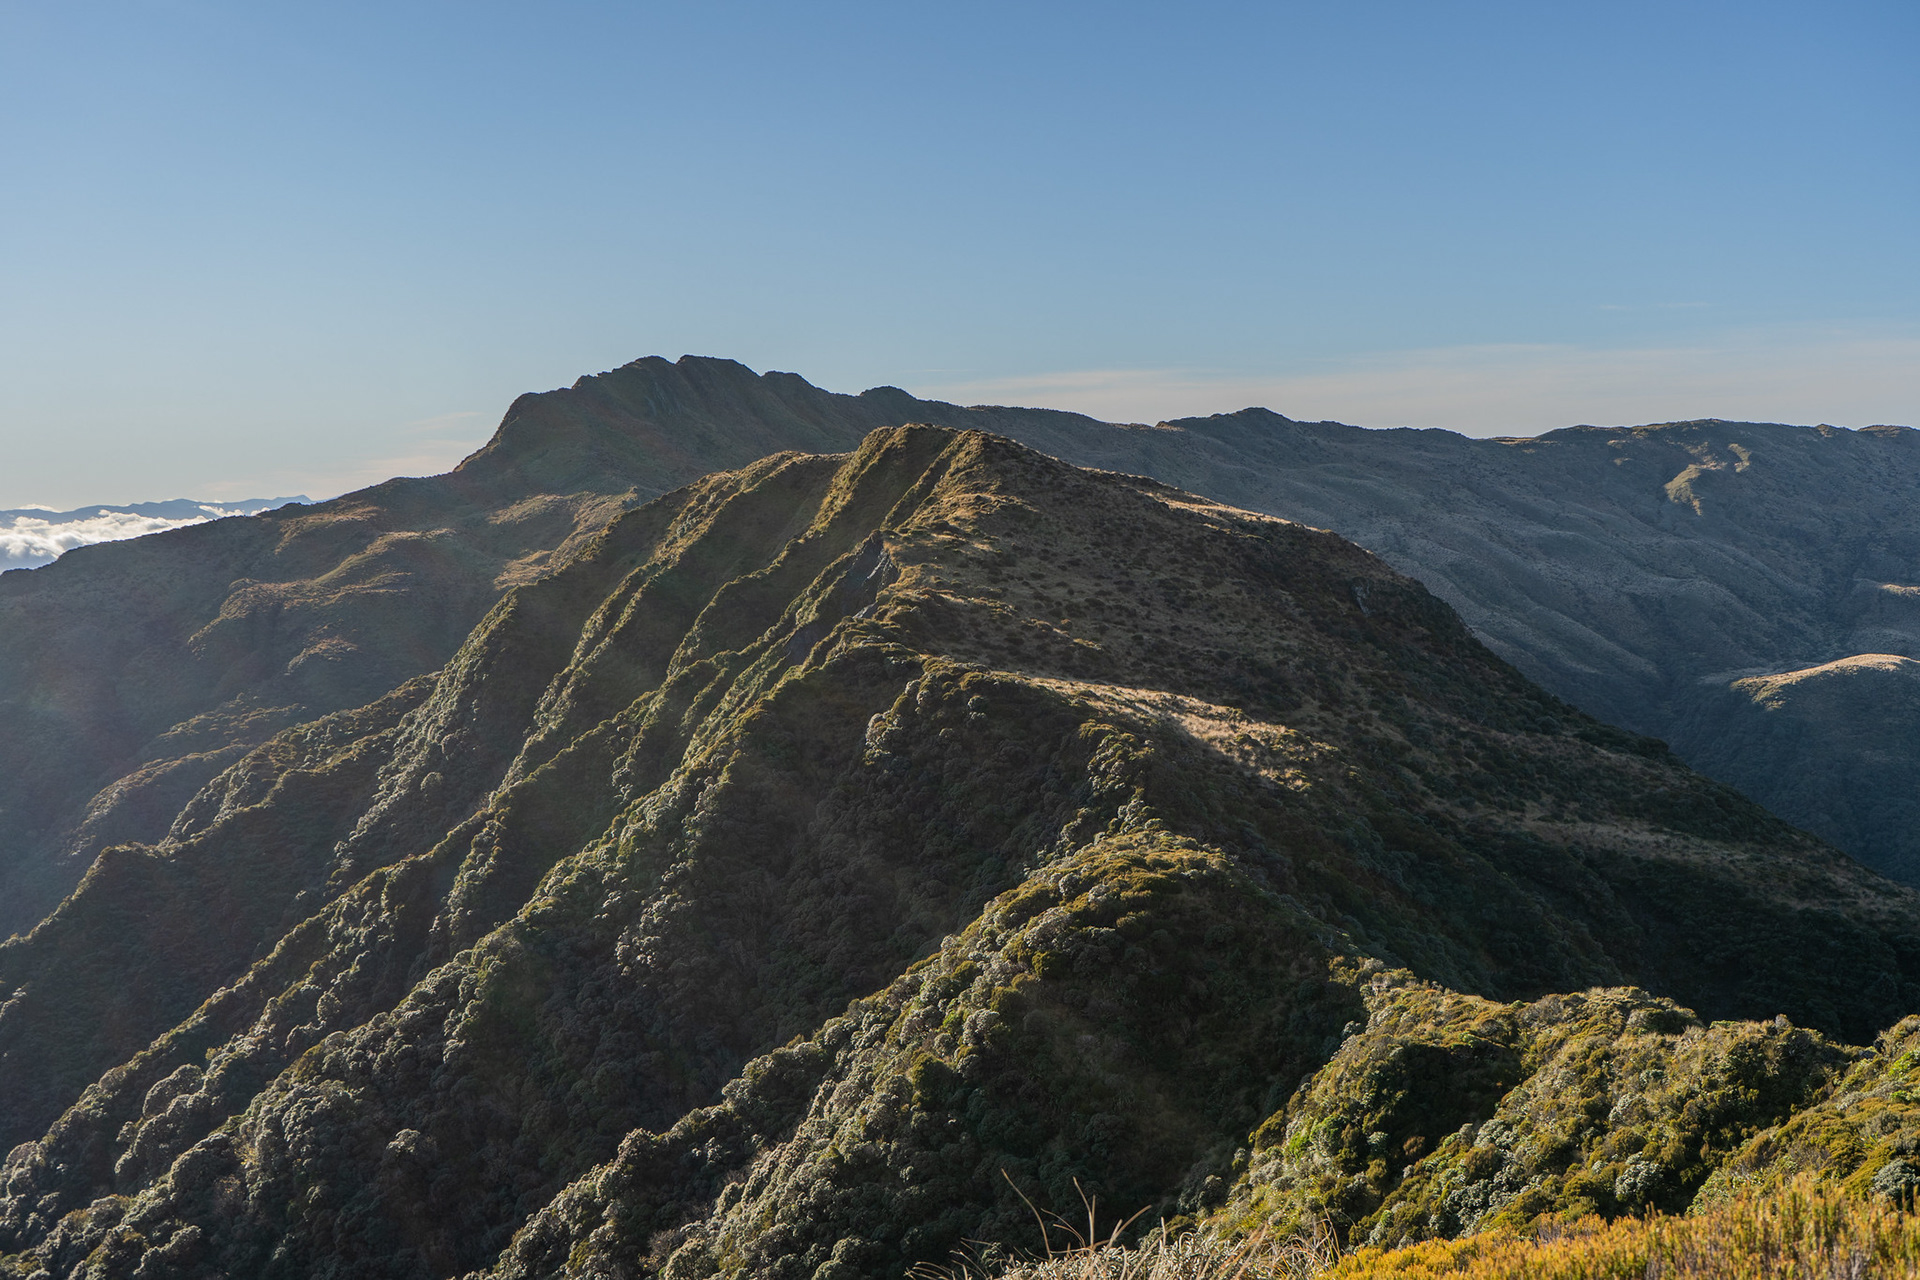
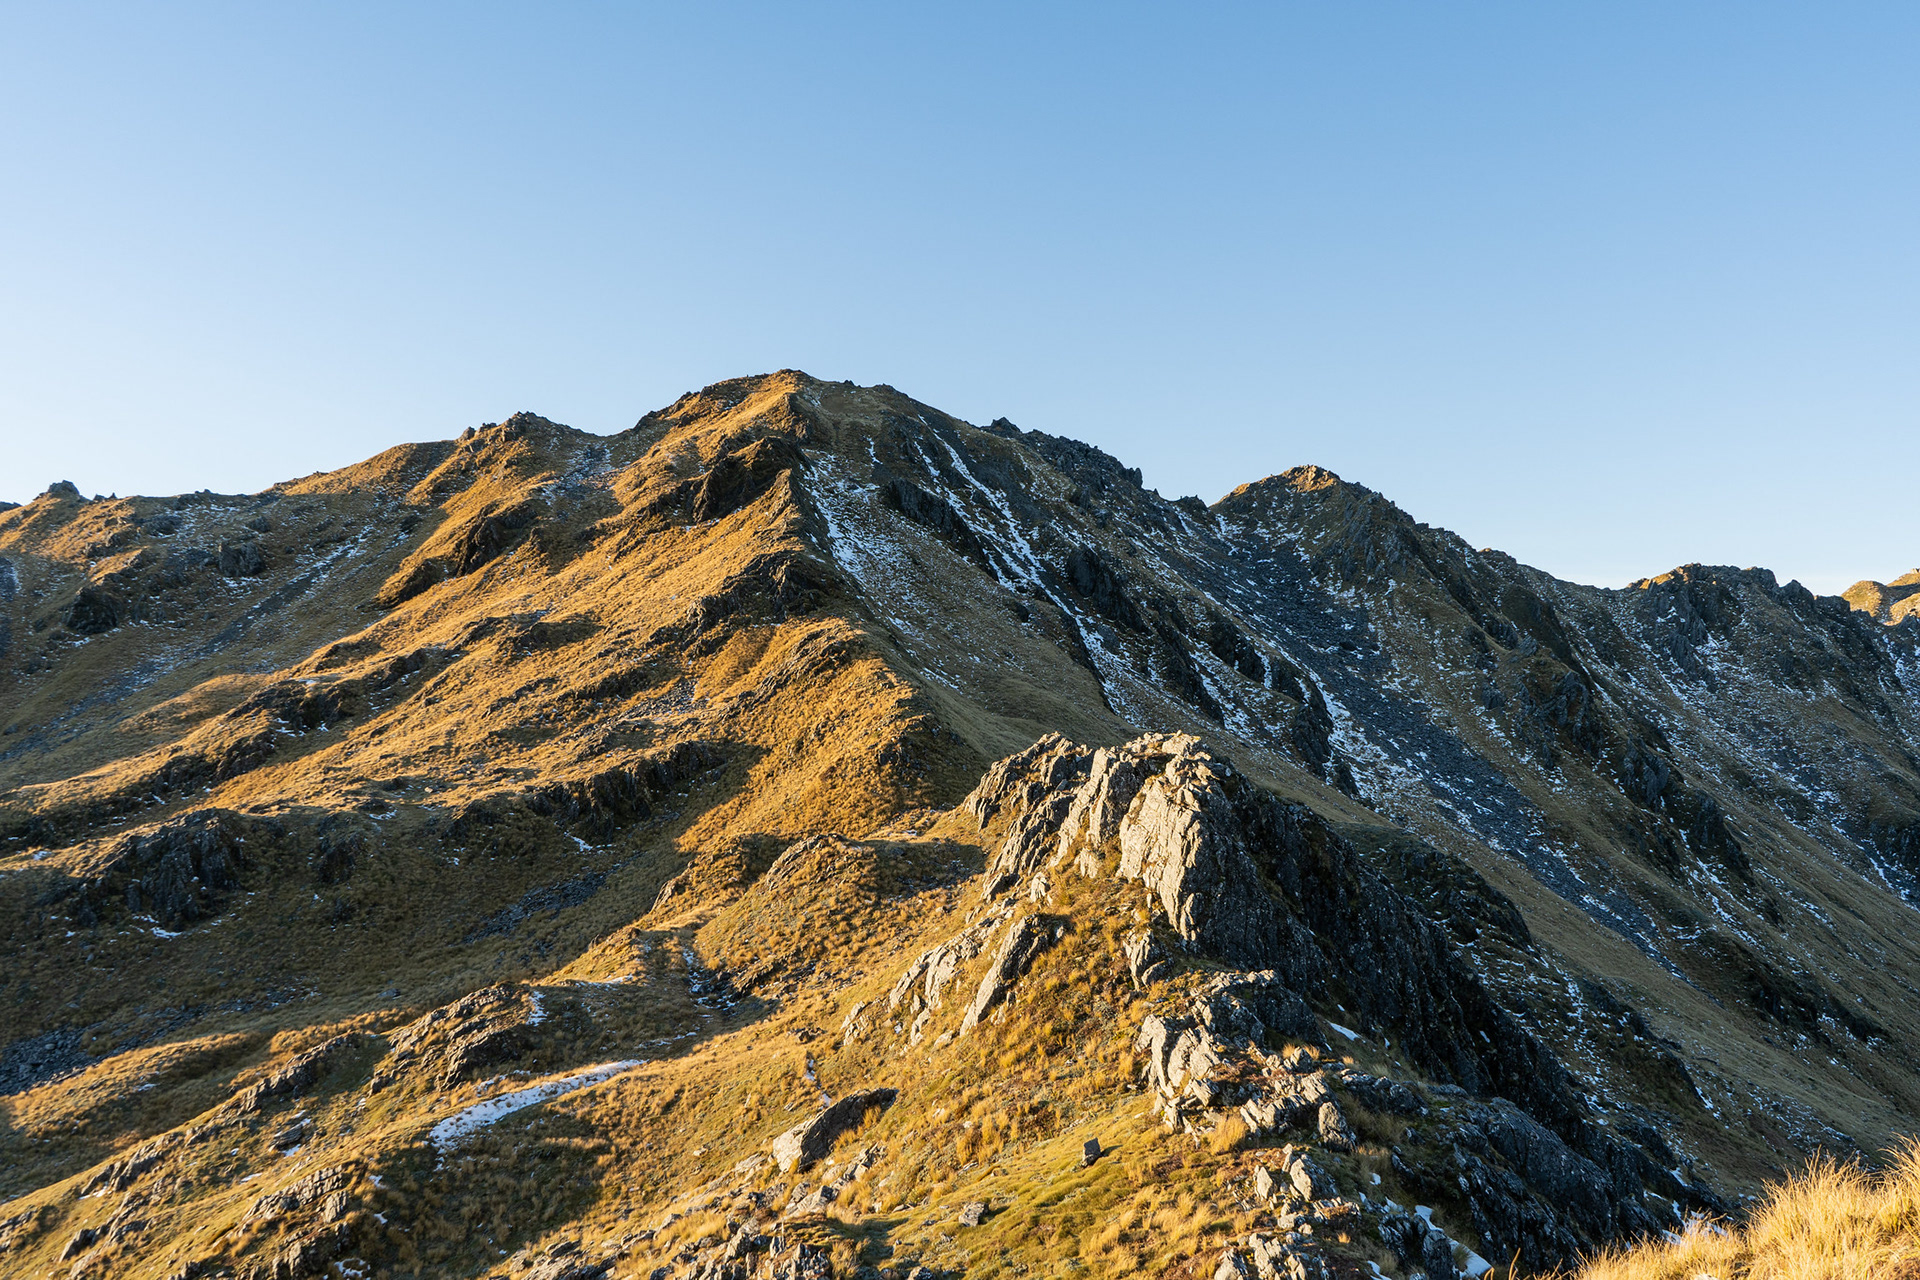
The lumpy ridge up to Mt O'Shanessy's outlier peak.

As Mt O'Shanessy is approached, beautiful schist fields begin to dominant requiring a bit of care. When I was there, quite a few of the ledges were iced over. It would presumably be an easier proposition in the height of summer.

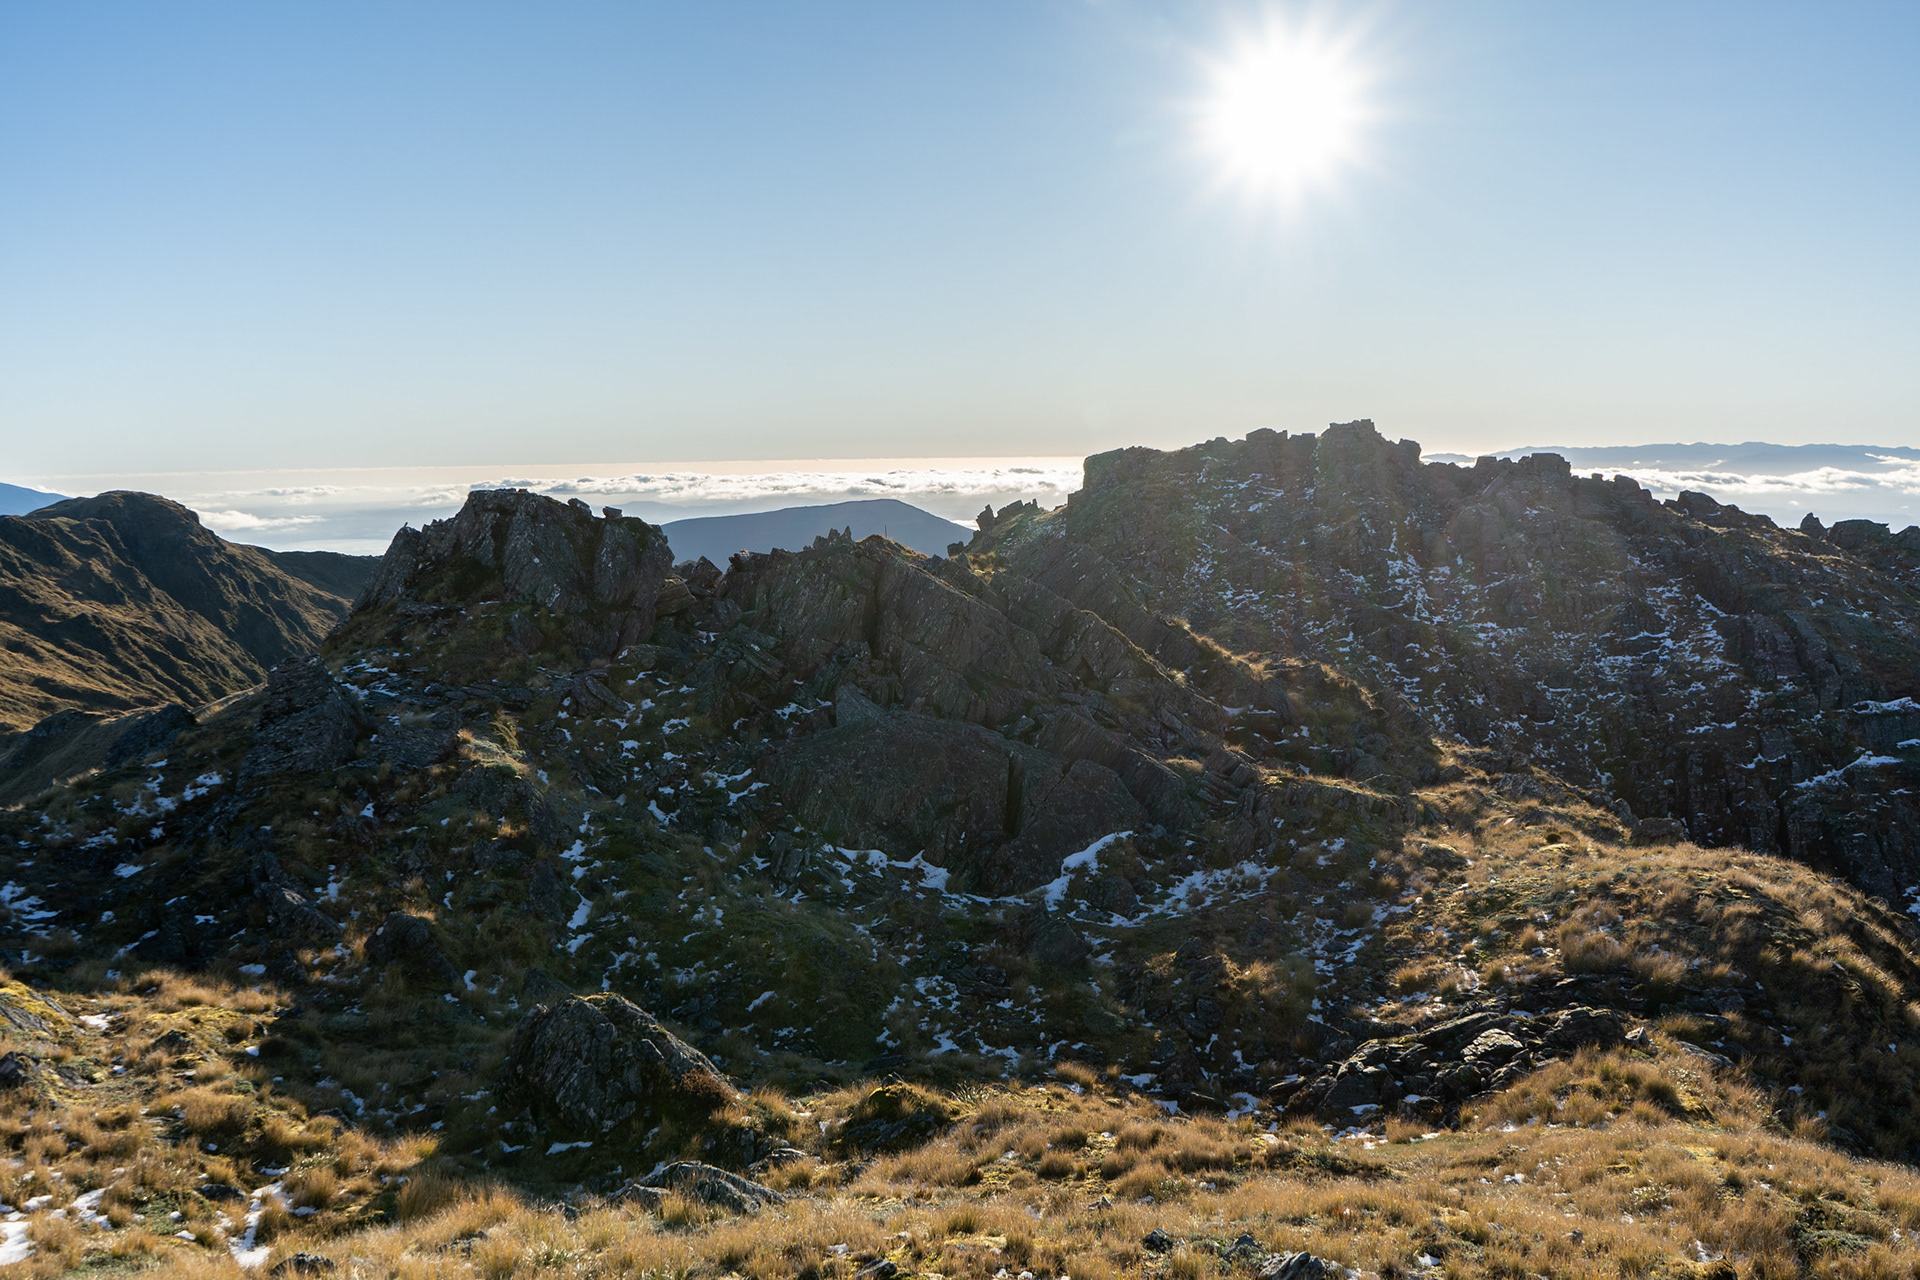
The boulder fields on the outlier peaks of Mt O'Shanessy.

The summit of Mt O'Shanessy gives a good vantage point across to a range of peaks and tramping regions of interest. Perhaps more pertinently, it also gives a line of sight down to Lake Morgan.

Mt Elizabeth, I would love to one day get up here.

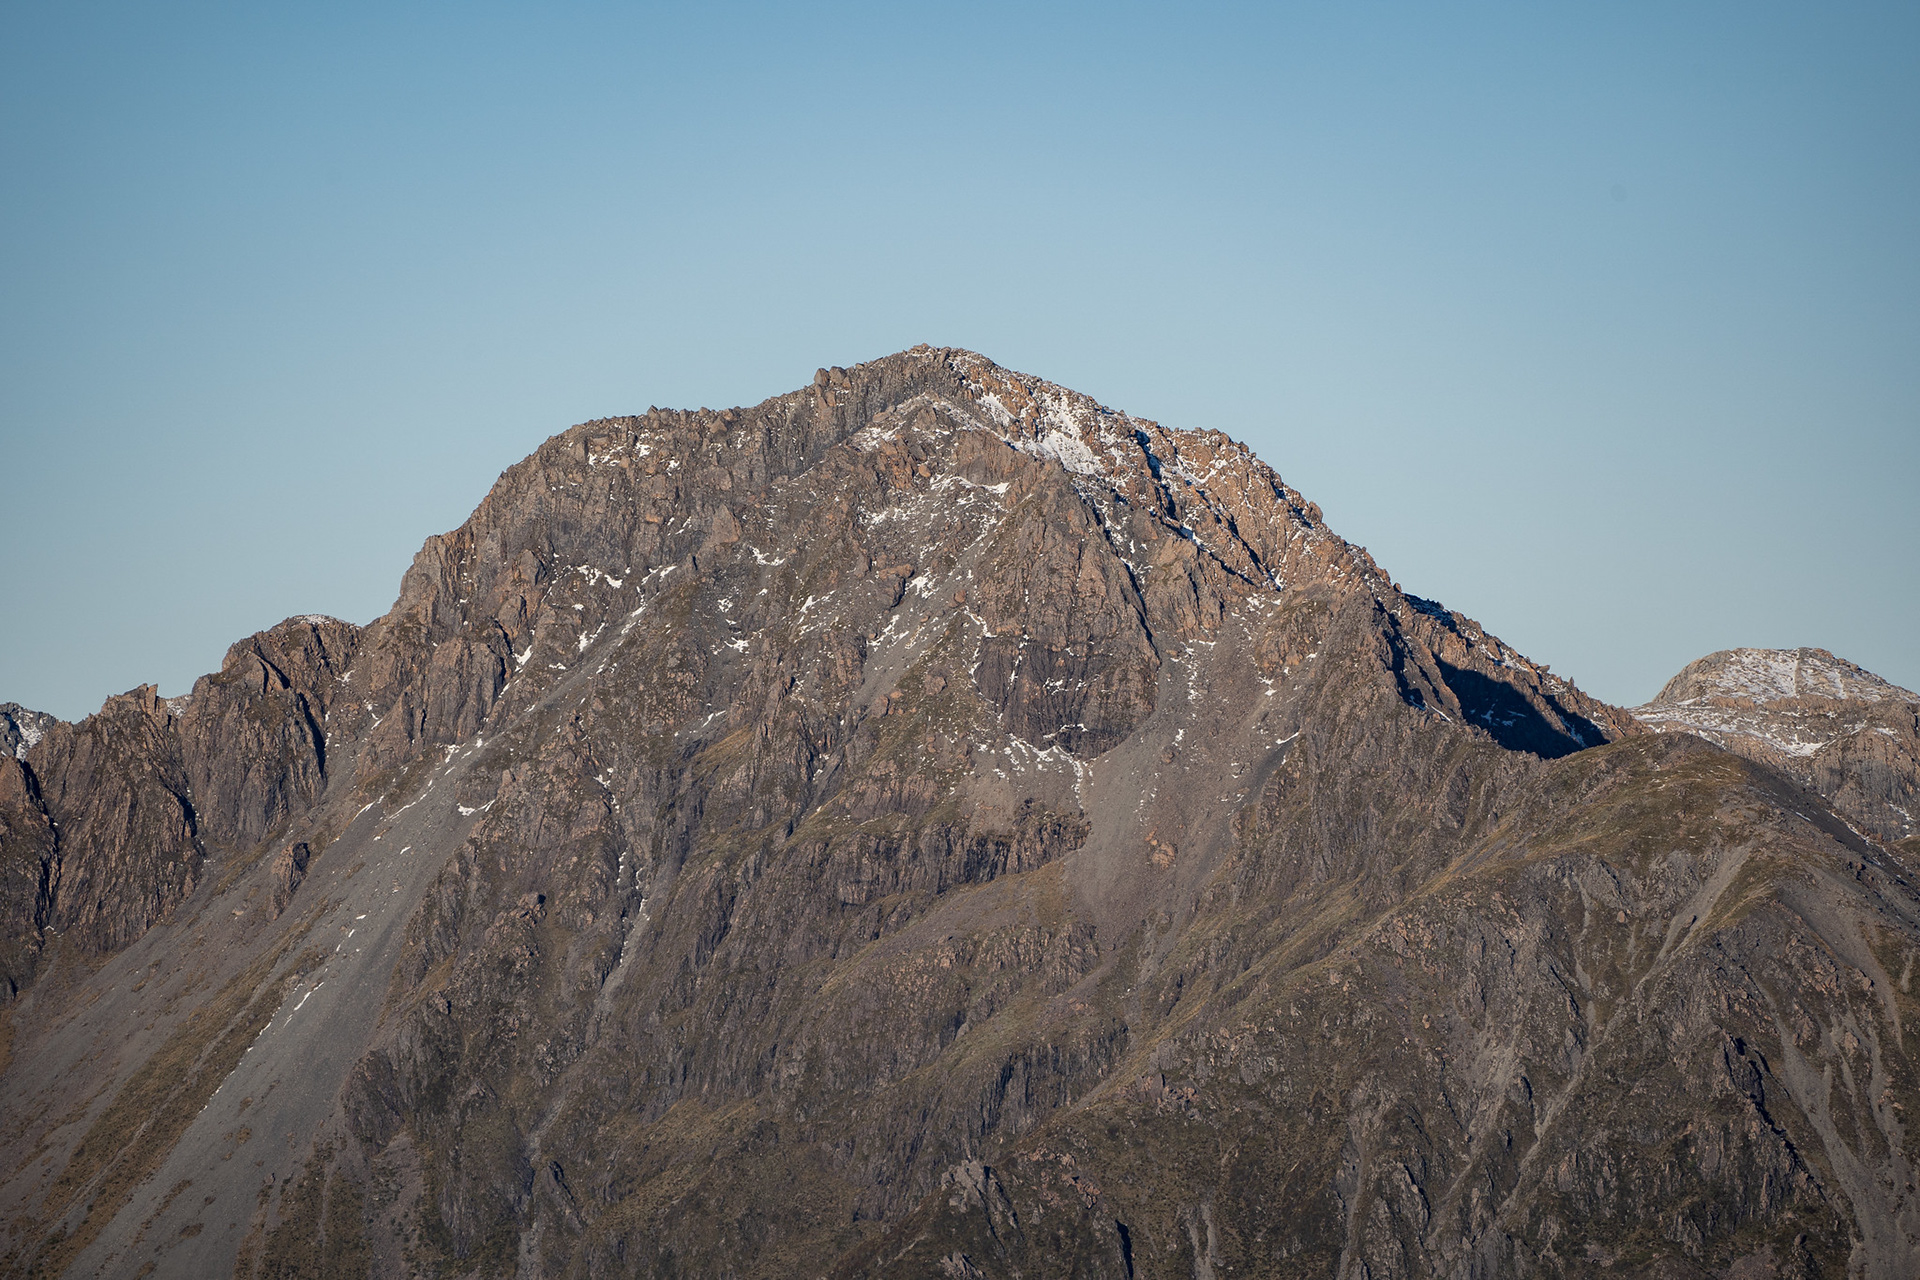
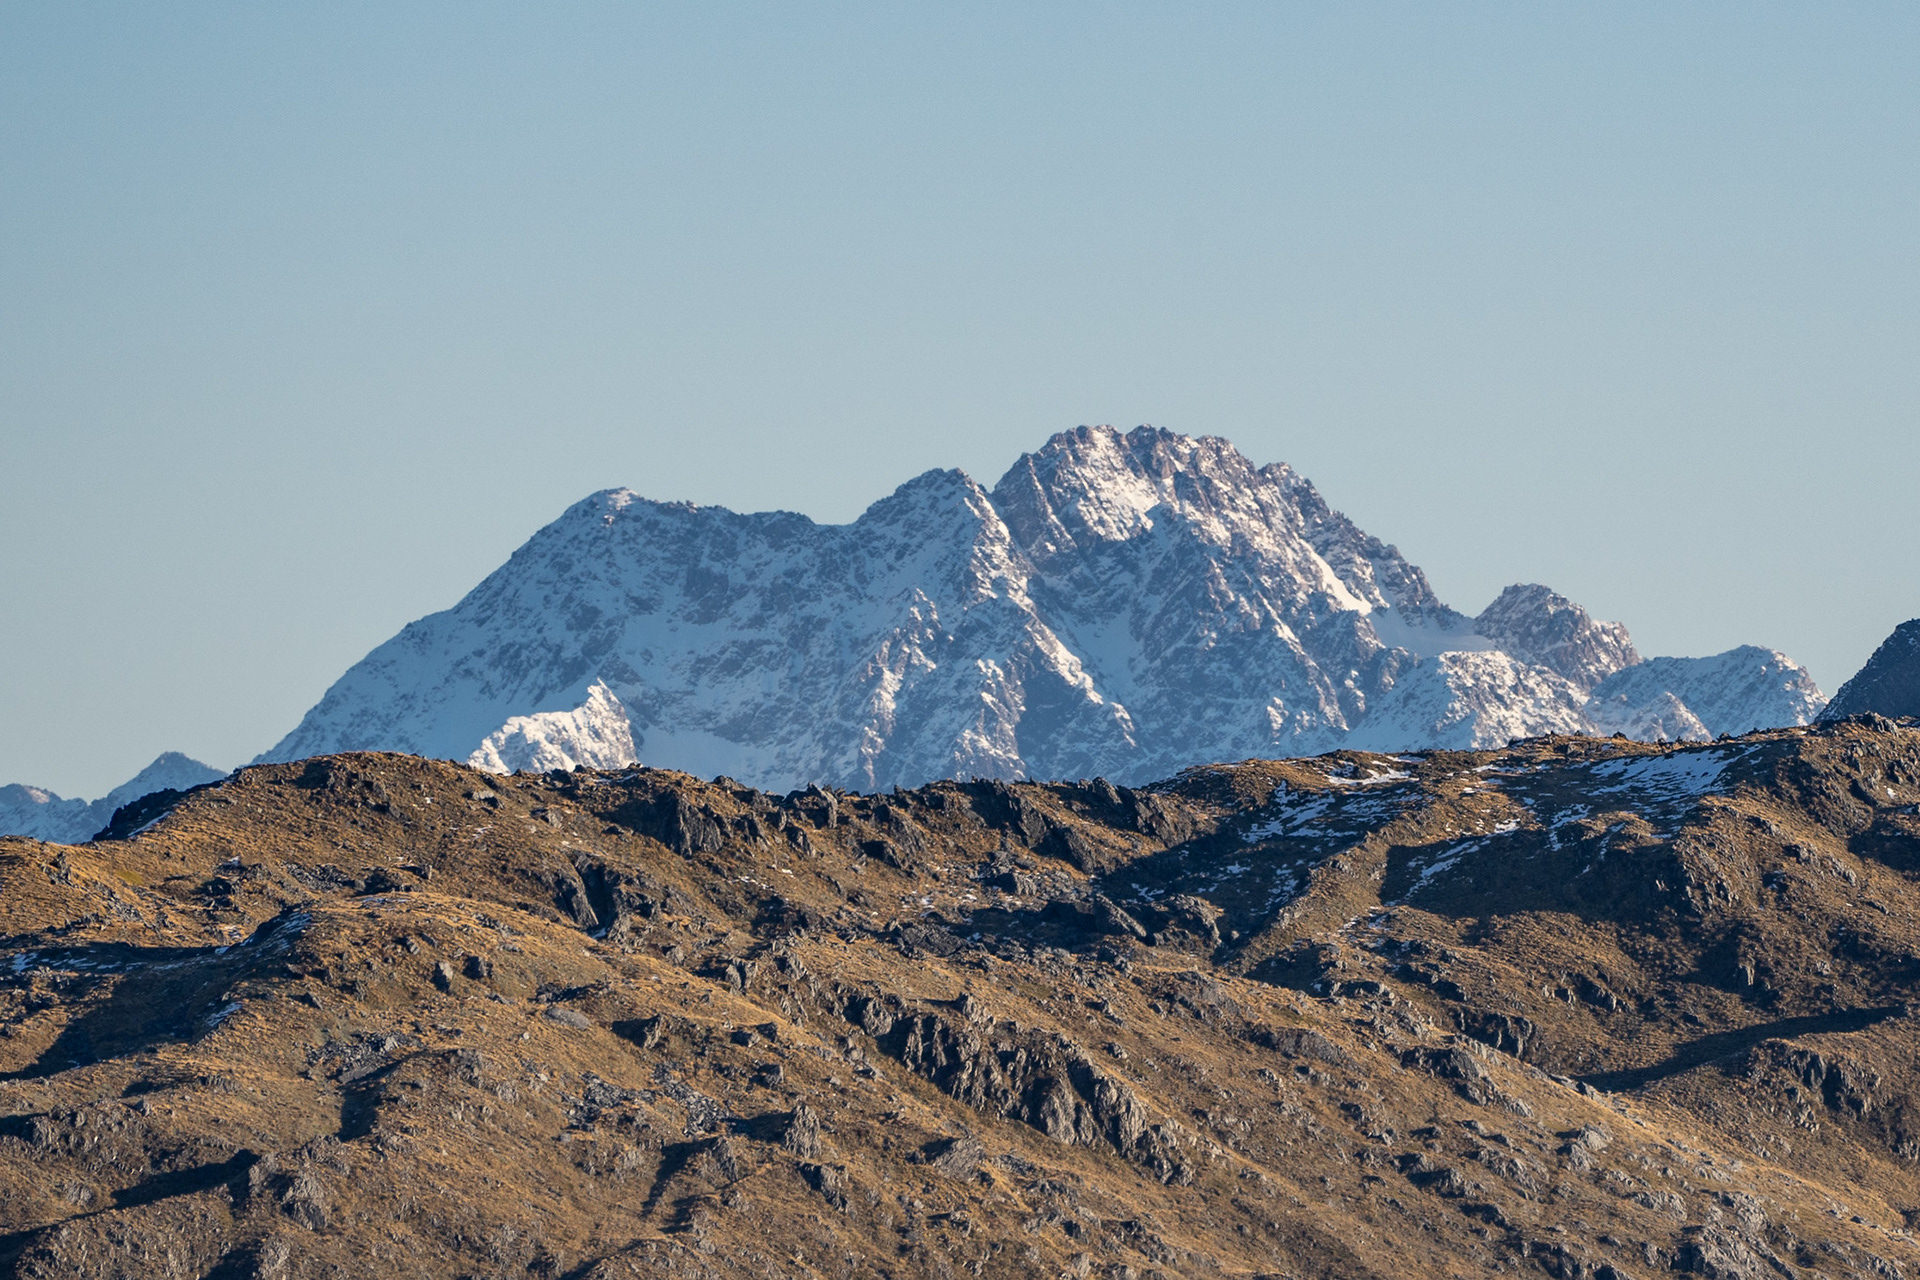
The Howe - Alexander connecting ridge, a fearsome beast.

The Otira aspects of Mt Rolleston.

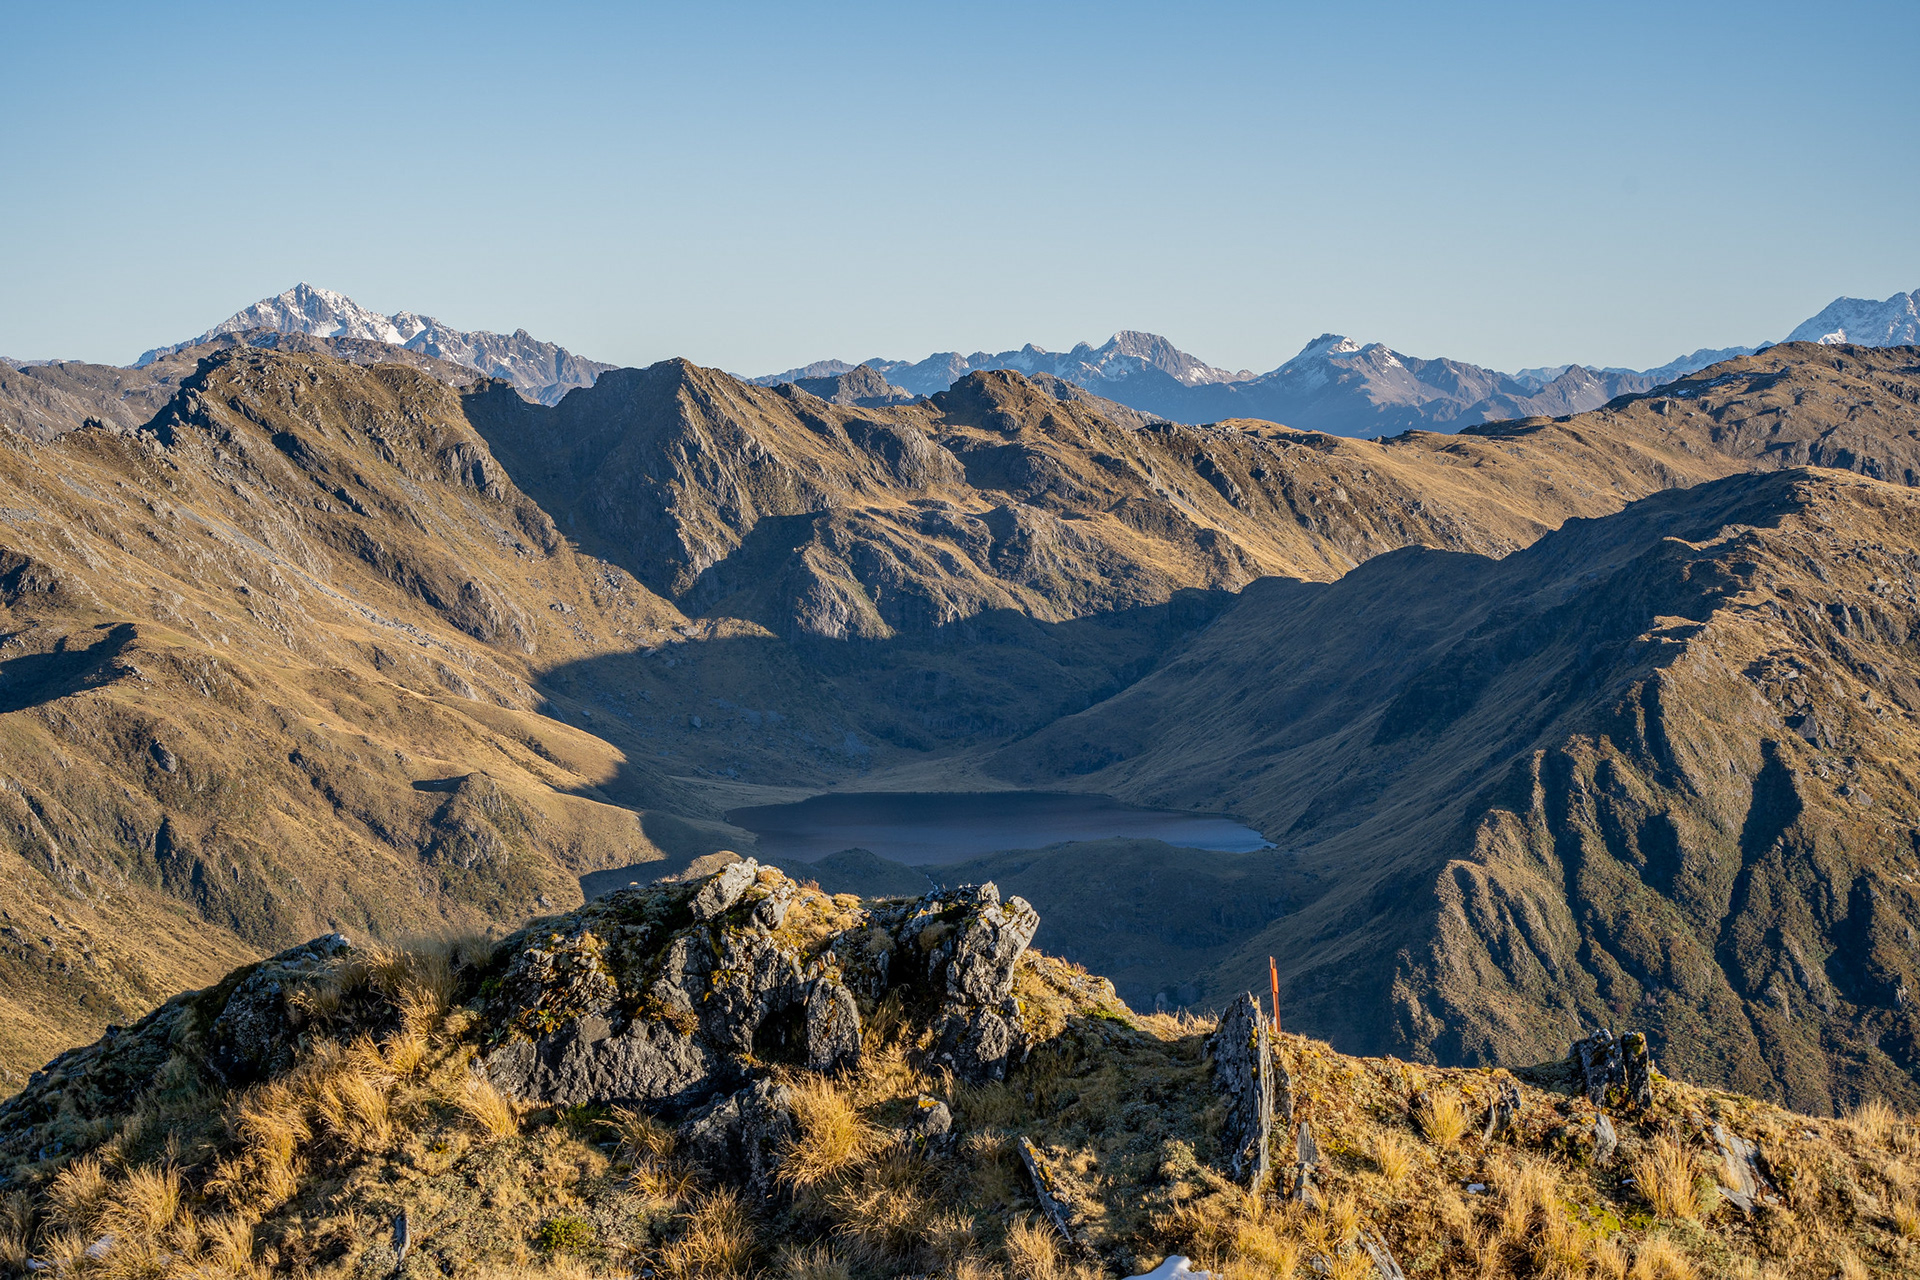
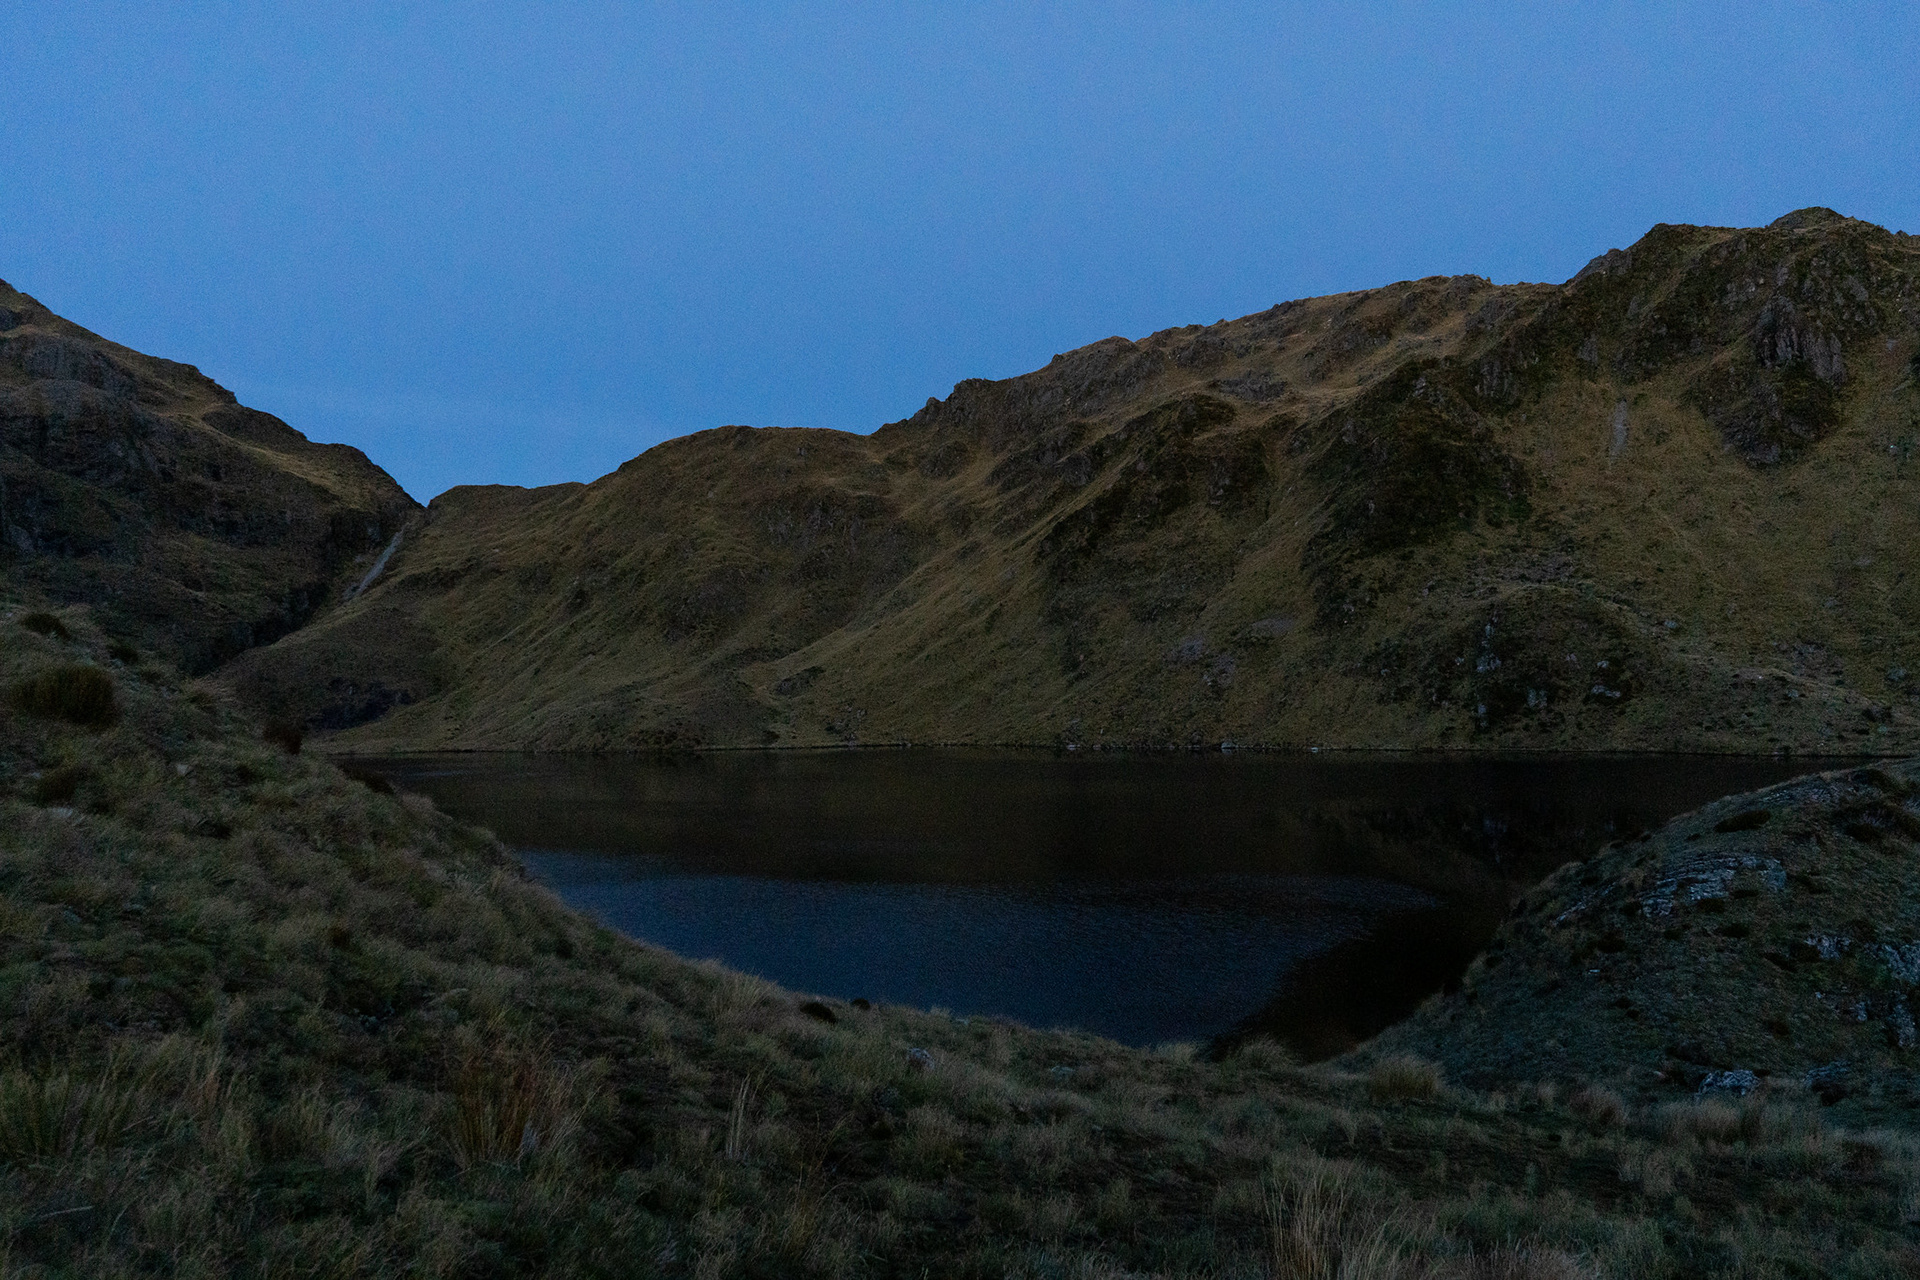
Looking down to Lake Morgan.

Perhaps unexpectedly, the marked route continues down slightly east of the southern ridge of O'Shanessy. The ridge itself is pinnacled, so the deviation is necessary. Much like the earlier iced ledges, the SE face was iced up when I was there - I suspect most people visit in summer and are unlikely to face the same issues.

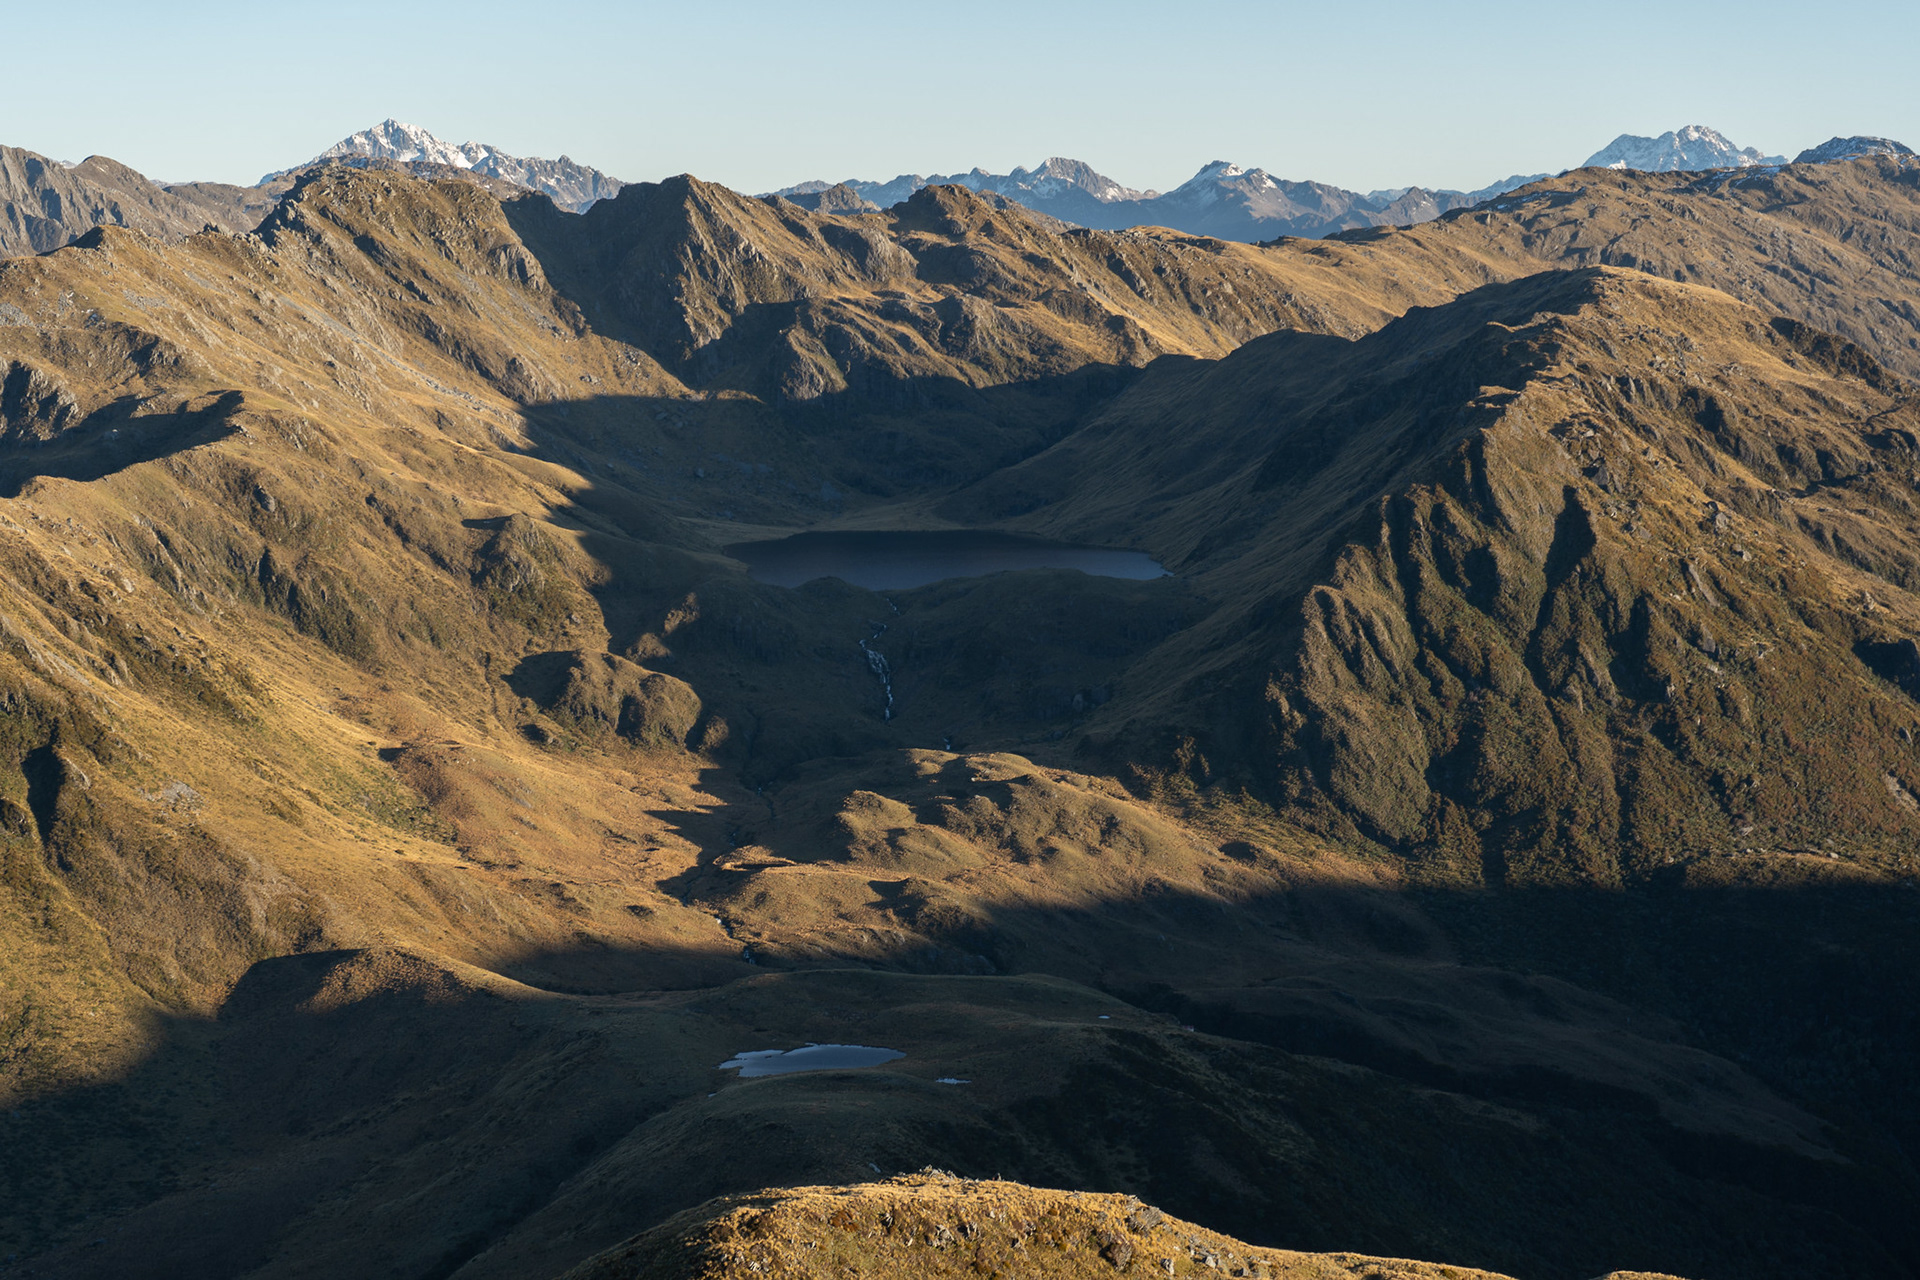
Another view of the lake, the hut is visible near the bushline just in front of the obvious gut.

Looking back up the southern ridge of Mt O'Shanessy, the route initially goes down the right hand face and then cuts across in obvious dip.

A bit under 6h after setting out, I crossed the flat final few hundred metres to the hut. It's a neat 6 bunker, built in the 1970s. It sees moderate patronage, a reasonable proportion of those from Gloriavale itself who also helped with the construction of the toilet. The surrounds are majestic, beautiful outcrops piercing the rolling tussocks and a lovely view out to Mt Alexander.

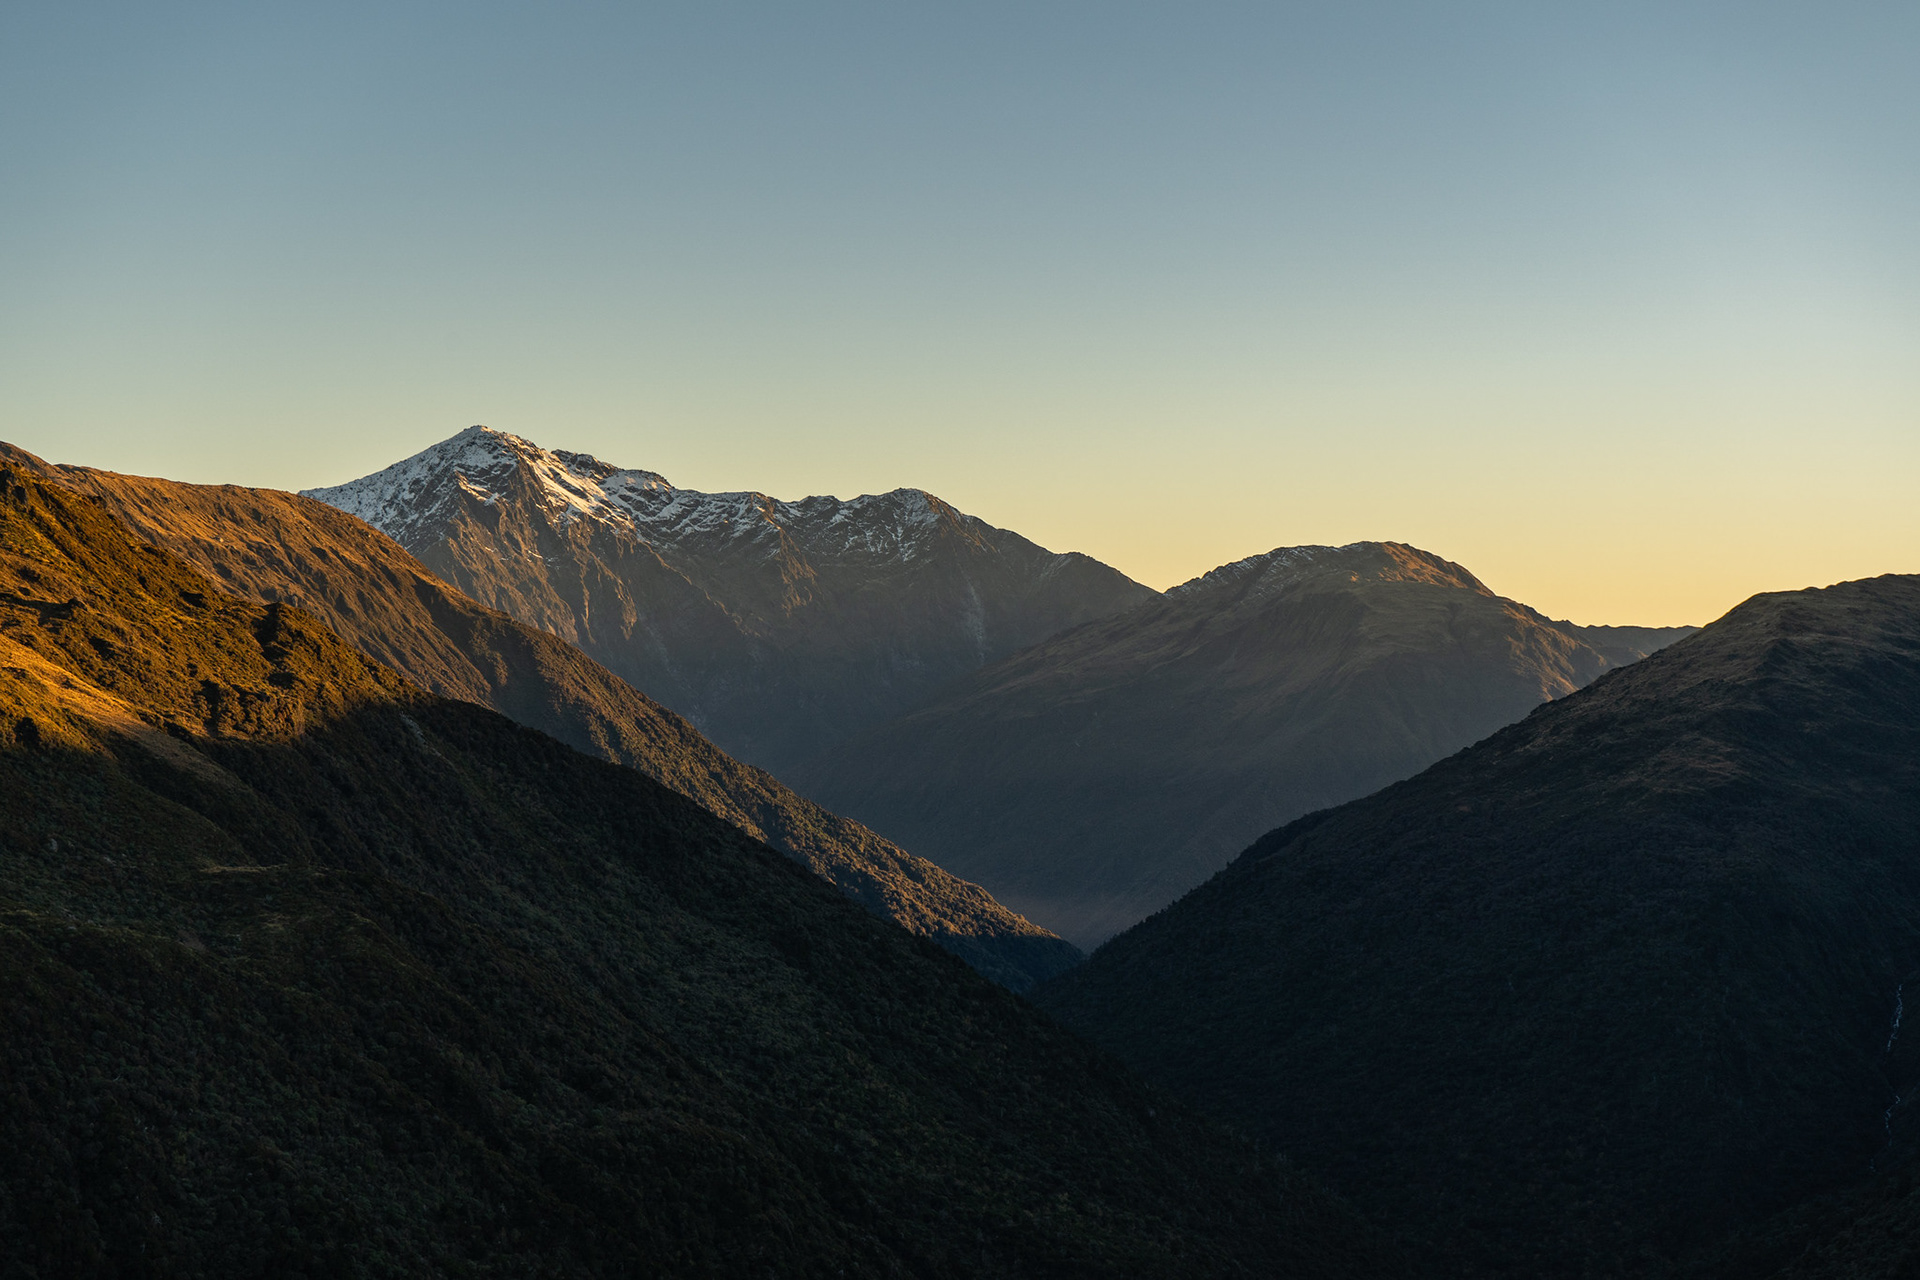
The sun setting on Mt Alexander.

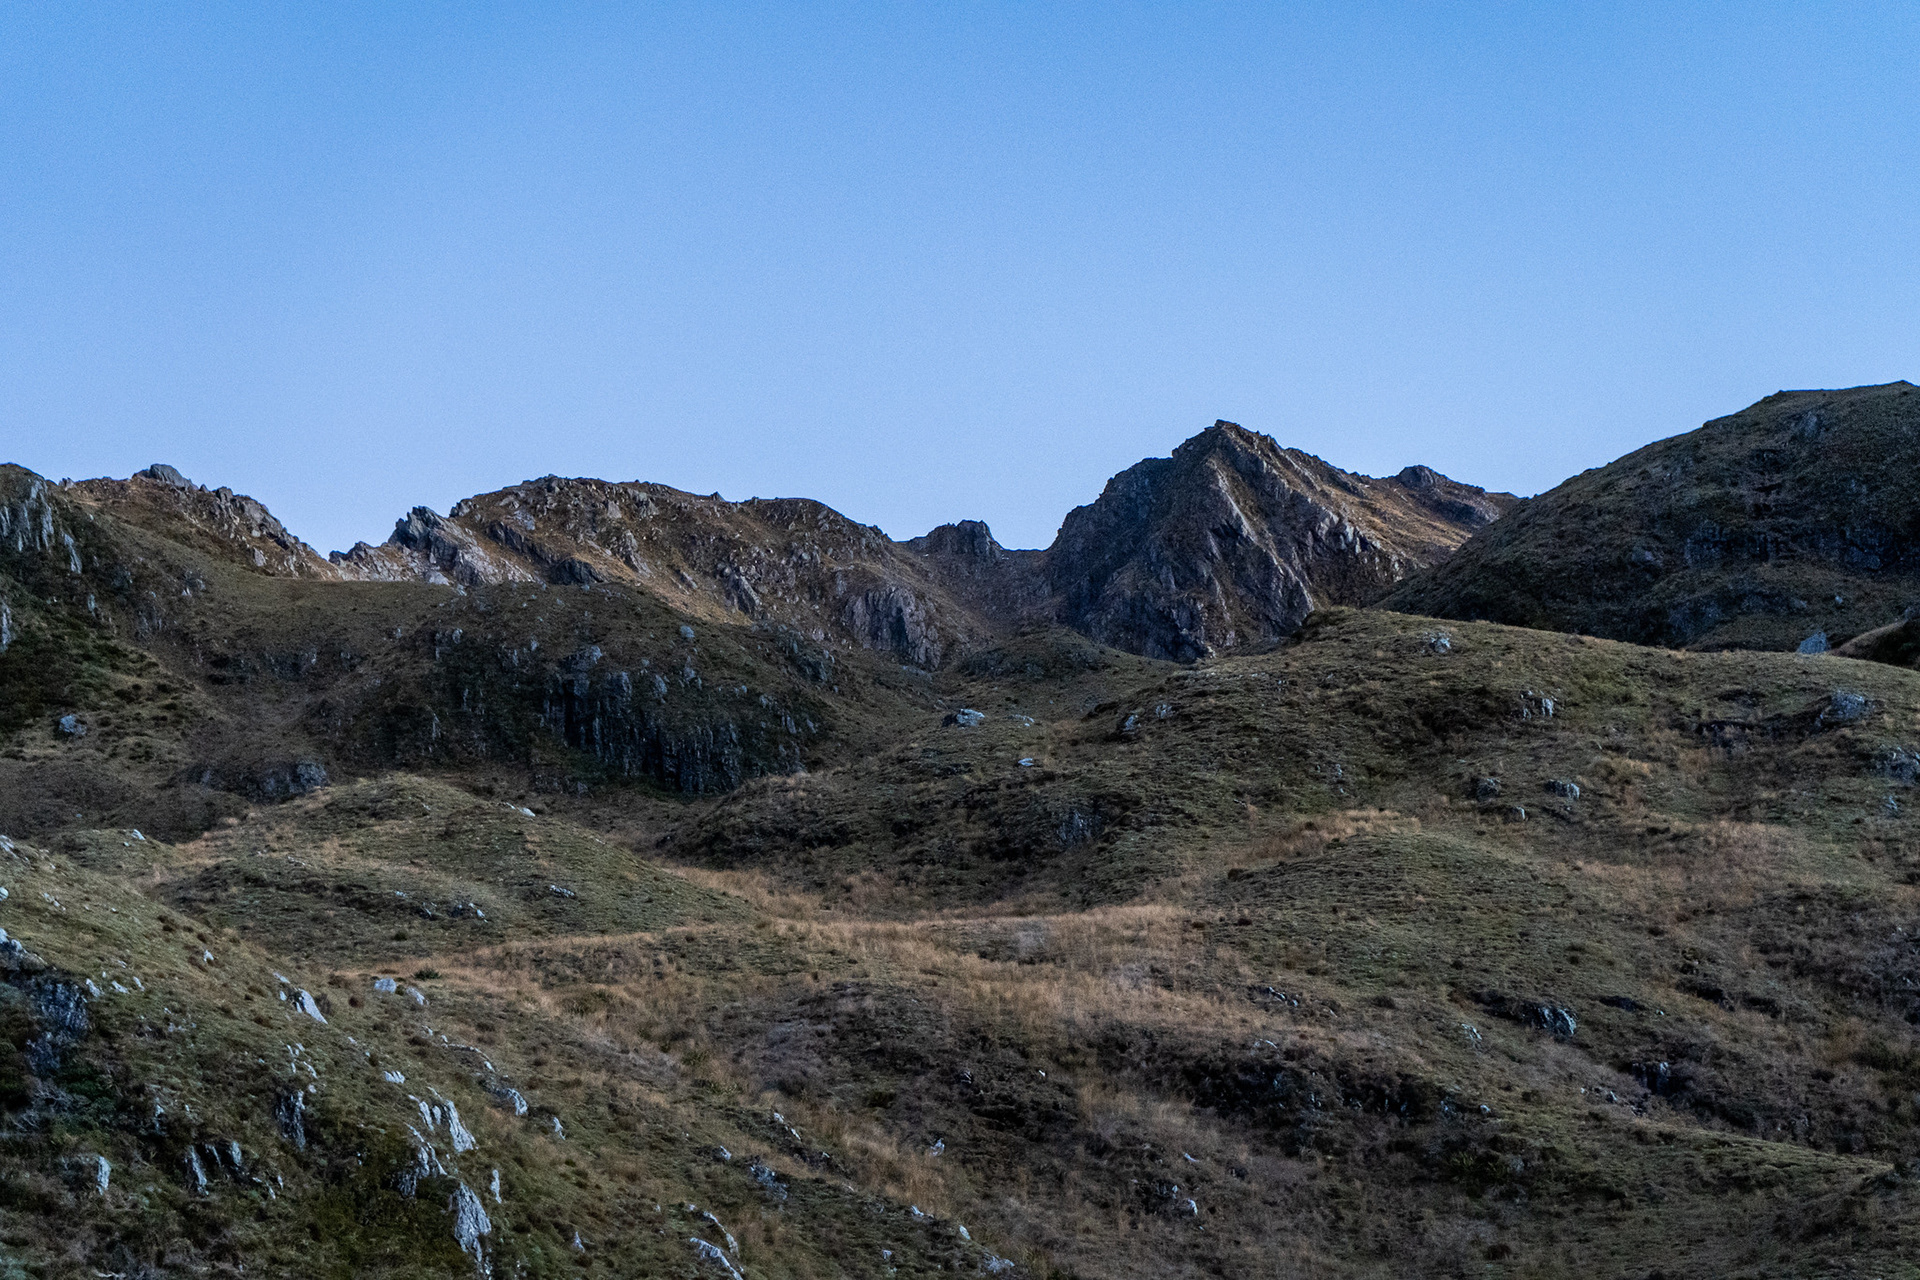
The lumpy surrounds.

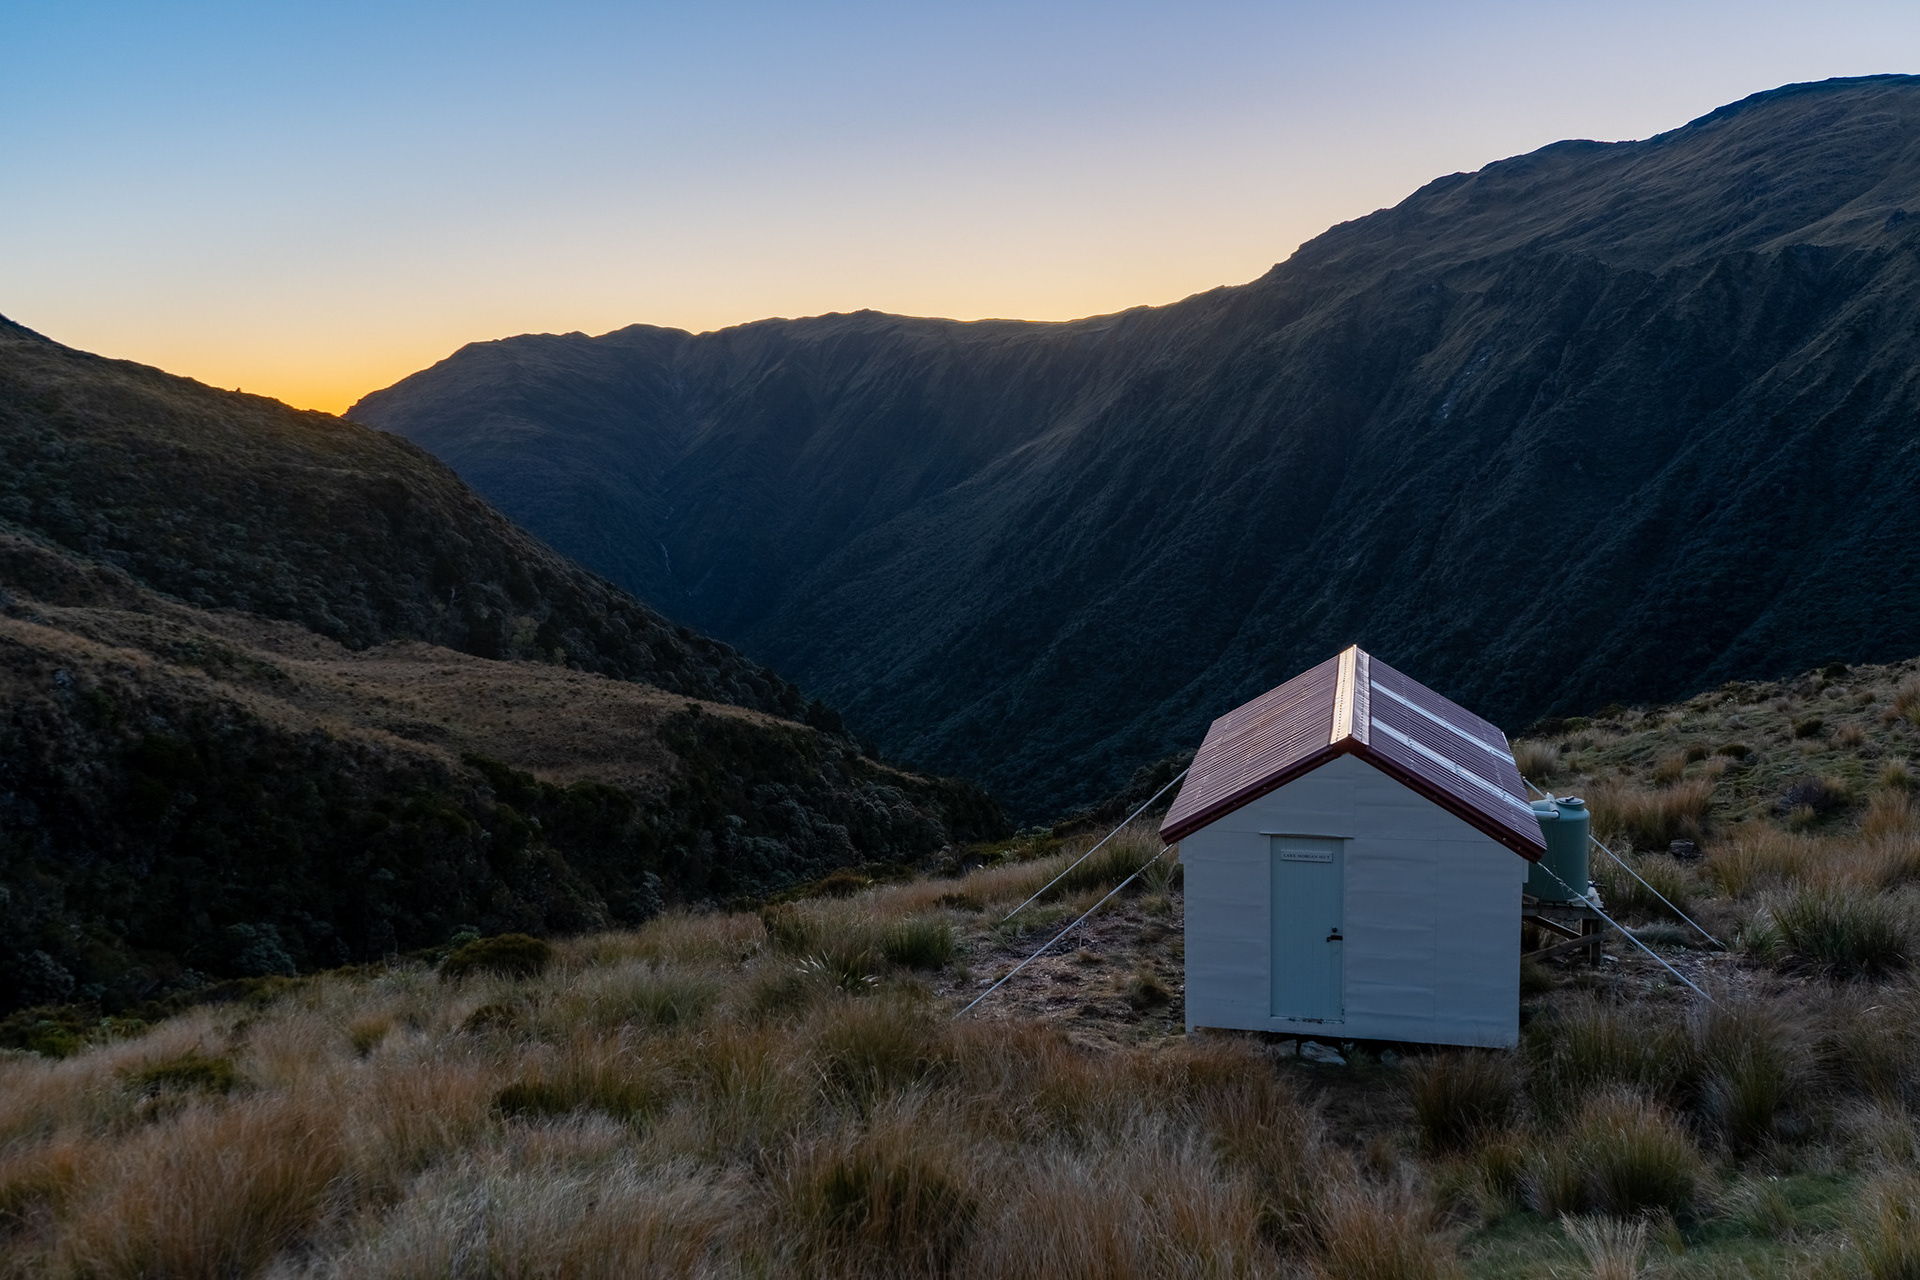
Lake Morgan Hut, the Morgan Valley behind.

After a beautiful night with the hut to myself, I set off early to catch the sunrise from the tops. Most people who do this circuit cover it in three days which makes the early start unnecessary, but each to their own. Heading up to the lake in the darkness benefits from a good headlamp and a GPS, cutting high to dodge the scrubby gut and then tending left up a gully to avoid the cliffs by the lake outlet. About half an hour after setting out, I passed the lake margins.

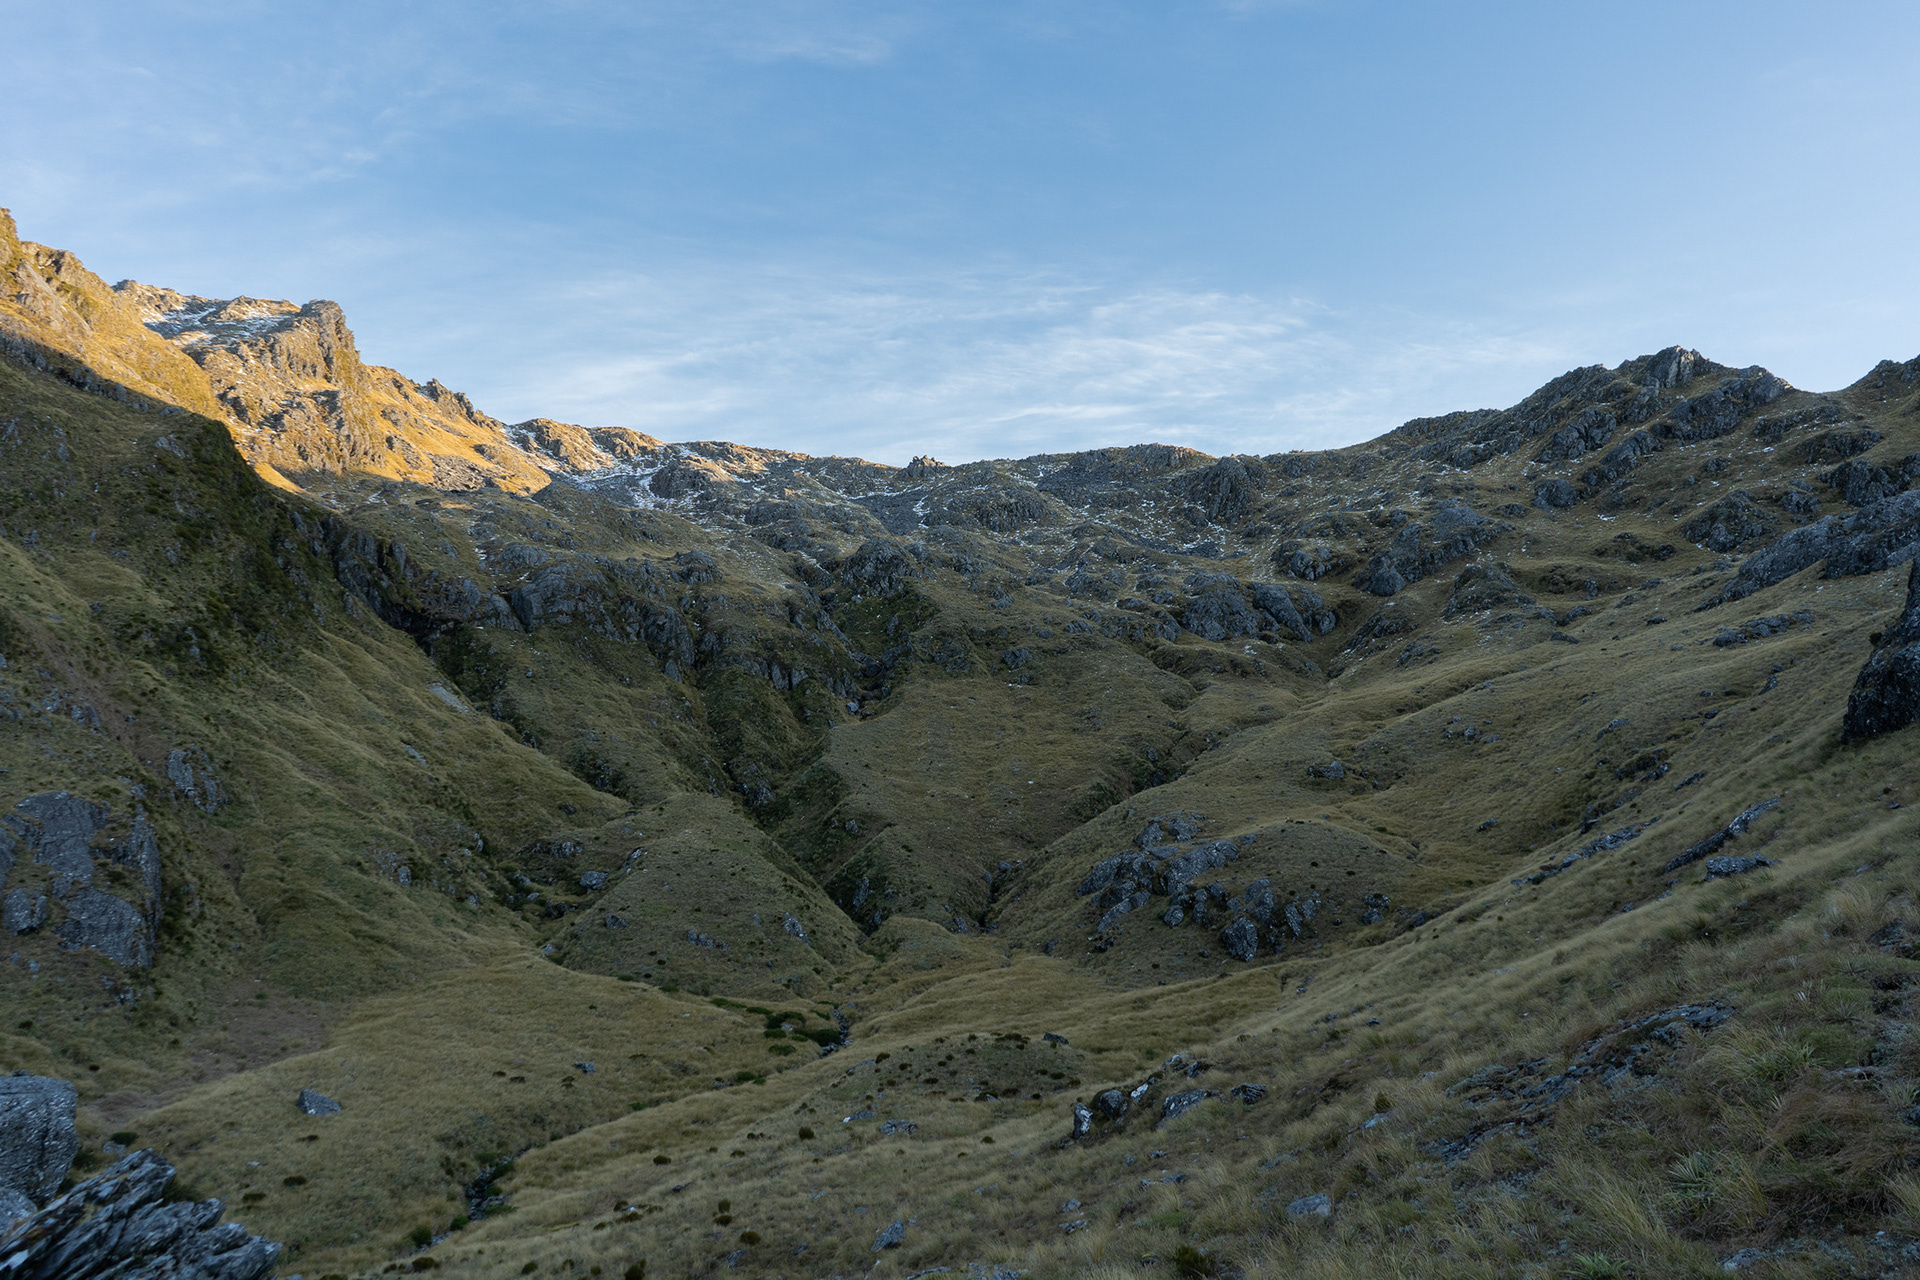
Looking back towards Mt O'Shanessy, the route comes up the vegetated gut on the right.

Lake Morgan with its pre-sunset hues.

From the lake, you can take the obvious ridgeline which climbs sharply to just over 1400m. There is some steep terrain as you approach the crest of the lake's bounding ridge, and you might be better off traversing left on the approach to avoid this. From the crest, I had the chance to take in the beautiful sunrise over the alps.

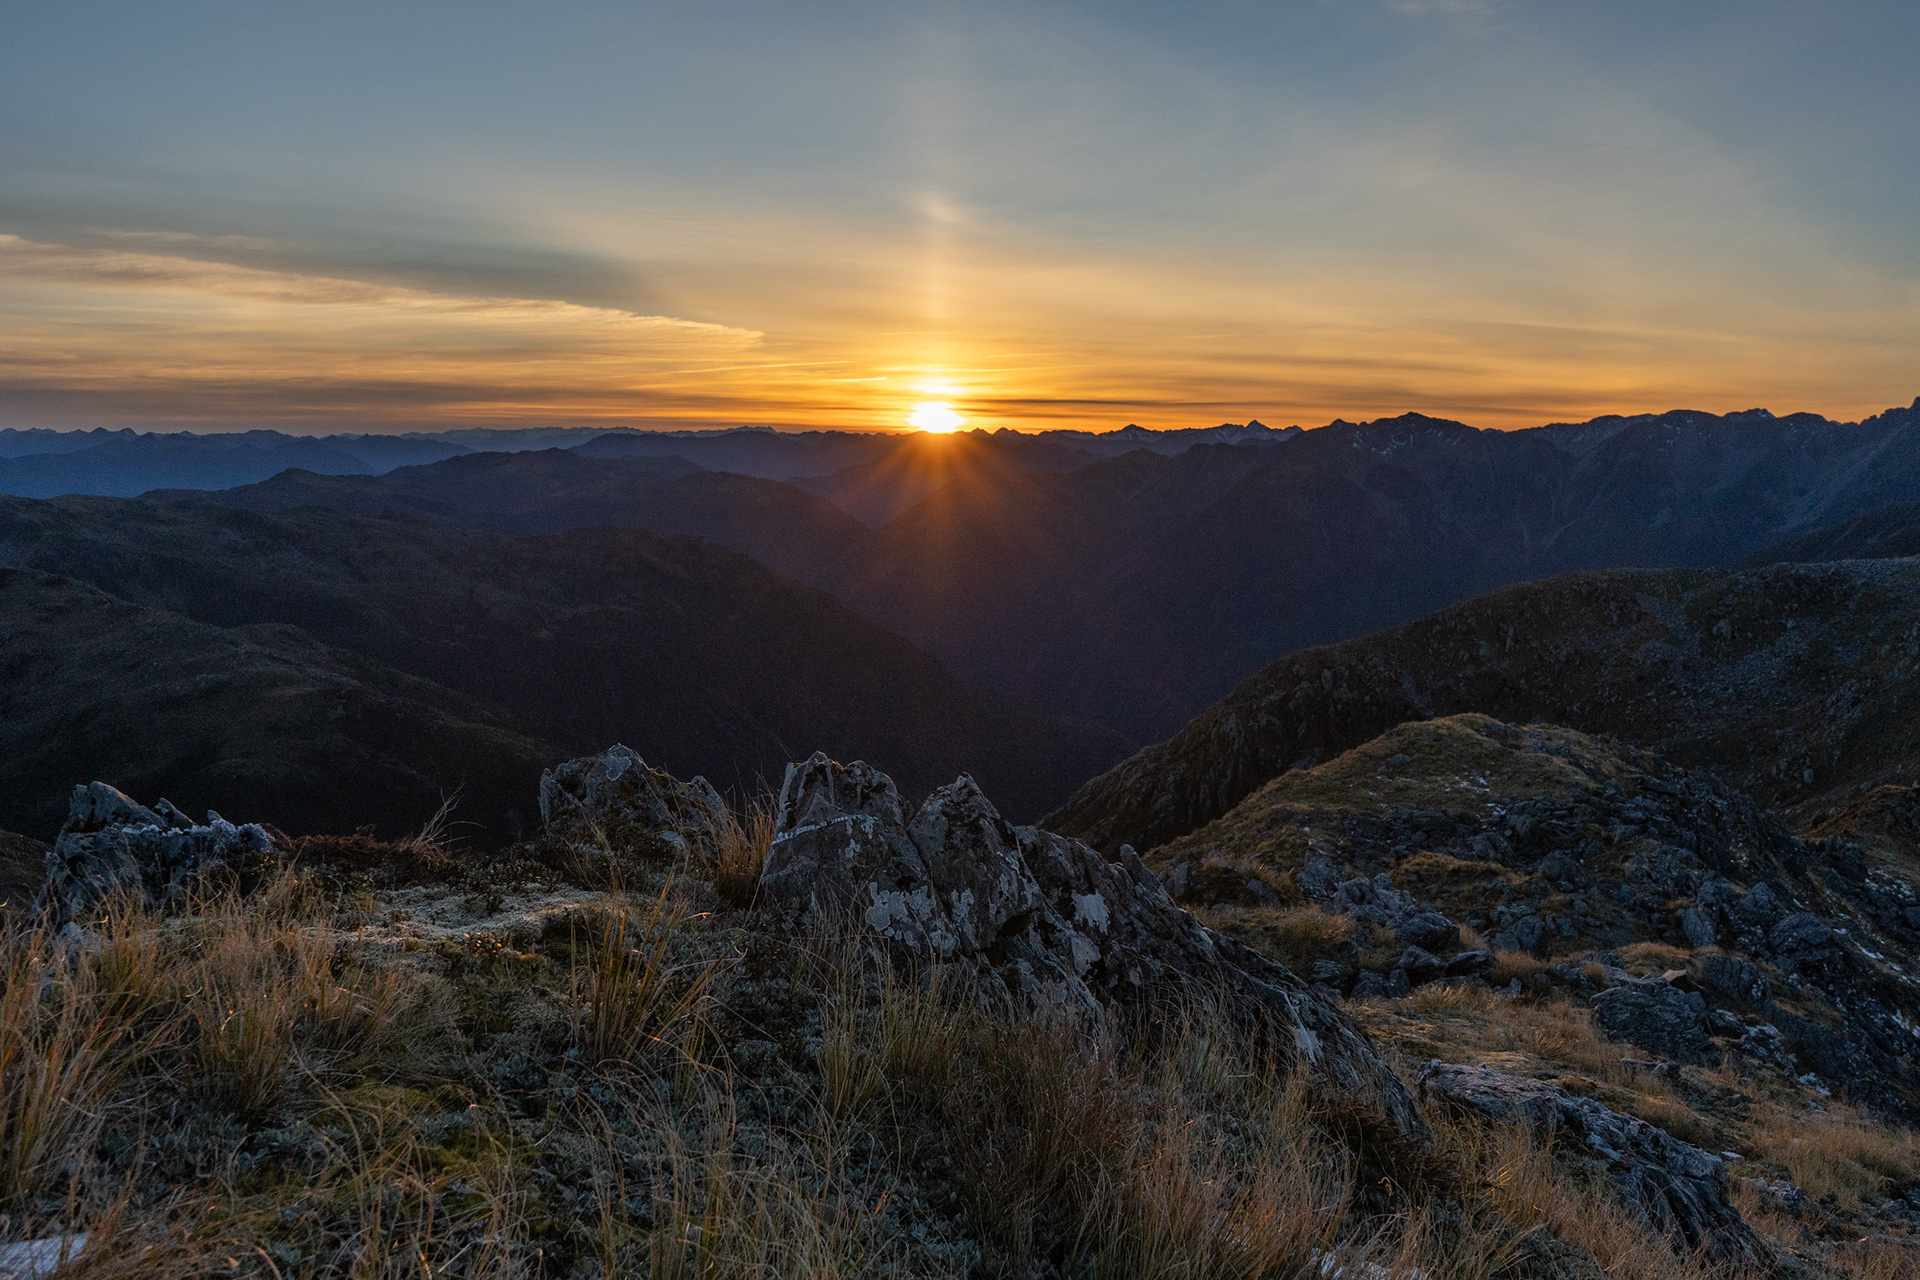
Watching the sunset from the ridge bounding Lake Morgan.

From the crest, there is also a partial visual into the upcoming basin. Ice, the bane of the trip, was present complicating things - however, the drop in isn't too bad provided you avoid the small cliff bands near the crest. The preferred dropoff point was cairned in 2021, but I imagine most places along the ridge would be suitable with care.

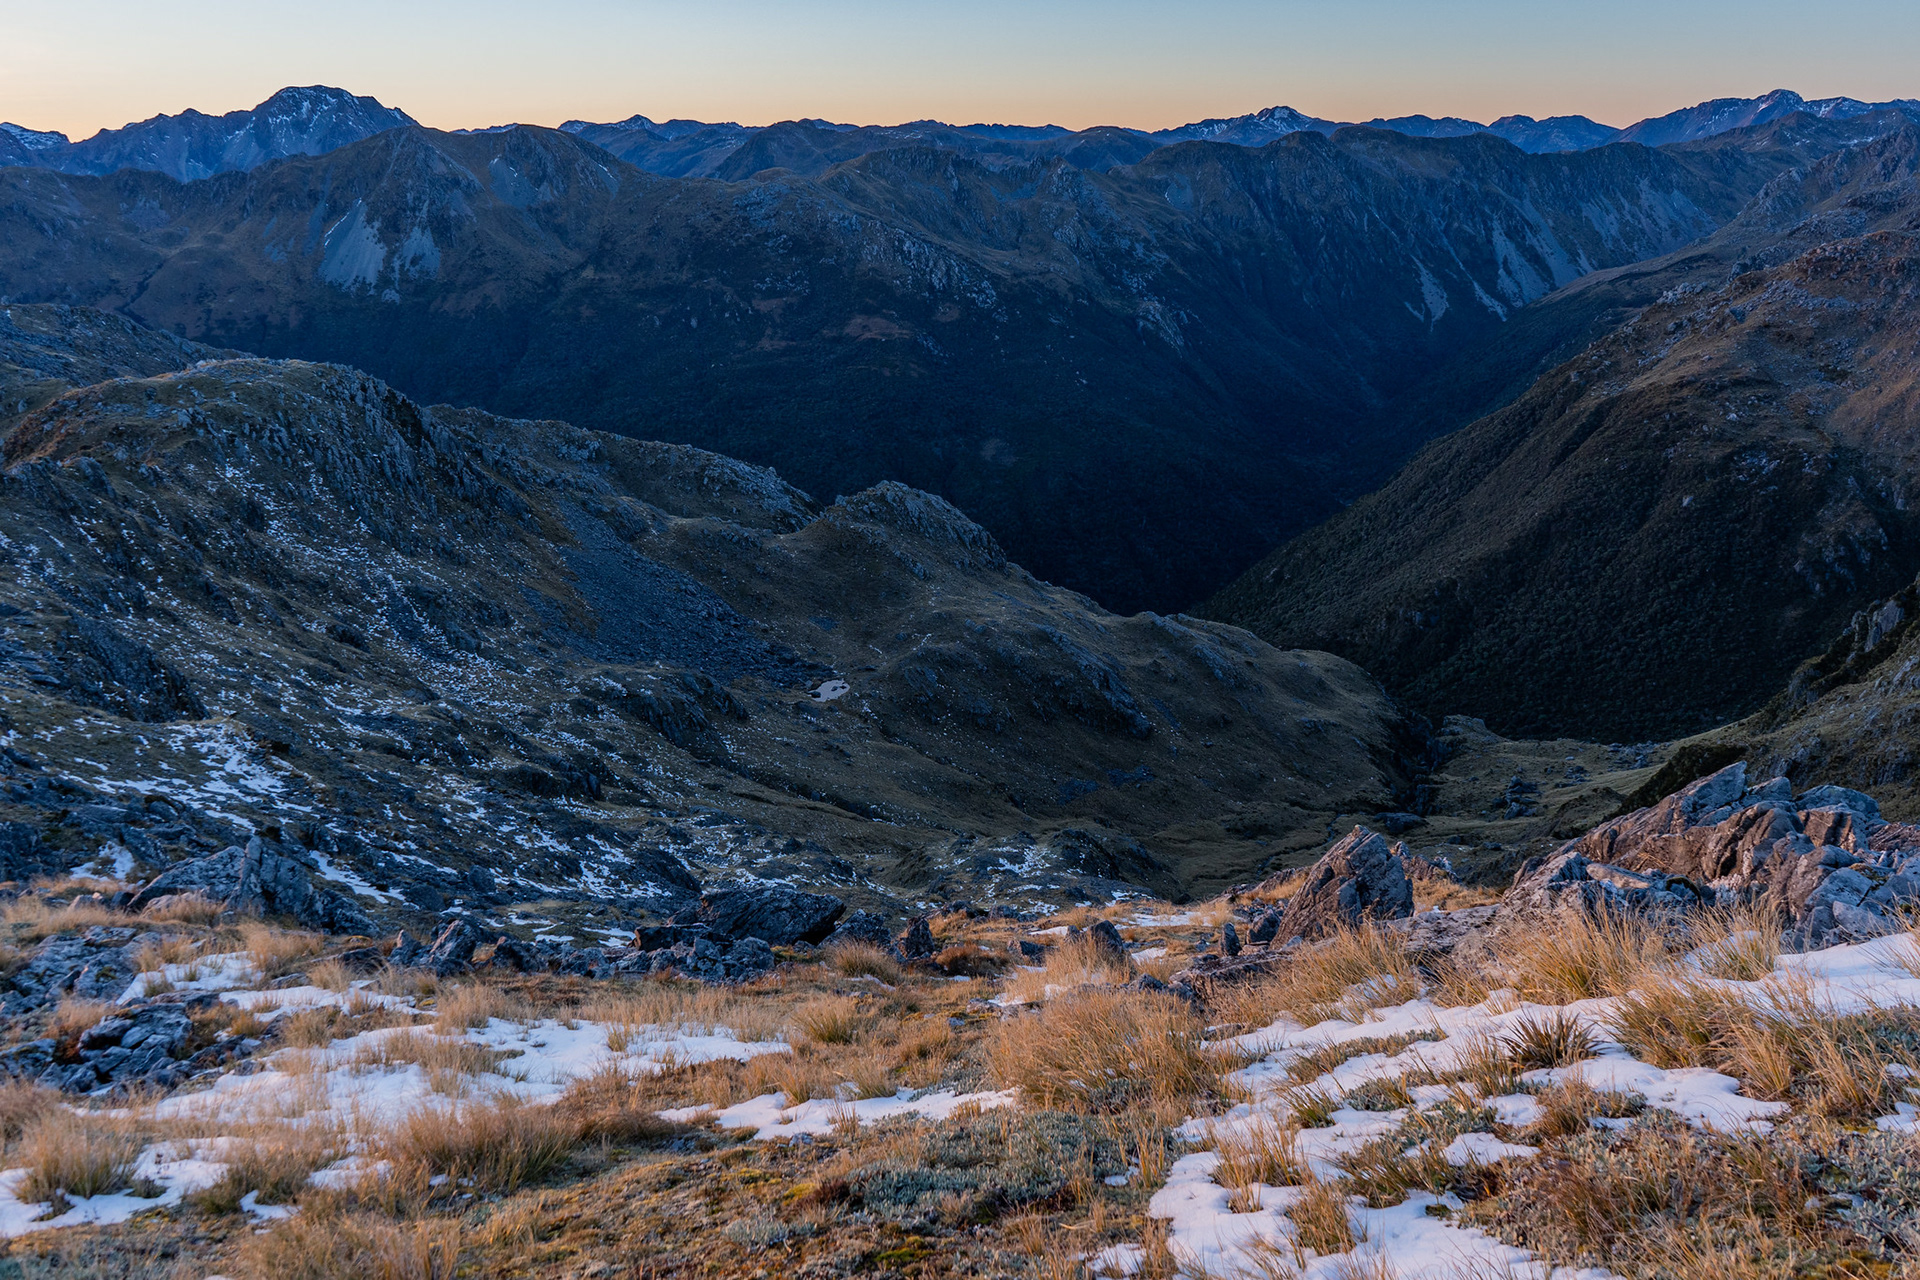
The basin used to access Cone Creek.

Once the initial steep travel has been dispatched, the terrain begins to mellow at around 1200m. There is a pronounced chasm present in the lower basin, which I traversed on the descender's left - the right looks like it would also work and gives easier travel initially, but there would be a short scrub bash and boulder hop required if working the latter. Assuming you stay left of the gulch, it's important to swing right again at ~1100m until you're on the spur crest that abuts the gut which gives open tussock of moderate gradient.

Looking back up the basin, the upper outcrops obvious.

Unfortunately I did not follow the above advice regarding navigation, and ended up amongst the scrubby cliffs at about 1120m. I could see there was better travel to my right, but gave in to my follies and decided I might as well see out my line of descent rather than having to reclimb and shimmy across. It just got worse and worse, awkwardly clambering down weaknesses until I ended up benighted above an obvious cliff band. Even now, the reclimb would have been the sensible option, but it was not a day of sensibilities for me. Maybe it was the early start, but a gentle throw of my walking poles down into the scrub below left me with the two hands required to downclimb the last of the cliffs. If that wasn't bad enough, it left me amongst unpleasant scrub which needed to be bashed to get to the gut which provides an exit from the basin. Trust me, it's better to swing right before you encounter the cliffs.

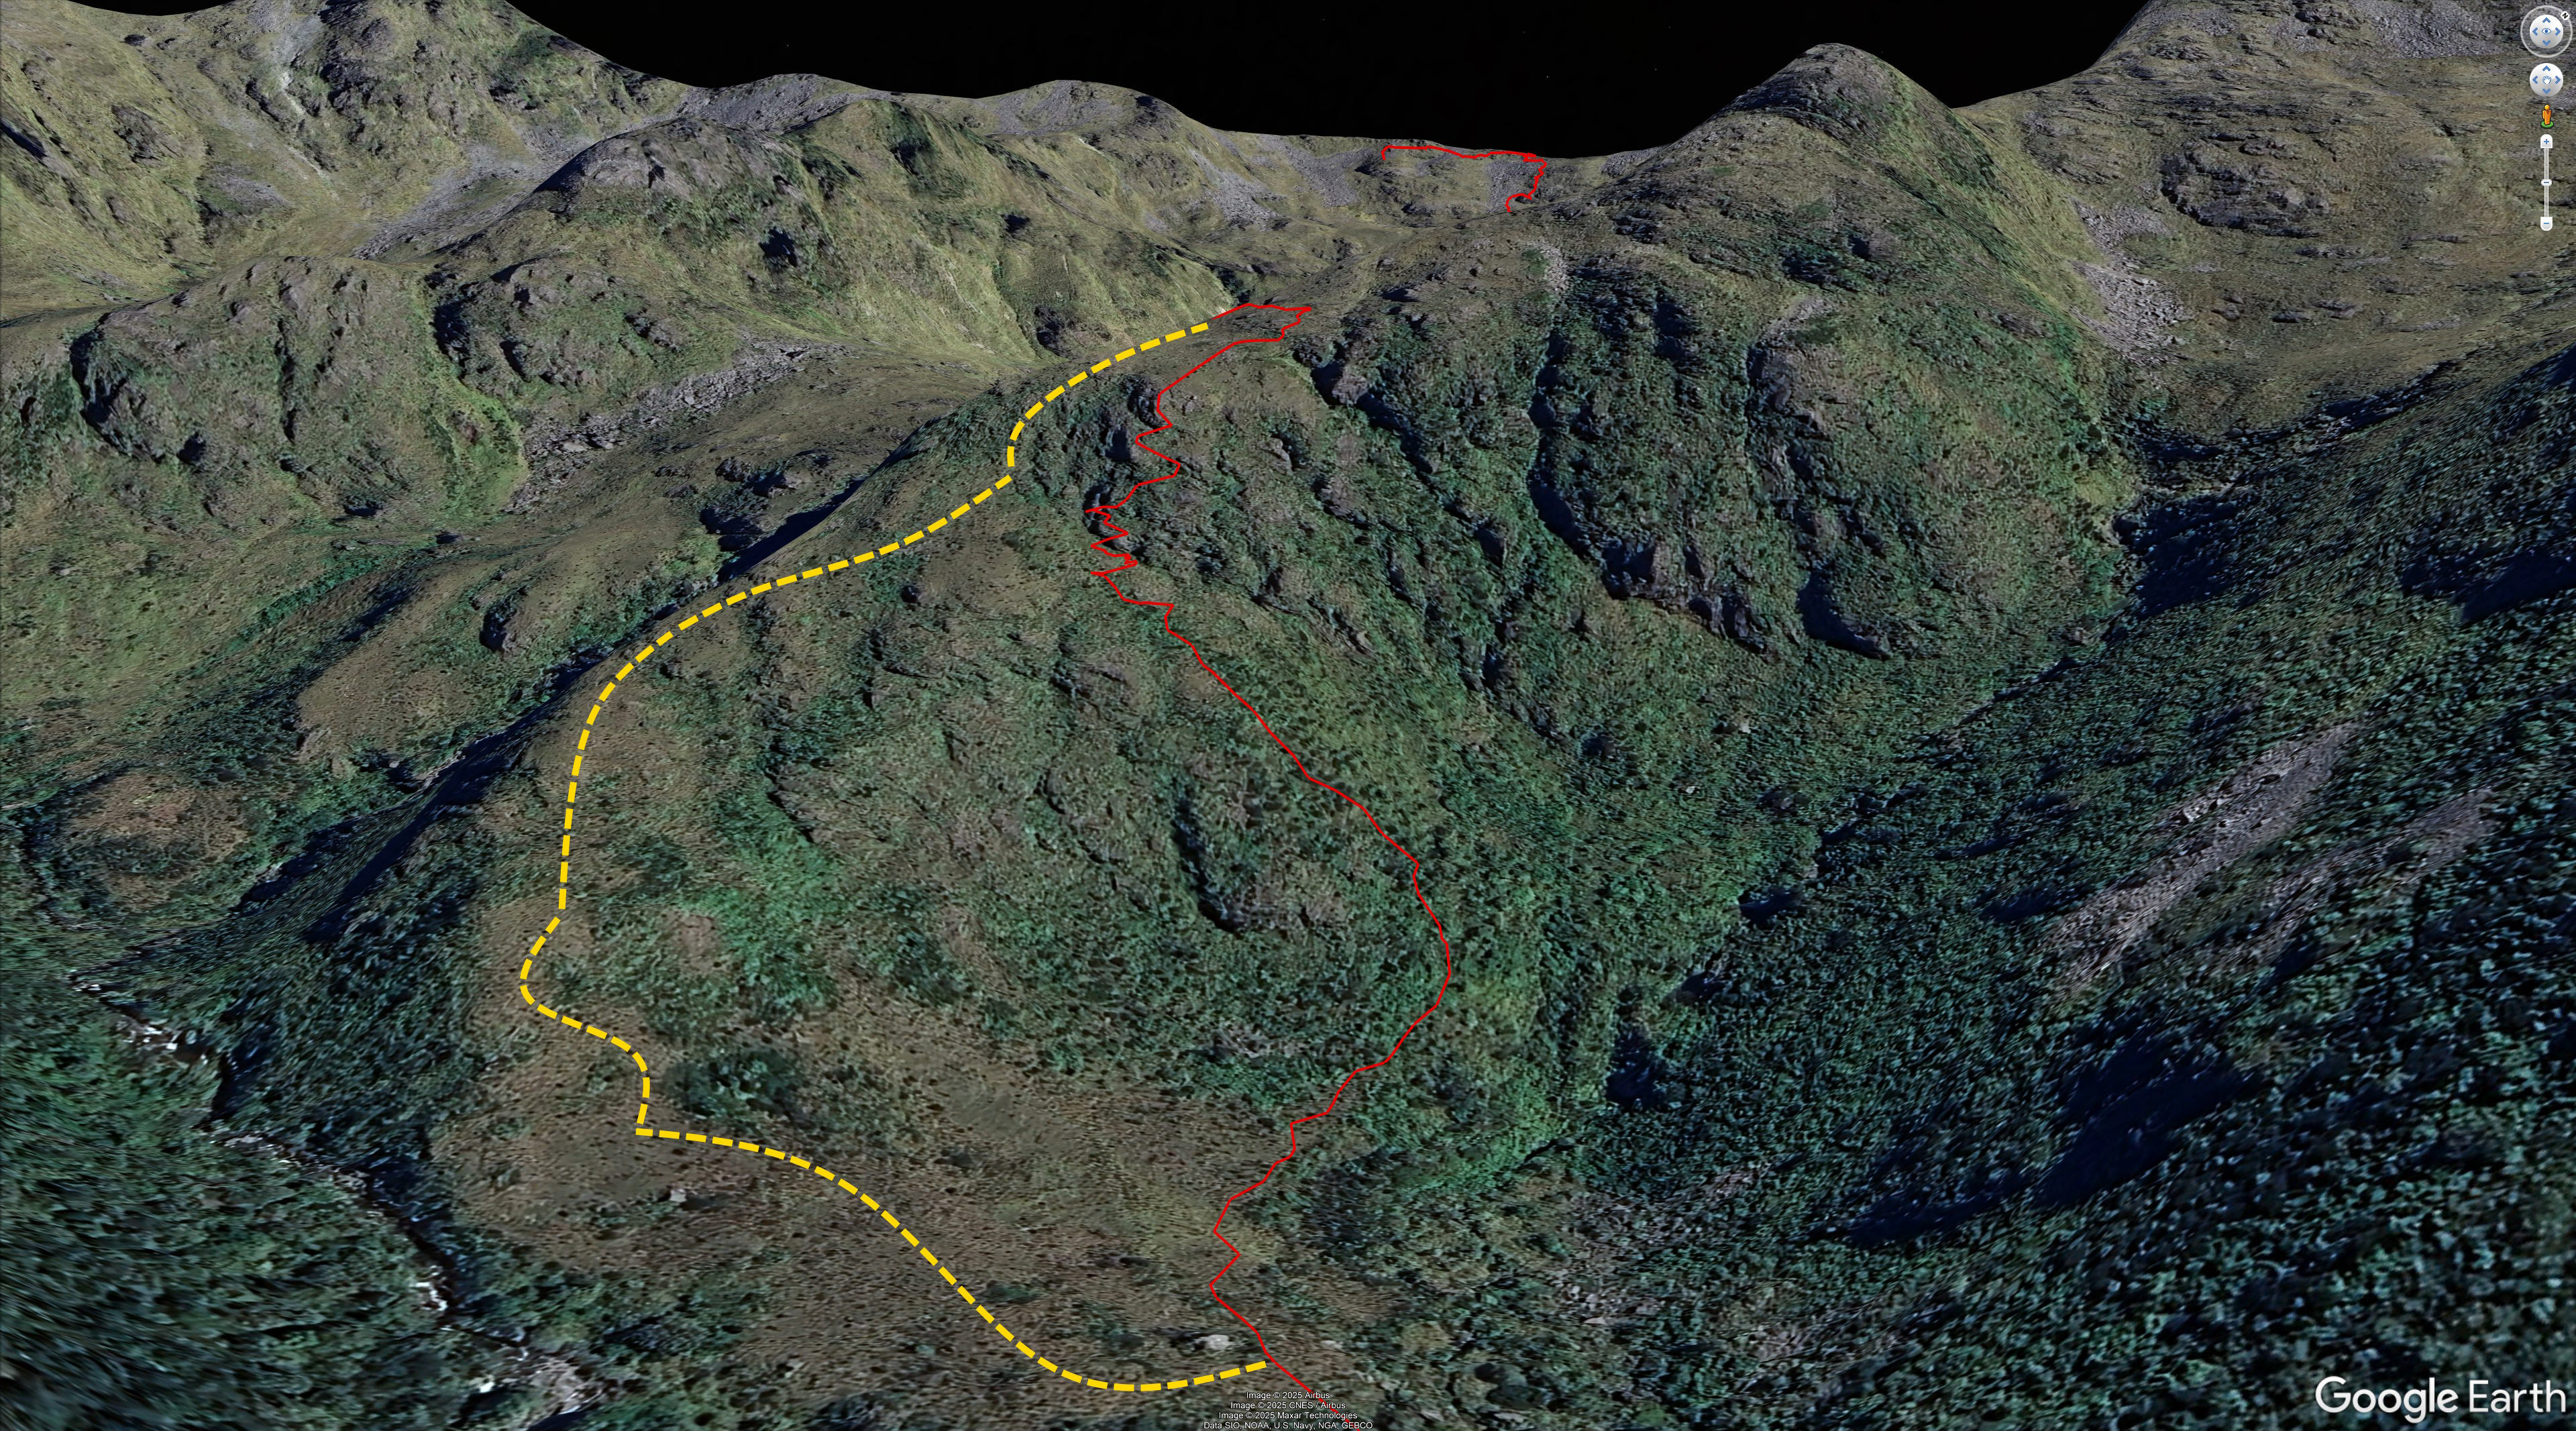
The lower section of the basin. The red line is where I went, which can't be recommended - it's exposed, and the bottom cliff band is a physical downclimb and hard to judge from above. The yellow line would be much better.

With the energy-sapping and unnecessary scrub travel completed, I picked up the short marked section of track before ending up in a dry gut. This is followed for perhaps 15 minutes, before it spits you out onto a chunky slip face which offers slow but straightforward travel down to Cone Creek. A few minutes of travel upriver drops you off at Cone Creek Hut, another nice little hut which sees limited patronage.

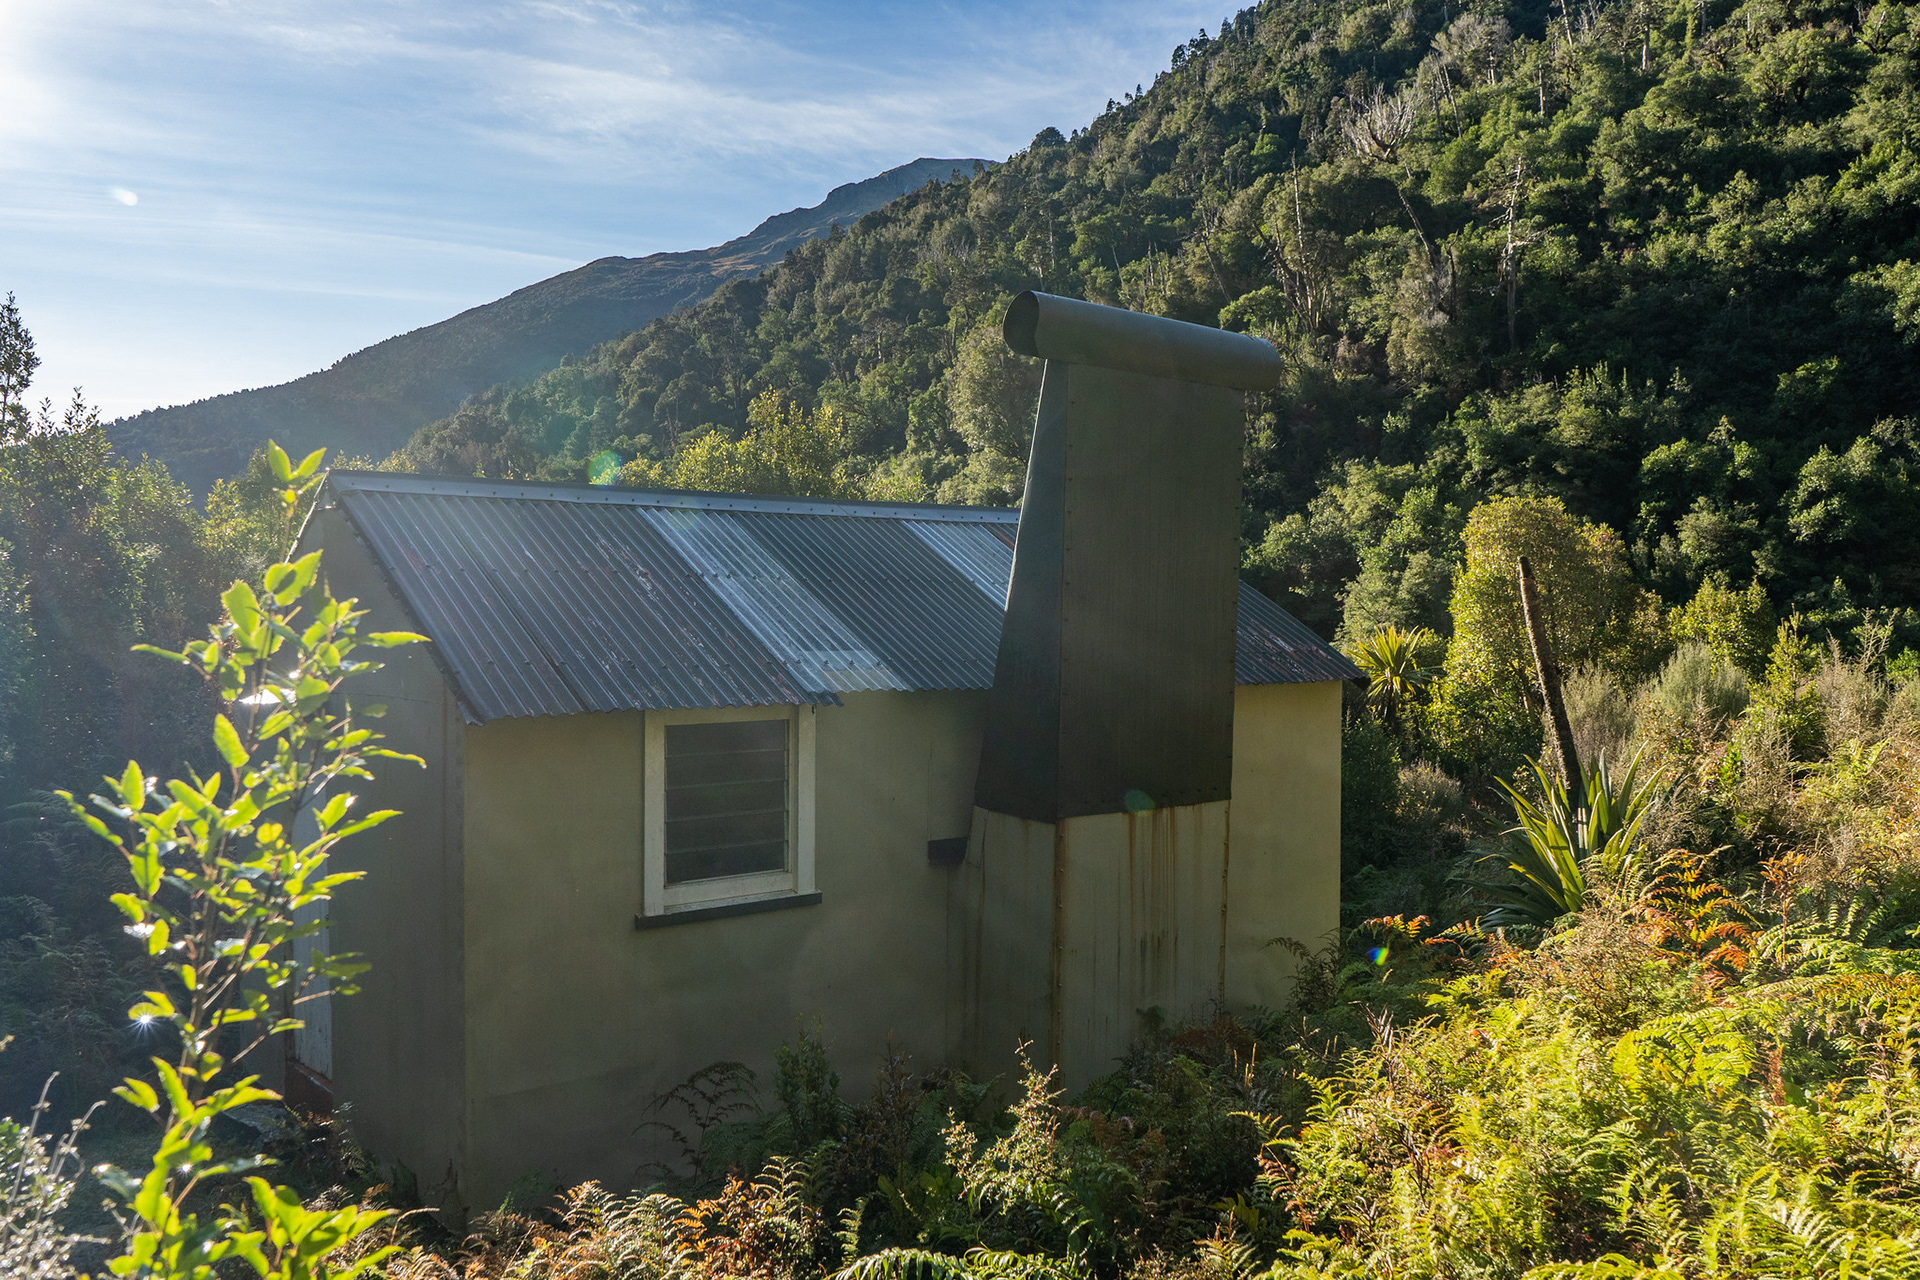
Cone Creek Hut, it has since been renovated and the surrounds cleared.

It had taken about 3h to get down to the hut, some of which was due to the interesting route choice in the lower basin. This is consistent with what Permolat recommends for this stretch, so not terrible going. Some parties do overnight here, which makes the circuit more manageable but also leaves a very short middle day. There's not a lot to do around the hut beyond admire the surroundings, the river travel above is apparently not brilliant and there are no named peaks for afternoon sojourns. Still, if you had company and didn't mind a long afternoon of cards, it would be a nice place to sit and watch the world go by.
I had a snack at the hut and signed the hut book, and then carried on my merry way. I'd somewhat optimistically told Gloriavale I'd be out around 1pm, which was brave given Permolat says it's another 5 - 6h back out from the hut.
The opening section of the downriver travel is tracked, though it was overgrown in places in 2021 and I don't know what it's like as of 2025. It's also an awkward trackline in that it sidles above the river for quite a while, so when you lose the track there's no easy way to relocate it. I came a cropper around the 520m and spent about 15 minutes trying to find the track continuation after a patch of windfall, before eventually deciding I could just bash through until I got forced down into river travel. That mercifully led me back to the track a few minutes later, and I continued to descend.
The GPS trackline included here is not perfect and jumps around a bit, but it does give a rough lay of the land. There are a couple of steep climbs to get around obstacles, before the track eventually hits the river somewhere around 460m where the topo map shows open margins. The river travel is a mixture of boulder hopping and wades, scrubby flats and a smattering of short sidles on the true left.

Easy-ish boulder travel in the middle reaches of Cone Creek.

Around 420m, the next section of trackline scoots uphill. This one is hard to miss, as going any further downhill would put you straight into a daunting gorge. The terrain is reasonably easy at this point, though I briefly lost the track again at around 360m. Near the junction with the Haupiri River, the terrain further mellows - there are (apparently mediocre) hot springs across the creek which I skipped in the name of timeliness, though I did see whio / blue ducks which is even better.

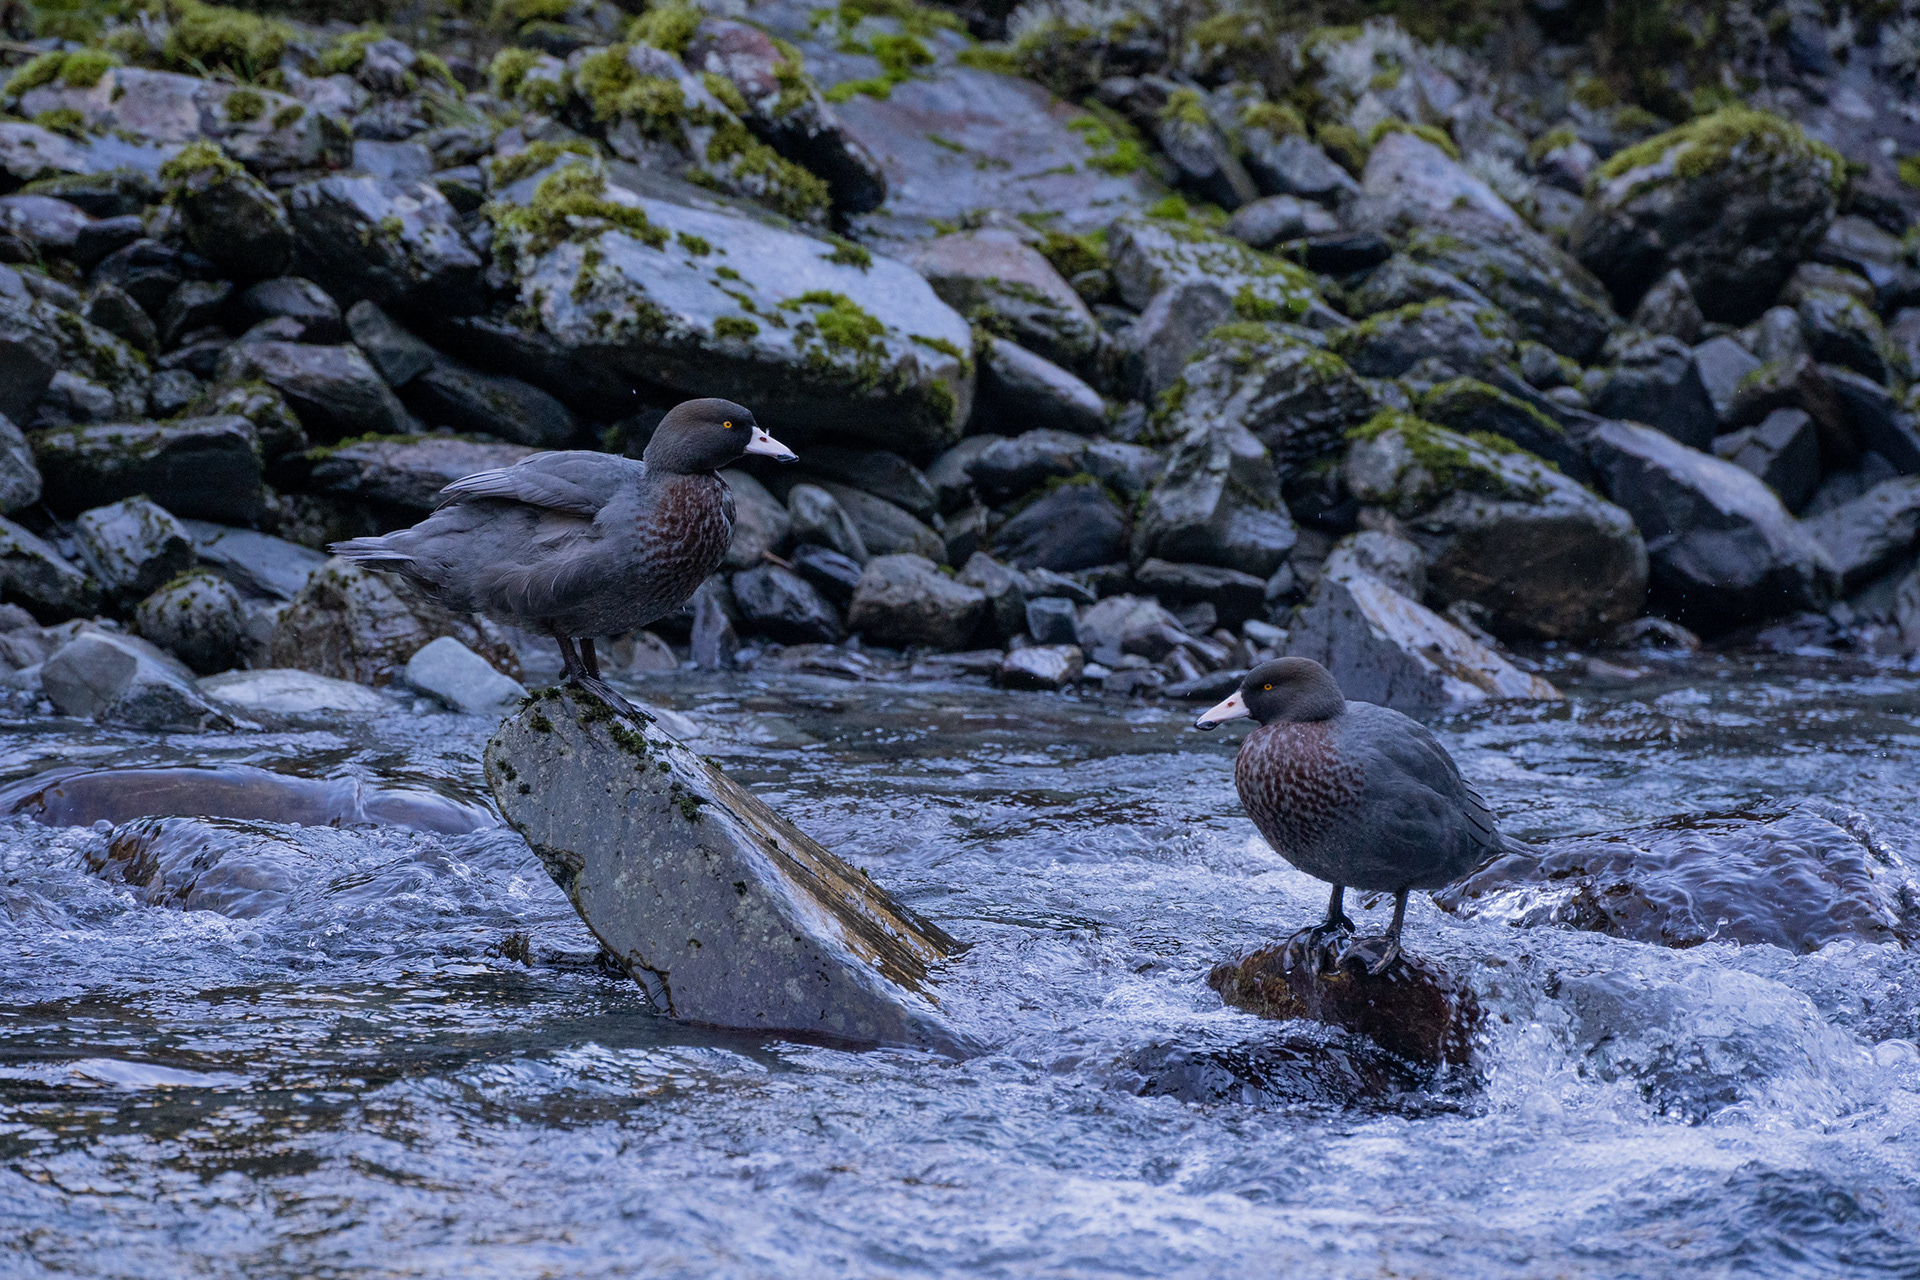
Blue ducks / whio in Cone Creek.

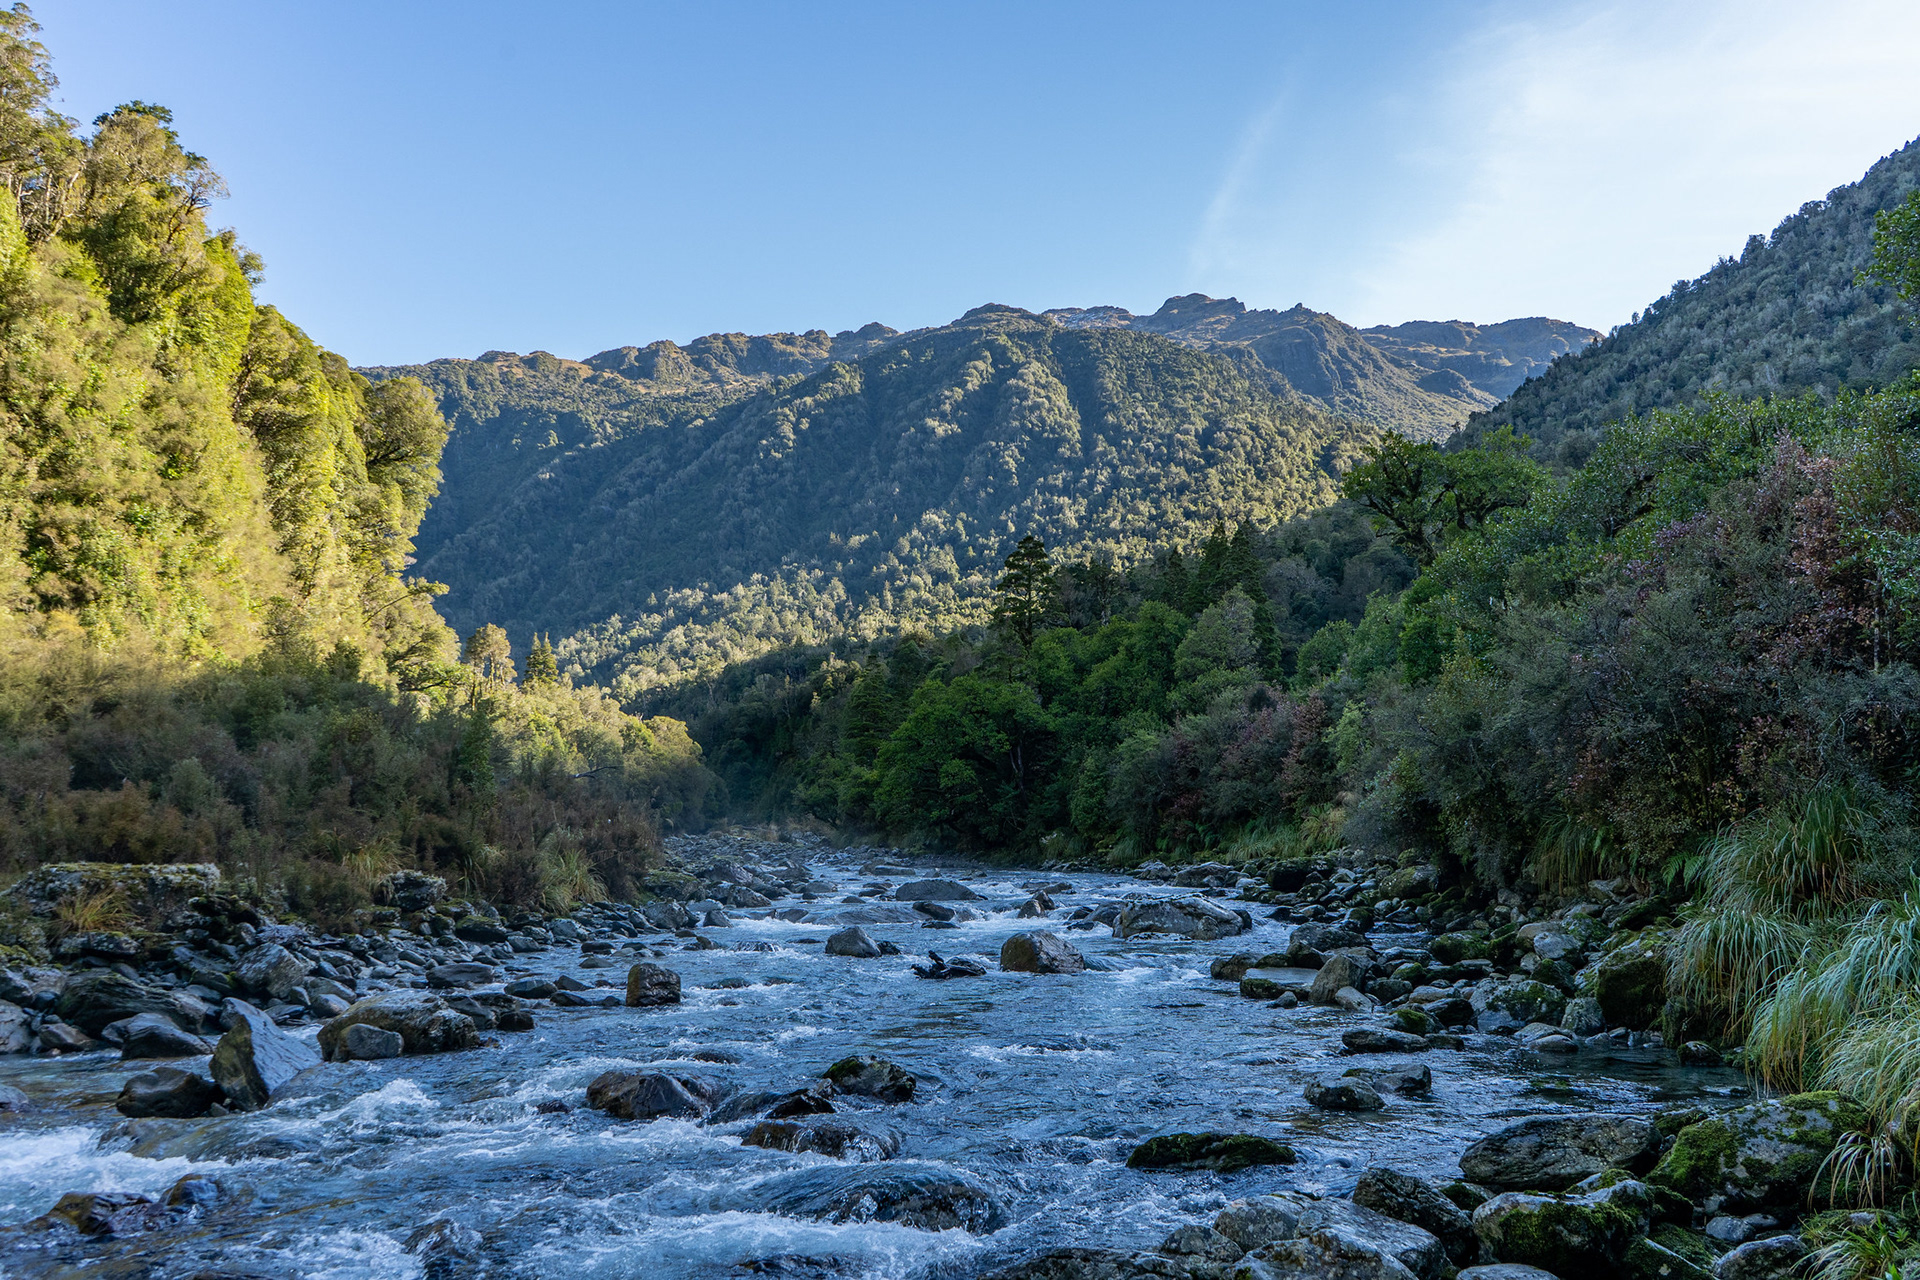
Looking back up Cone Creek to the Lake Morgan tops.

From the Cone / Haupiri junction, travel becomes trivial and beautiful courtesy of nearly continuous open flats. It's best to just navigate lines that give direct-ish access downriver without hitting the sporadic forested sections, keeping an eye out for the deer and trout which seem prolific in the catchment. The river briefly abuts the flats about halfway down, but there are good trails in bush which negate the need to cross the Haupiri which is a reasonably large river.
The end of the 4WD track can be picked up around BU21 990 793, which then gives straightforward access back to the carpark. It can be boggy in places, but it's easy to follow and a grateful conduit in the bush. Once back at your car, all that is left to do is sign out from Gloriavale and reflect on the beautiful sights in this part of the world.

You may also like

Back to Top