The Hokitika Gorge is without a doubt one of the West Coast's most popular tourist attractions, along with the Franz Josef and Fox Glaciers. Perhaps unknown to most is that the Hokitika catchment itself is the home of many splendorous gorges, without the throng of tourists.
Even the name of the Hokitika Gorge is a bit of a misnomer, to be fair. Most of the water presents arises from the Whitcombe catchment, and the opaque green hues are driven largely by the Sale and Barron glacial feeds up near Whitcombe Pass. Nonetheless, the Hokitika somehow gets bragging rights downstream of the confluence. Just to make things more fun, this trip starts on Whitcombe Valley Road at the Whitcombe Valley carpark - makes sense, right?
Driving to the carpark requires a couple of small fords, though the main challenge is not bottoming out the vehicle on the banks of accumulated shingle. The carpark itself is broad and well formed, a popular destination for trampers and hunters. Having finished work on the Friday, I made the drive over and set off as the sun began to set.

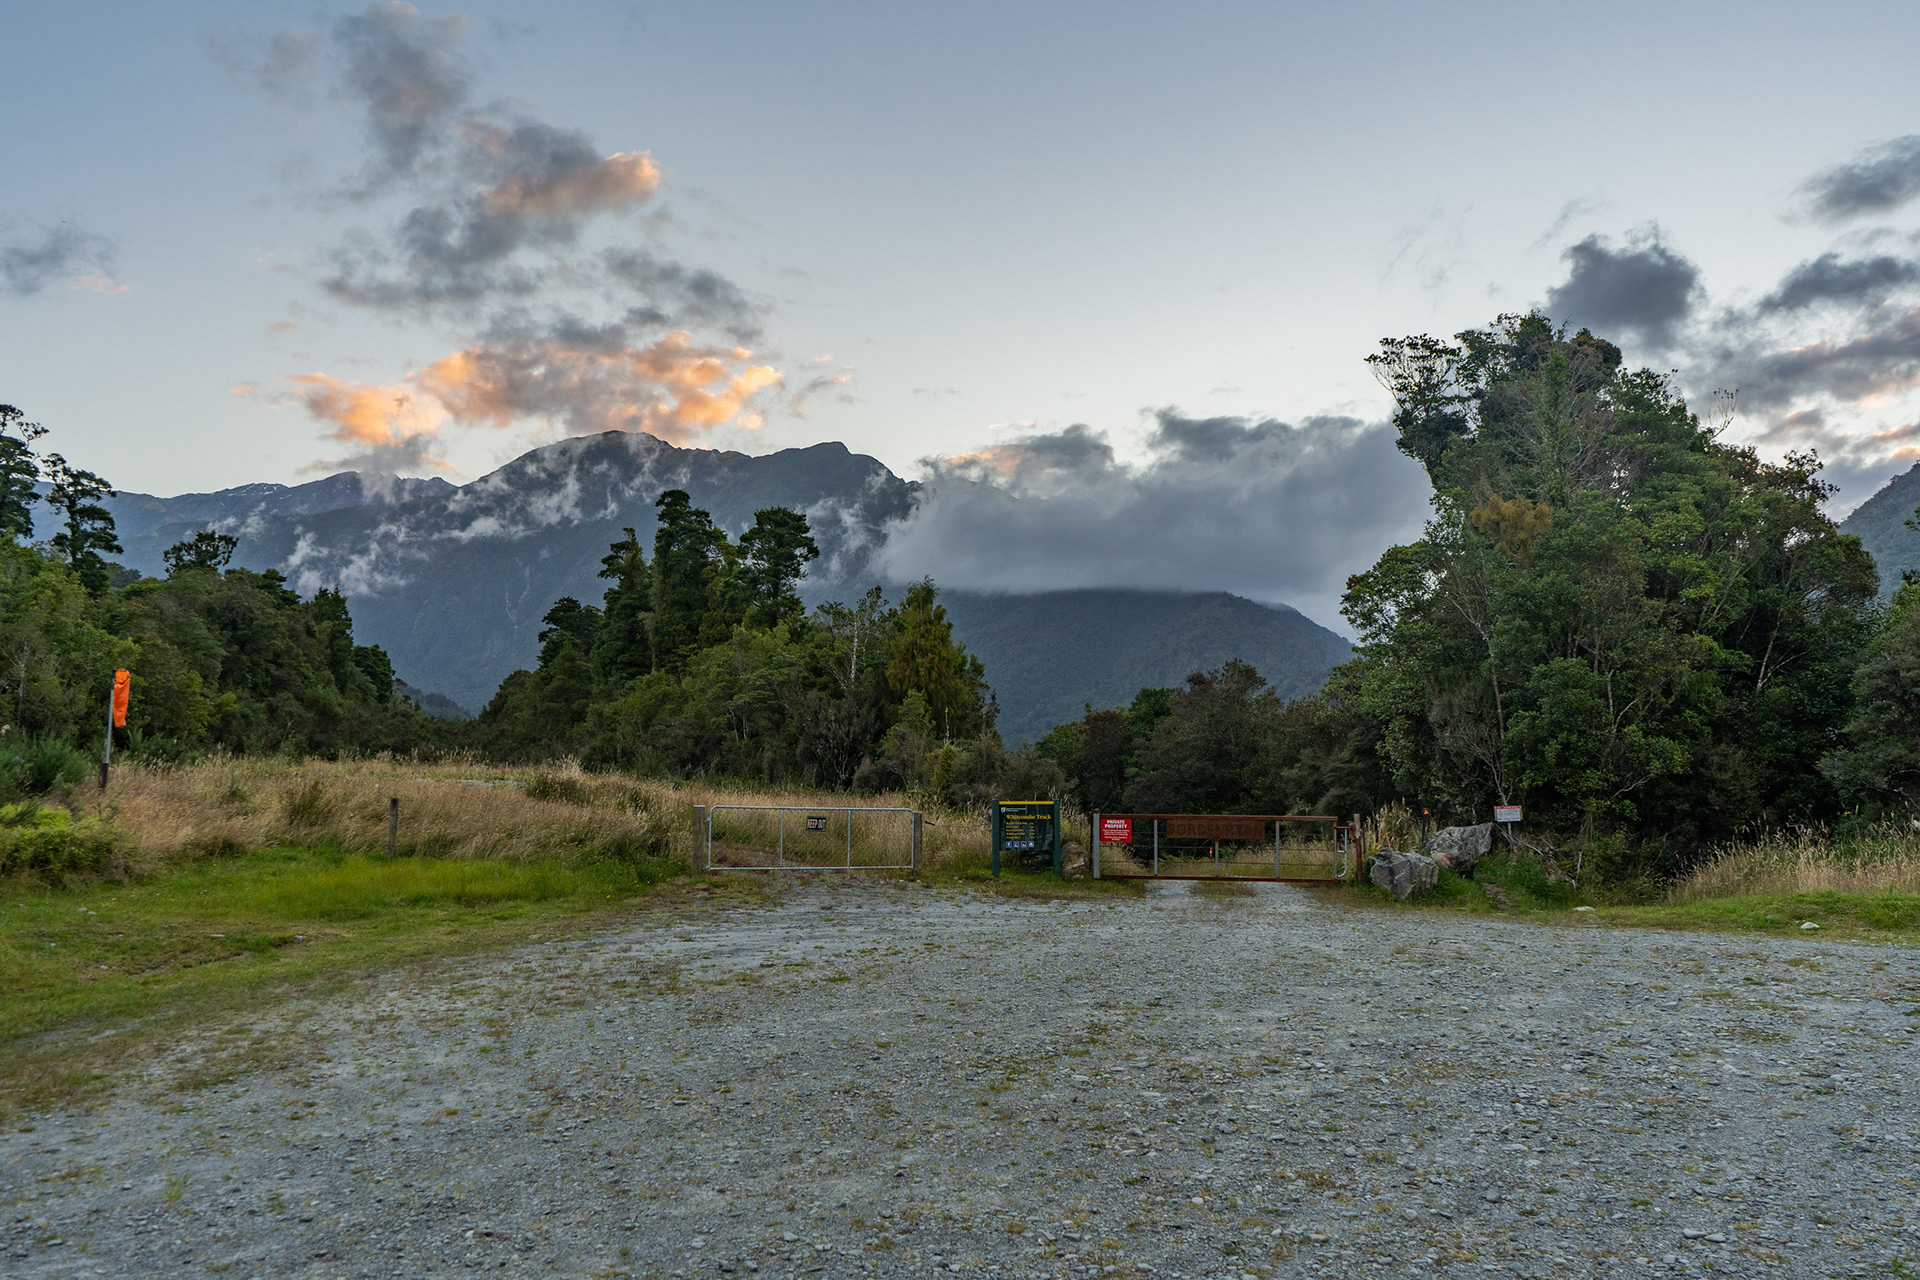
The Whitcombe Valley carpark in the fading daylight.

Walking through the rust-stained gates feels like the beginning of a grand adventure, wherever your journey is taking you. The Whitcombe is long and protracted, running all the way to the spine of the Main Divide. The pass at its head found use as an early transport route due to its low elevation (1239m) and topographically gentle approaches, though the northern approach is scrubby and bouldery with the southern side slow tussock travel down Lauper Stream. The southern exit difficulties extend beyond the ranges to this day, as the Rakaia River must be crossed which is no mean feat for most of the year.
One big advantage of the Whitcombe is that the first hut (Rapid Creek Hut) is easily walkable in the dark.  Unlike the adjacent Toaroha (3 - 4h) with its diverse track in, the opening salvo on the Whitcombe takes <2h and is broadly a 50/50 split of 4WD track and benched travel on a flattish terrace. That being said, it's not without its minor complexities.
I headed out in the last of the daylight, travelling along the farm road for about 45 minutes. The route then dropped me onto the wide and stony banks of the Hokitika River, which offer surprisingly pleasant travel despite being uneven underfoot. I managed to lose about 15 minutes unsuccessfully trying to get my Garmin InReach to work, along with any remnants of usable light. The InReach proved to be a bit problematic throughout the trip, frustratingly showing messages as delivered only for my trusted contact to not receive any of them. I did ultimately discover that it helps if you leave the Earthmate app open for 5 - 10 minutes with line-of-sight to the sky after a message shows as delivered, but it was an unexpected shortfall - maybe it's just the price you pay for living in the less populated southern hemisphere.

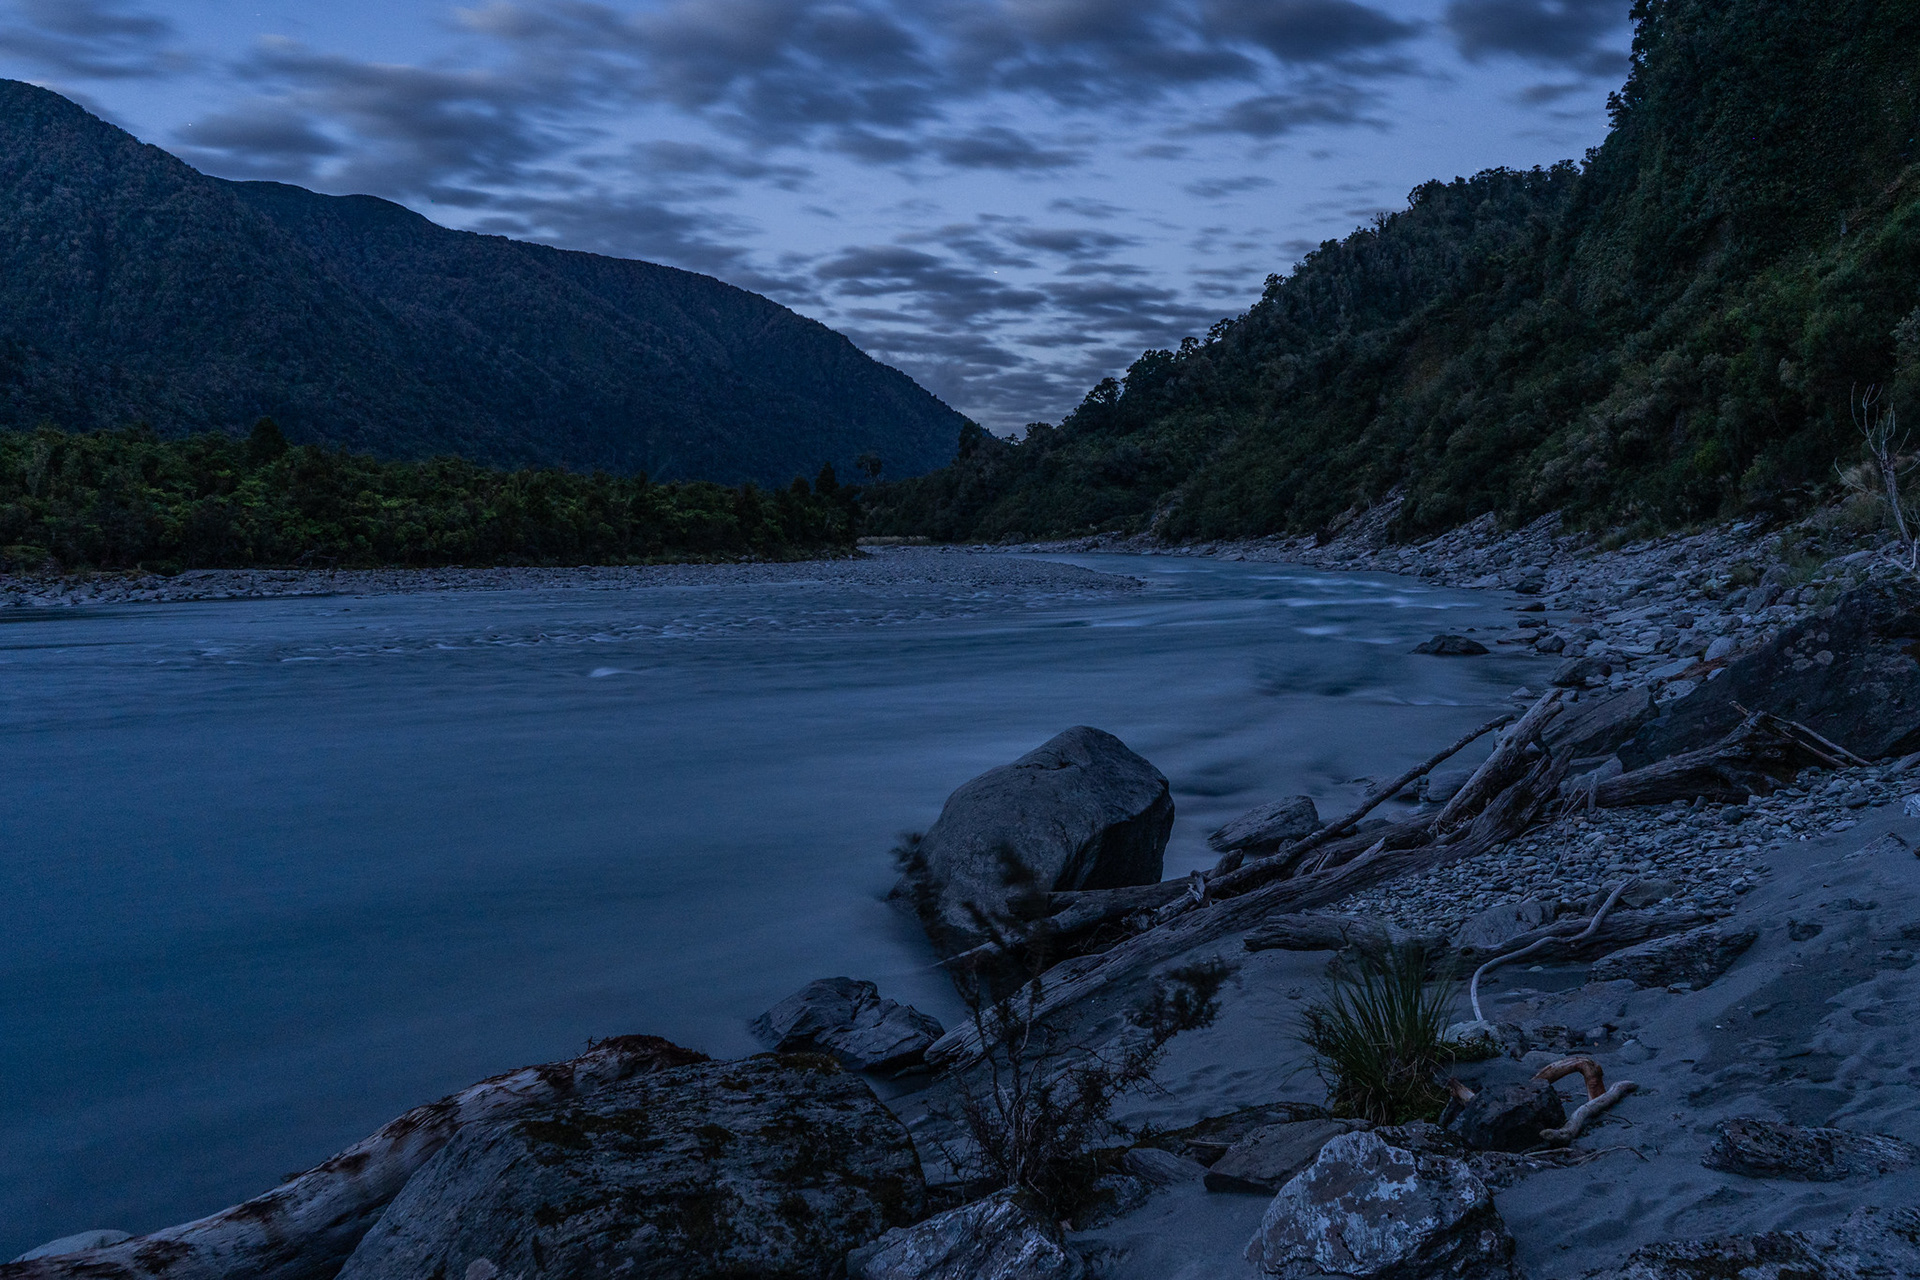
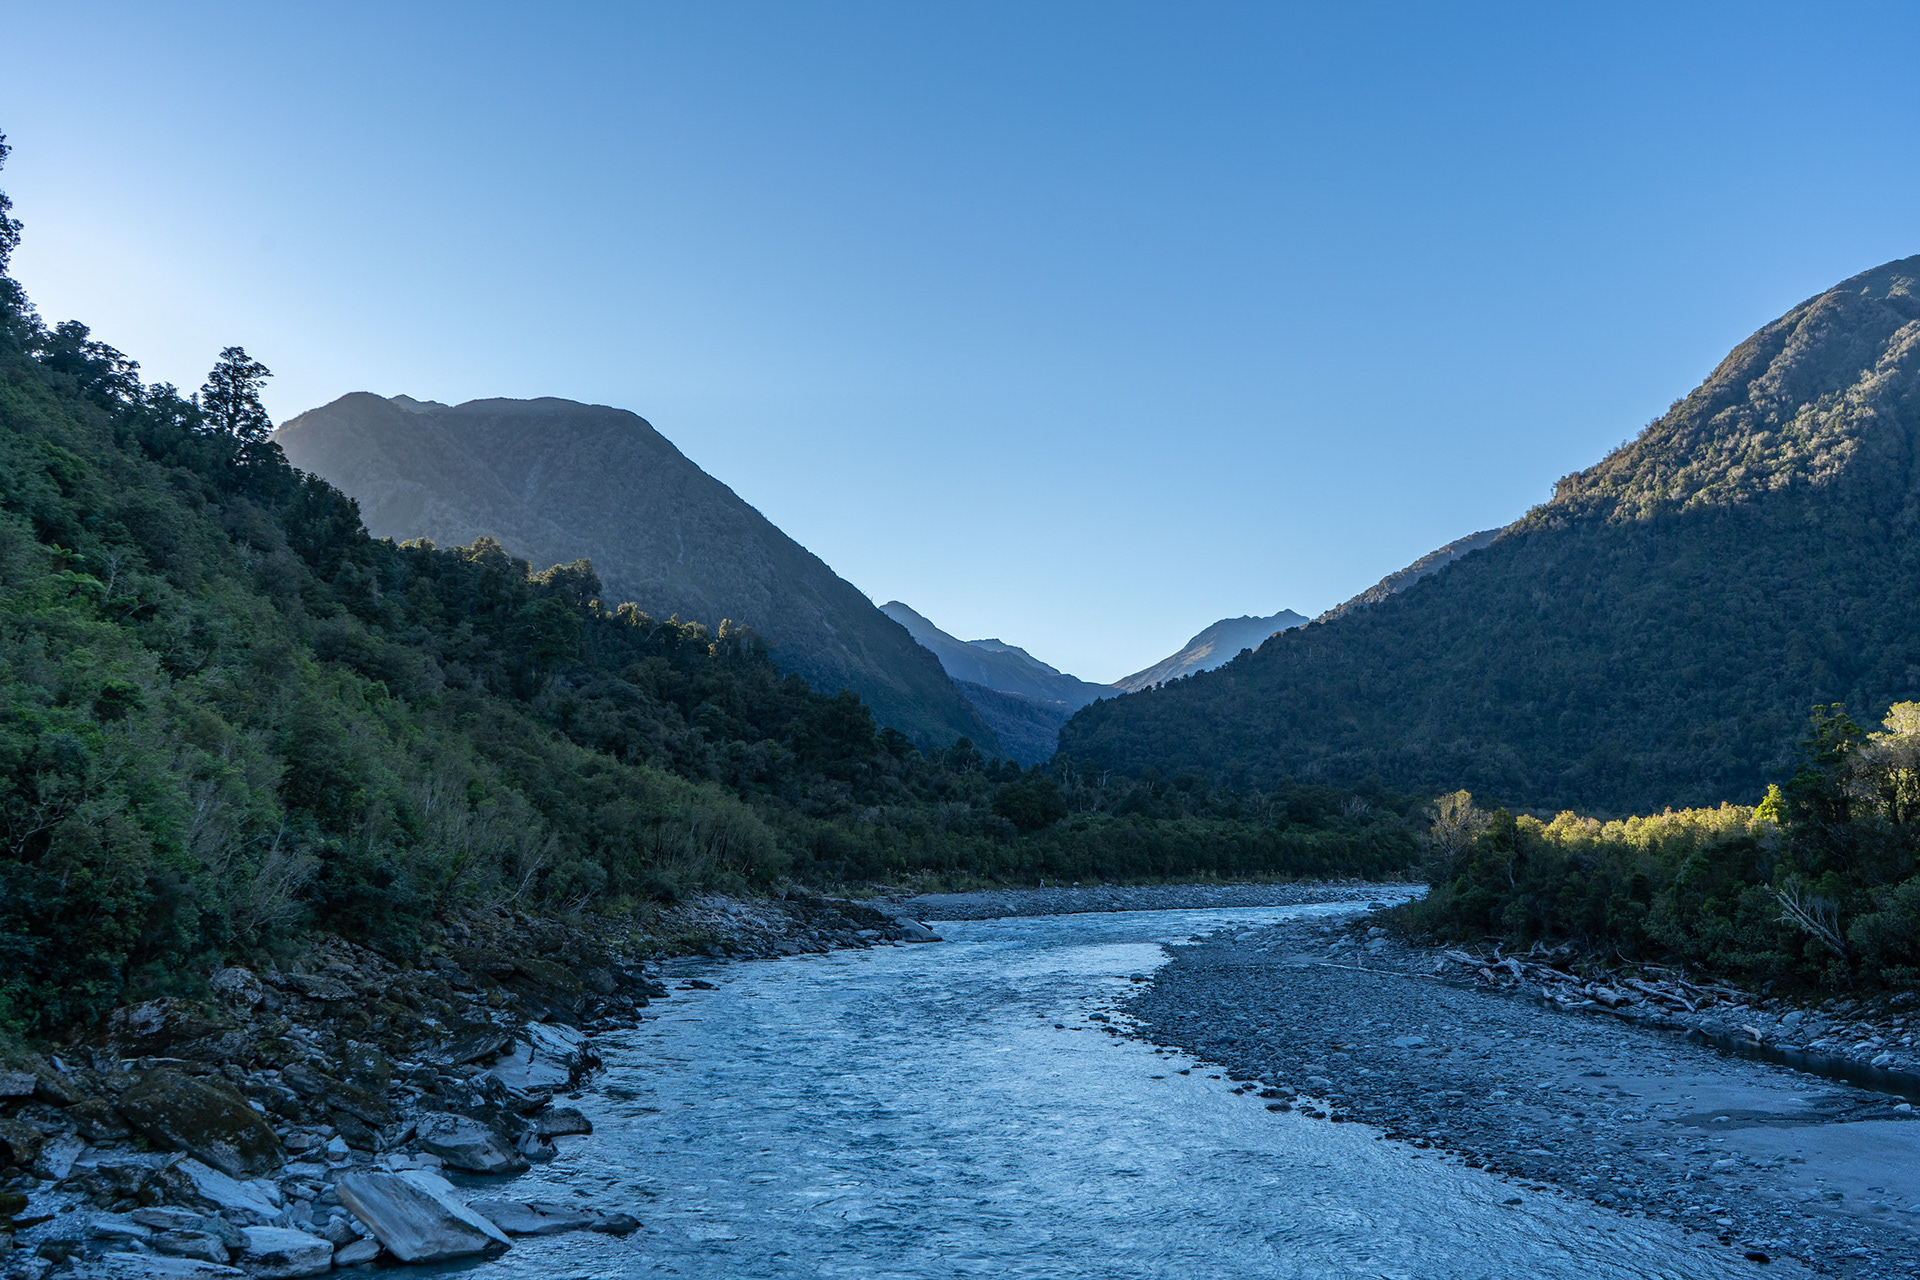
Looking back down the Hokitika River, shortly before climbing up onto the terrace behind.

Anyway, I digress. After the section of riverbed travel, the route climbs up through a small gut and onto the terrace. You do need to keep an eye out for the marker as it's not completely obvious, but it's not prohibitively difficult to locate. Once on the terrace, the track is benched and easy travel with occasional side streams bisecting it. I had the displeasure of encountering a mustelid (probably a stoat) in the depths of the night, my headlamp must have been blinding for it attempted an initial stalk before deciding I was beyond its predatory capabilities.
A few hours in comes the highlight of the first day - the cableway. These were once ubiquitous in the backcountry, but have slowly been falling out of fashion in favour of bridges which offer easier travel at the expense of capital cost. The Rapid Creek cableway is one of the most accessible iterations, but also one of the harder ones to traverse - it's a long span (about 60m), and has quite a bit of sag. Solo cableway crossings are not super common because of the physicality involved, but I didn't really have a choice.
There are instructions on the cableway, but they're similar to the goods lifts at skifields. The cage is transferred to your side of the river using the winding handle, where it's tethered via the supplied chain. One person sits in the cage with their pack, and the tether is disconnected leaving the tramper to roll under the force to gravity to the central point of the cable (it will take a few oscillations). If you're lucky enough to have friends, they can wind you to the far side where you can tie off and disembark. Rinse and repeat, and your whole crew has navigated the crossing.
If you are solo, there is a handle provided in the cage which can be used to push the cage. This is basically a locking hook which slides over the cable and braces against the cage / cable interface, acting as a leverage point and also a brake. It's a physical exercise which has stymied trampers in the past, if your upper body strength is somewhat lacking you might be better off travelling with others. Regardless of whether you cross solo or as a group, you must release the cage so it is left in the centre of the cable span - missing this step risks benighting others who cannot retrieve a cage locked off on the other side of the river.

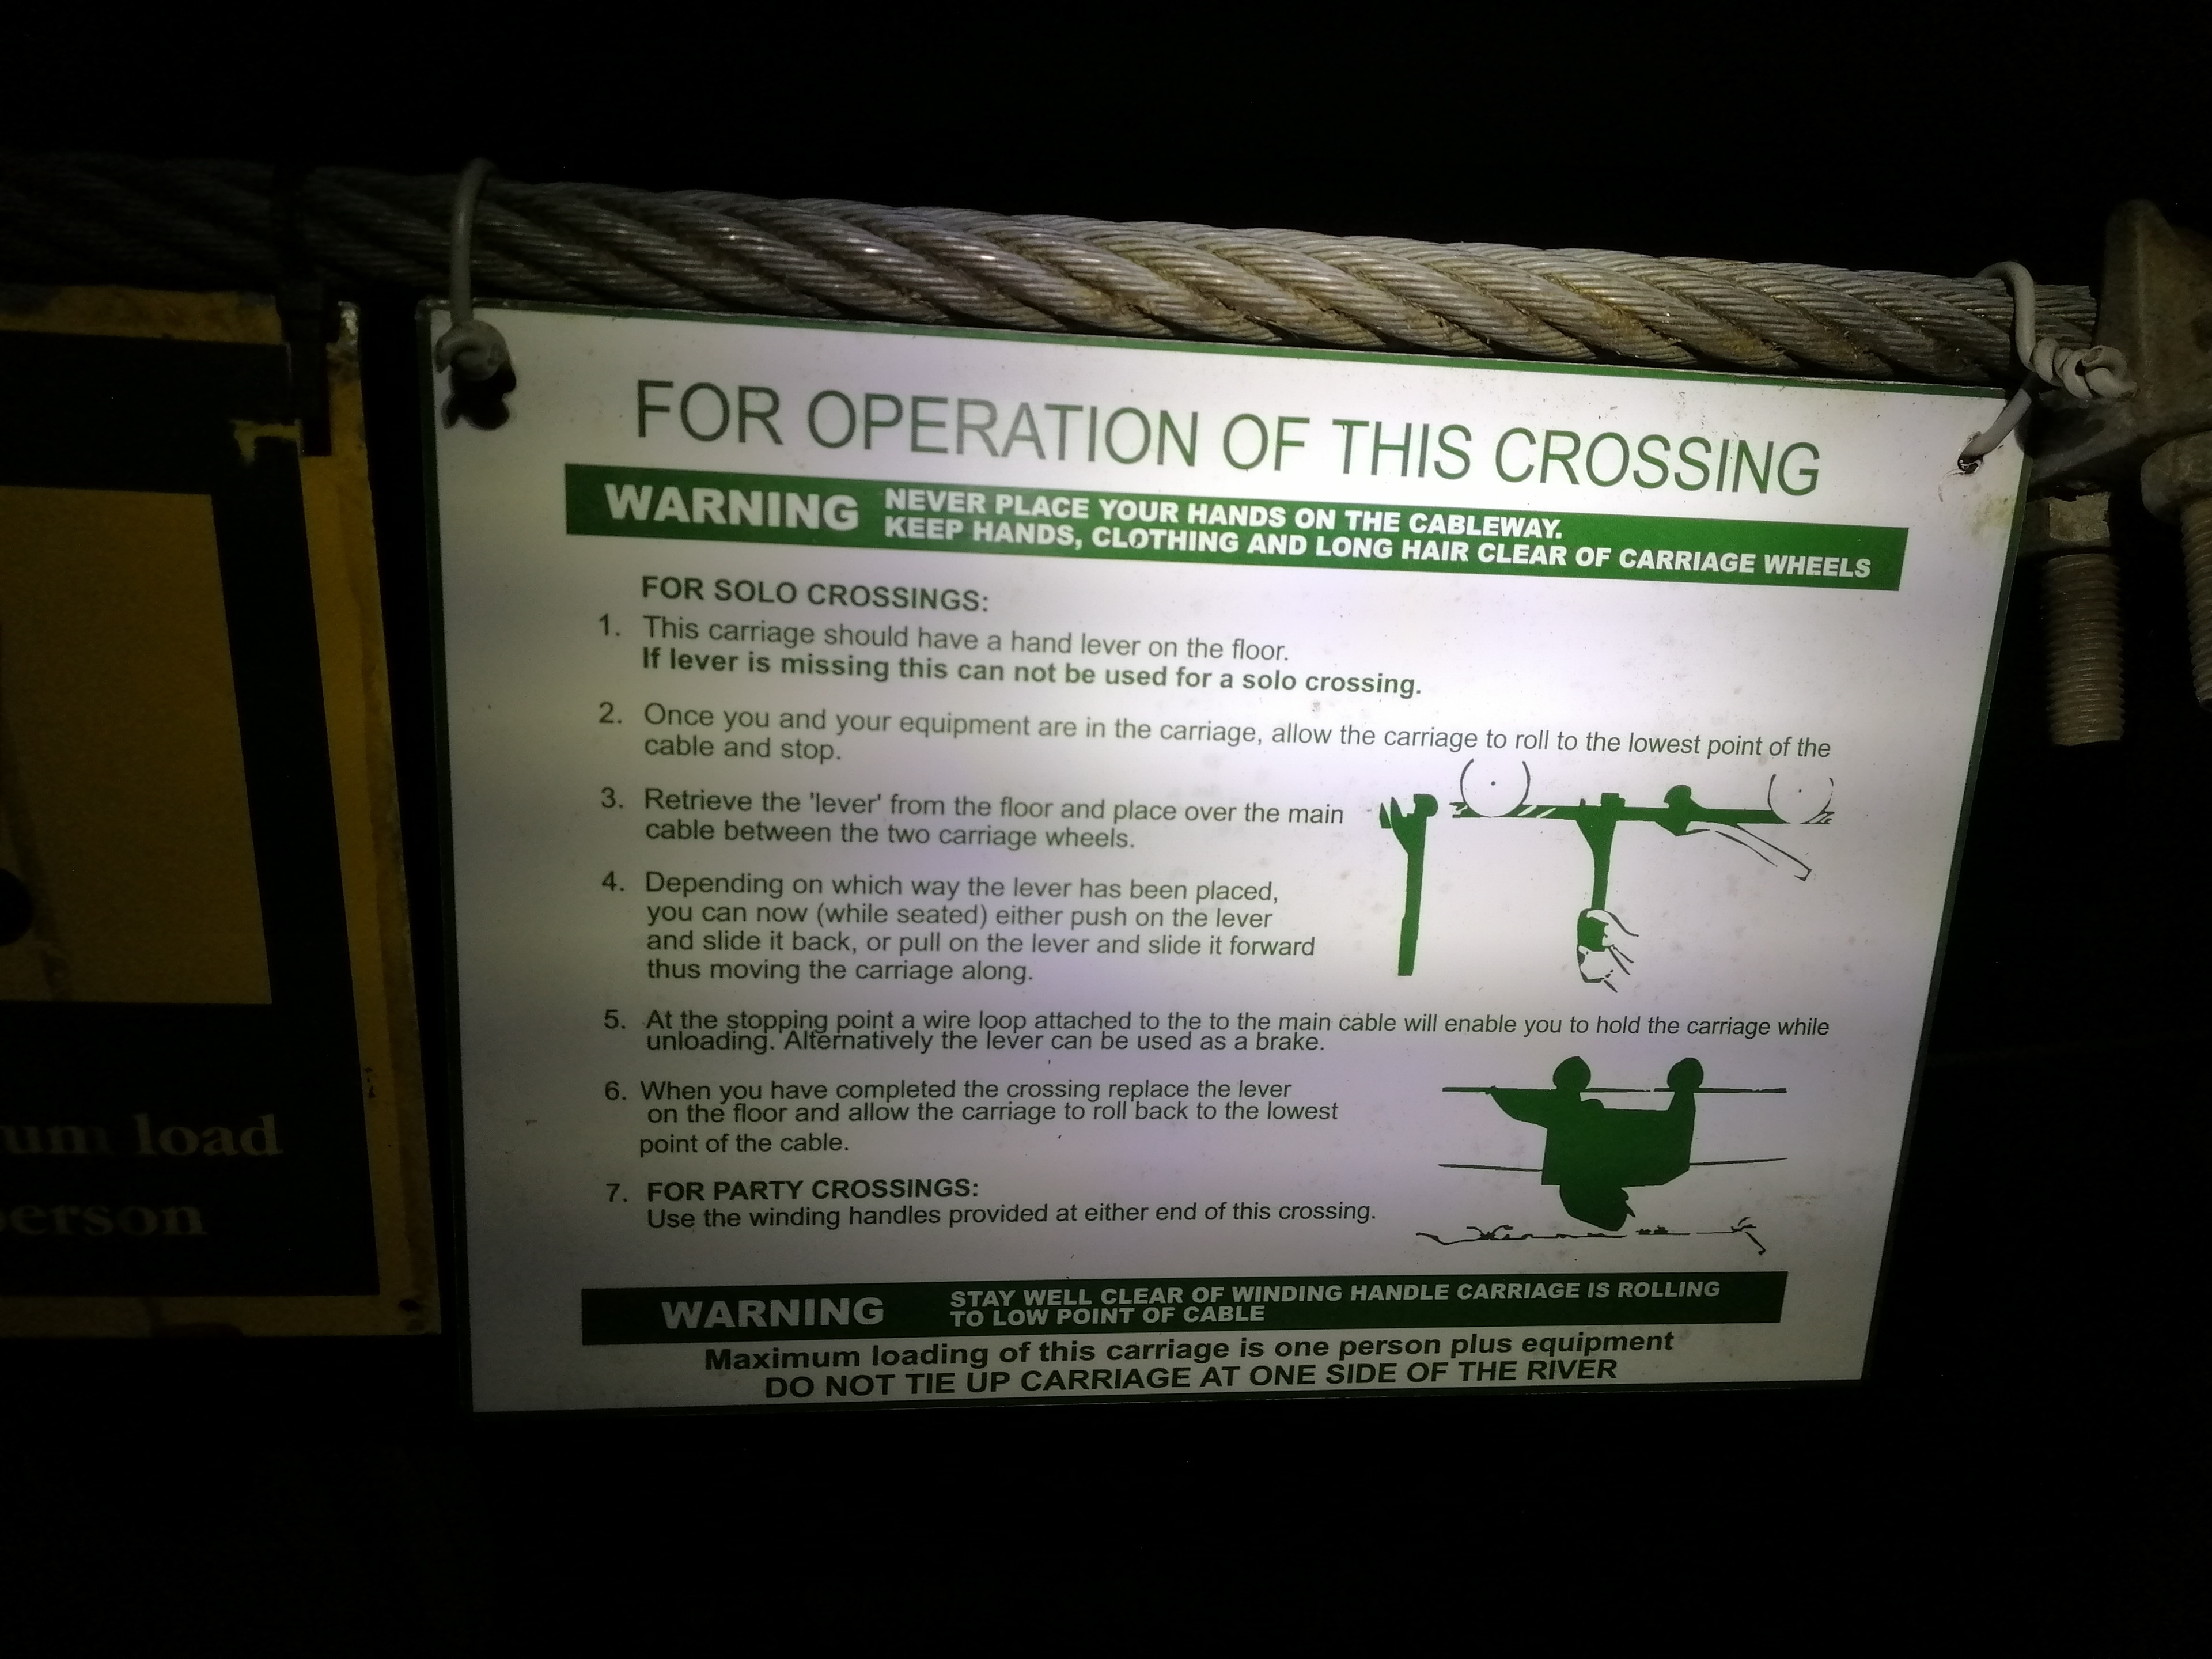
The instructions on the Rapid Creek cableway.

I had the benefit of having used the cableway on previous trips, so it was a reasonably familiar and easy exercise which soon had me on the true left of the Hokitika. From there, 10 minutes through the forest took me to a clearing and Rapid Creek Hut. It only sleeps four, but it's a cute wee thing and there were three beds left. Despite the late hour, I chatted with the overseas visitor who was delightful and somewhat bravely planning on heading to Neave Hut the following day. It would be a reasonably long haul (12h+), but he had four days to reach Glenfalloch and a favourable weather forecast. Somehow, it was around 1am by the time the chatter stopped and I went to sleep.

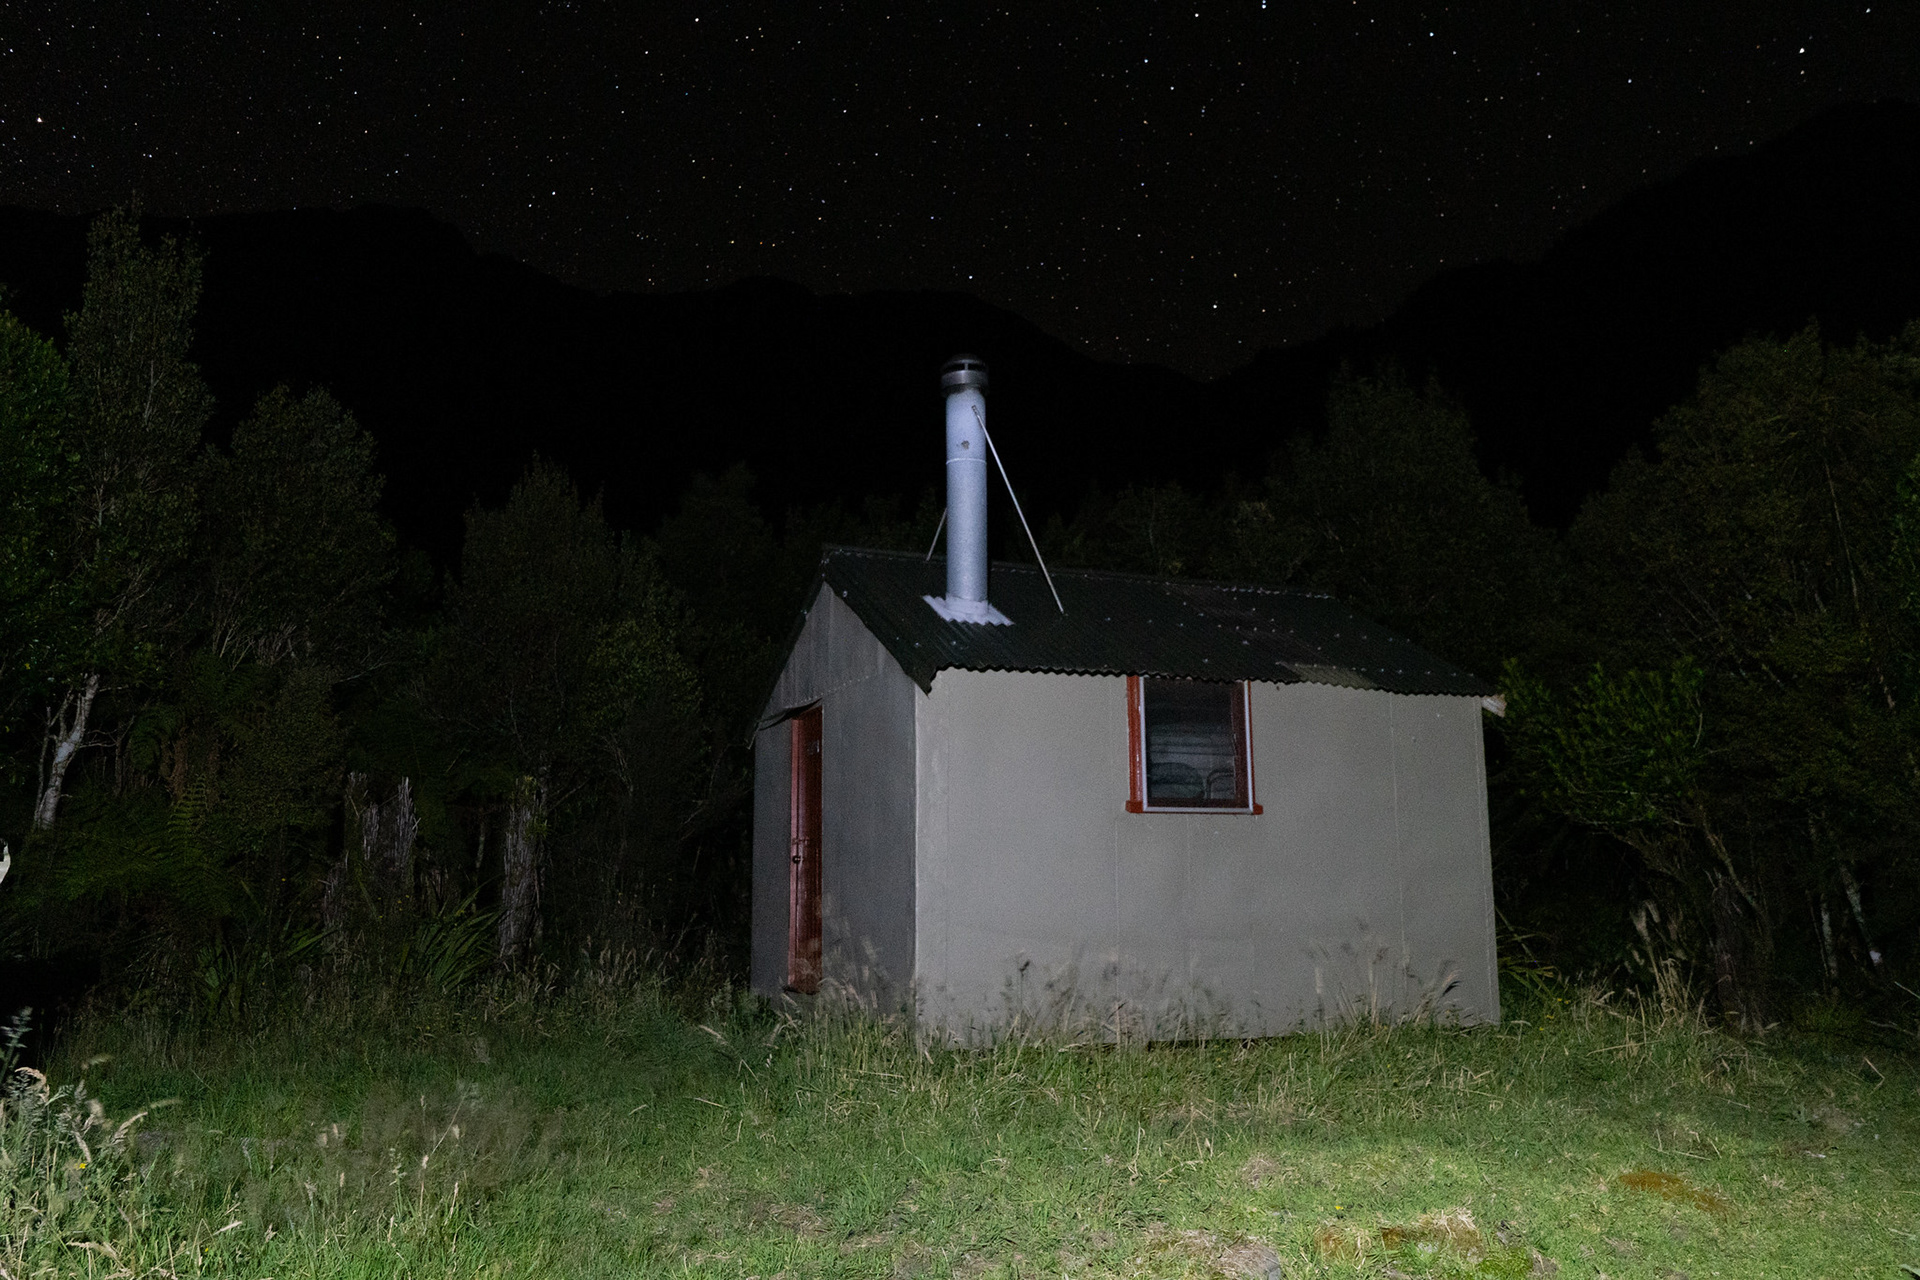
Rapid Creek Hut in the depths of the starry night.

Waking up at the reasonable hour of 6:45am the following morning revealed gorgeous blue skies. I got through a quick breakfast and was out the door for the long haul up to Frisco Hut that evening. Permolat estimates the route at a moderate ~10h, but they do give the valley the ominous honour of requiring a special note:
The Hokitika above the Whitcombe confluence is an extremely rugged valley, and several sections are actively eroding and slipping into the canyons. There are four large unbridged side-creeks that would be uncrossable after heavy rain. Entry points to the tracked sections around the canyons are marked with a combination of permolat, rock cairns, or cruise-tap. The terrain is generally rough, even on the tracked bits, with lots of ups and downs, and there are several sections of riverbed travel. There is a steep, narrow razorback on the descent to the river at the top end of the Kawau Gorge. Parts of it are roped and there are plenty of trees as handholds, but the drop-off on both sides is not recommended for those with vertigo. It's a long haul up from the Rapid Creek cableway to Serpentine and high levels of fitness and experience are essential prerequisites.
                                                                                                                                                                                    Permolat
Plenty to look forward to, it would seem.

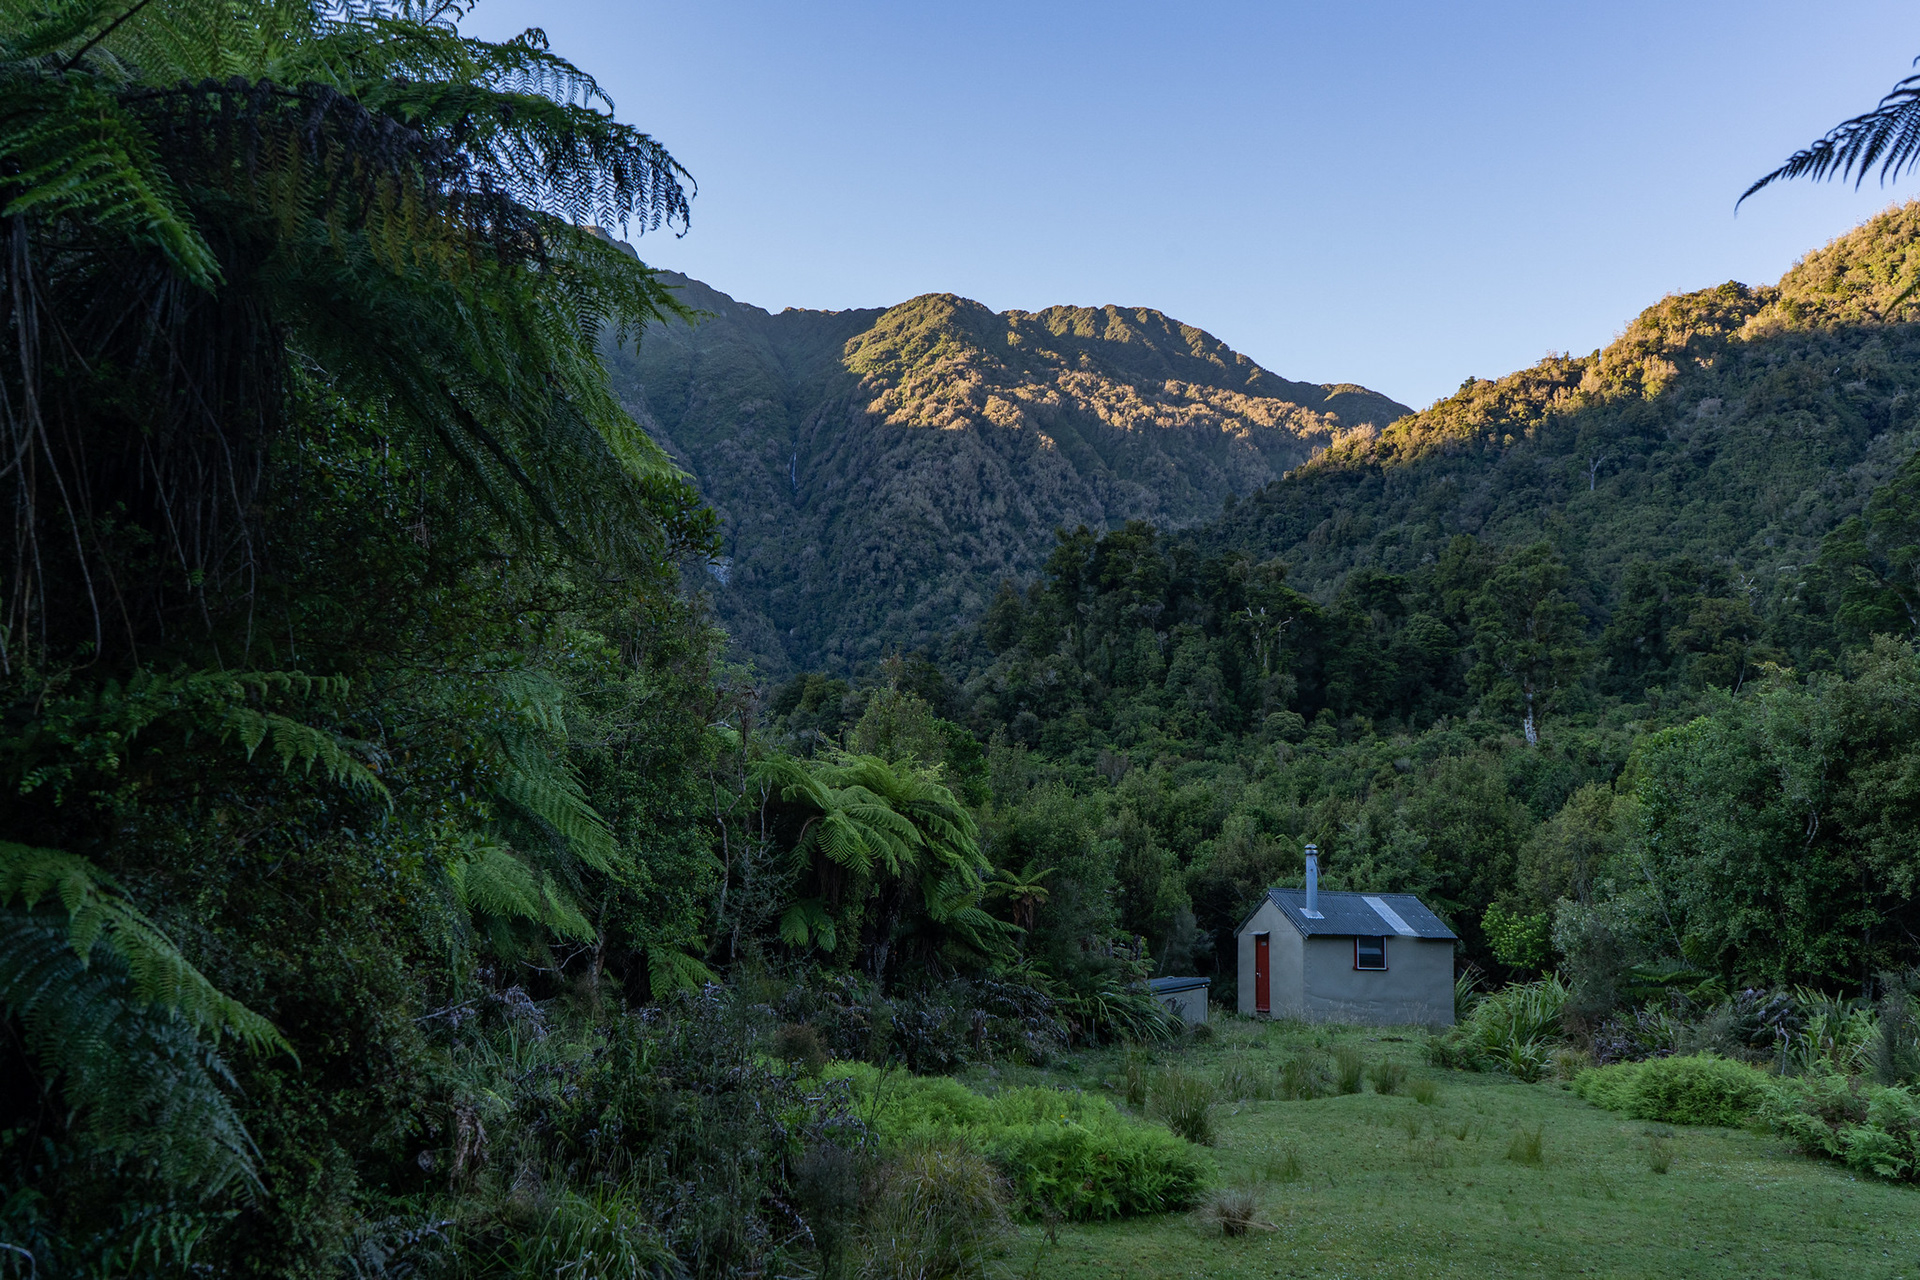
Leaving Rapid Creek Hut the following morning.

After heading out, the first order of the day was to recross the cableway to get back on the true right of the Hokitika River. This direction is harder because of the layout of the disembarking stations, but I must be getting stronger as it proved easier than previous crossings. I love the view up the Whitcombe from the middle of the cable span, the inviting forested hills cleaved by the slow snake of the river with more severe ranges distant.

Looking up the Whitcombe Valley from the middle of the cableway.

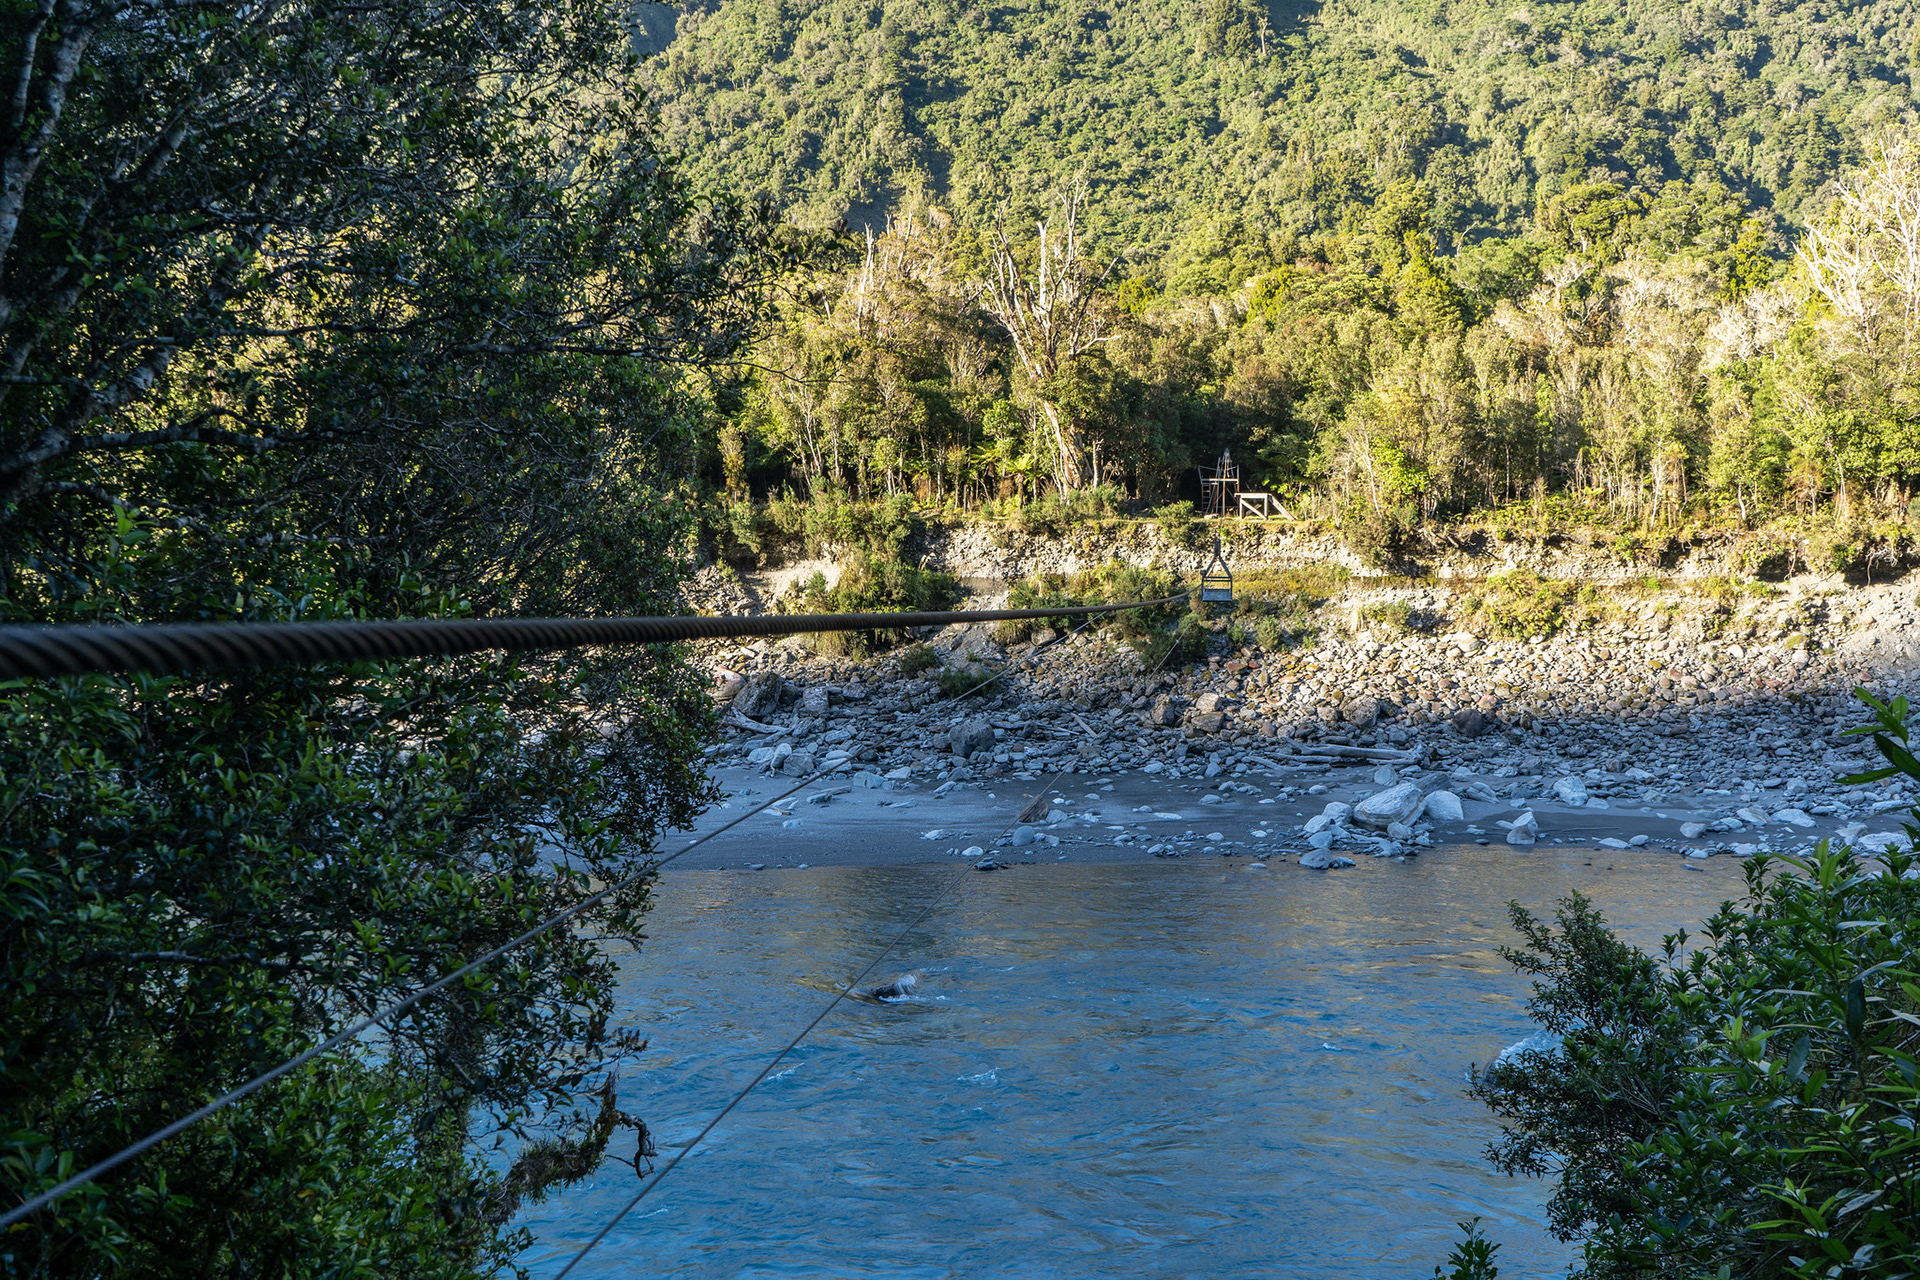
Back across the cableway from the disembarking station on the true right.

Once on dry land again, it's a short scramble down the bank onto the river margins and some easy boulder hopping which gives way to flatter banks. There is a terraced wedge immediately downstream of the Hokitika / Whitcombe confluence, and the track takes off reasonably early.

A short section of boulder travel to access the easier banks on the wedge above.

In daylight, the track is comfortable to follow with sporadic permolat markings and decent ground trails. The bush is quite open in places which is a blessing and a curse, but with care you should shortly find yourself spat out on stone banks by New Year Creek. If you were to find yourself completely unable to locate the track entrance at either end, following the riverbanks right around the wedge wouldn't be much slower.

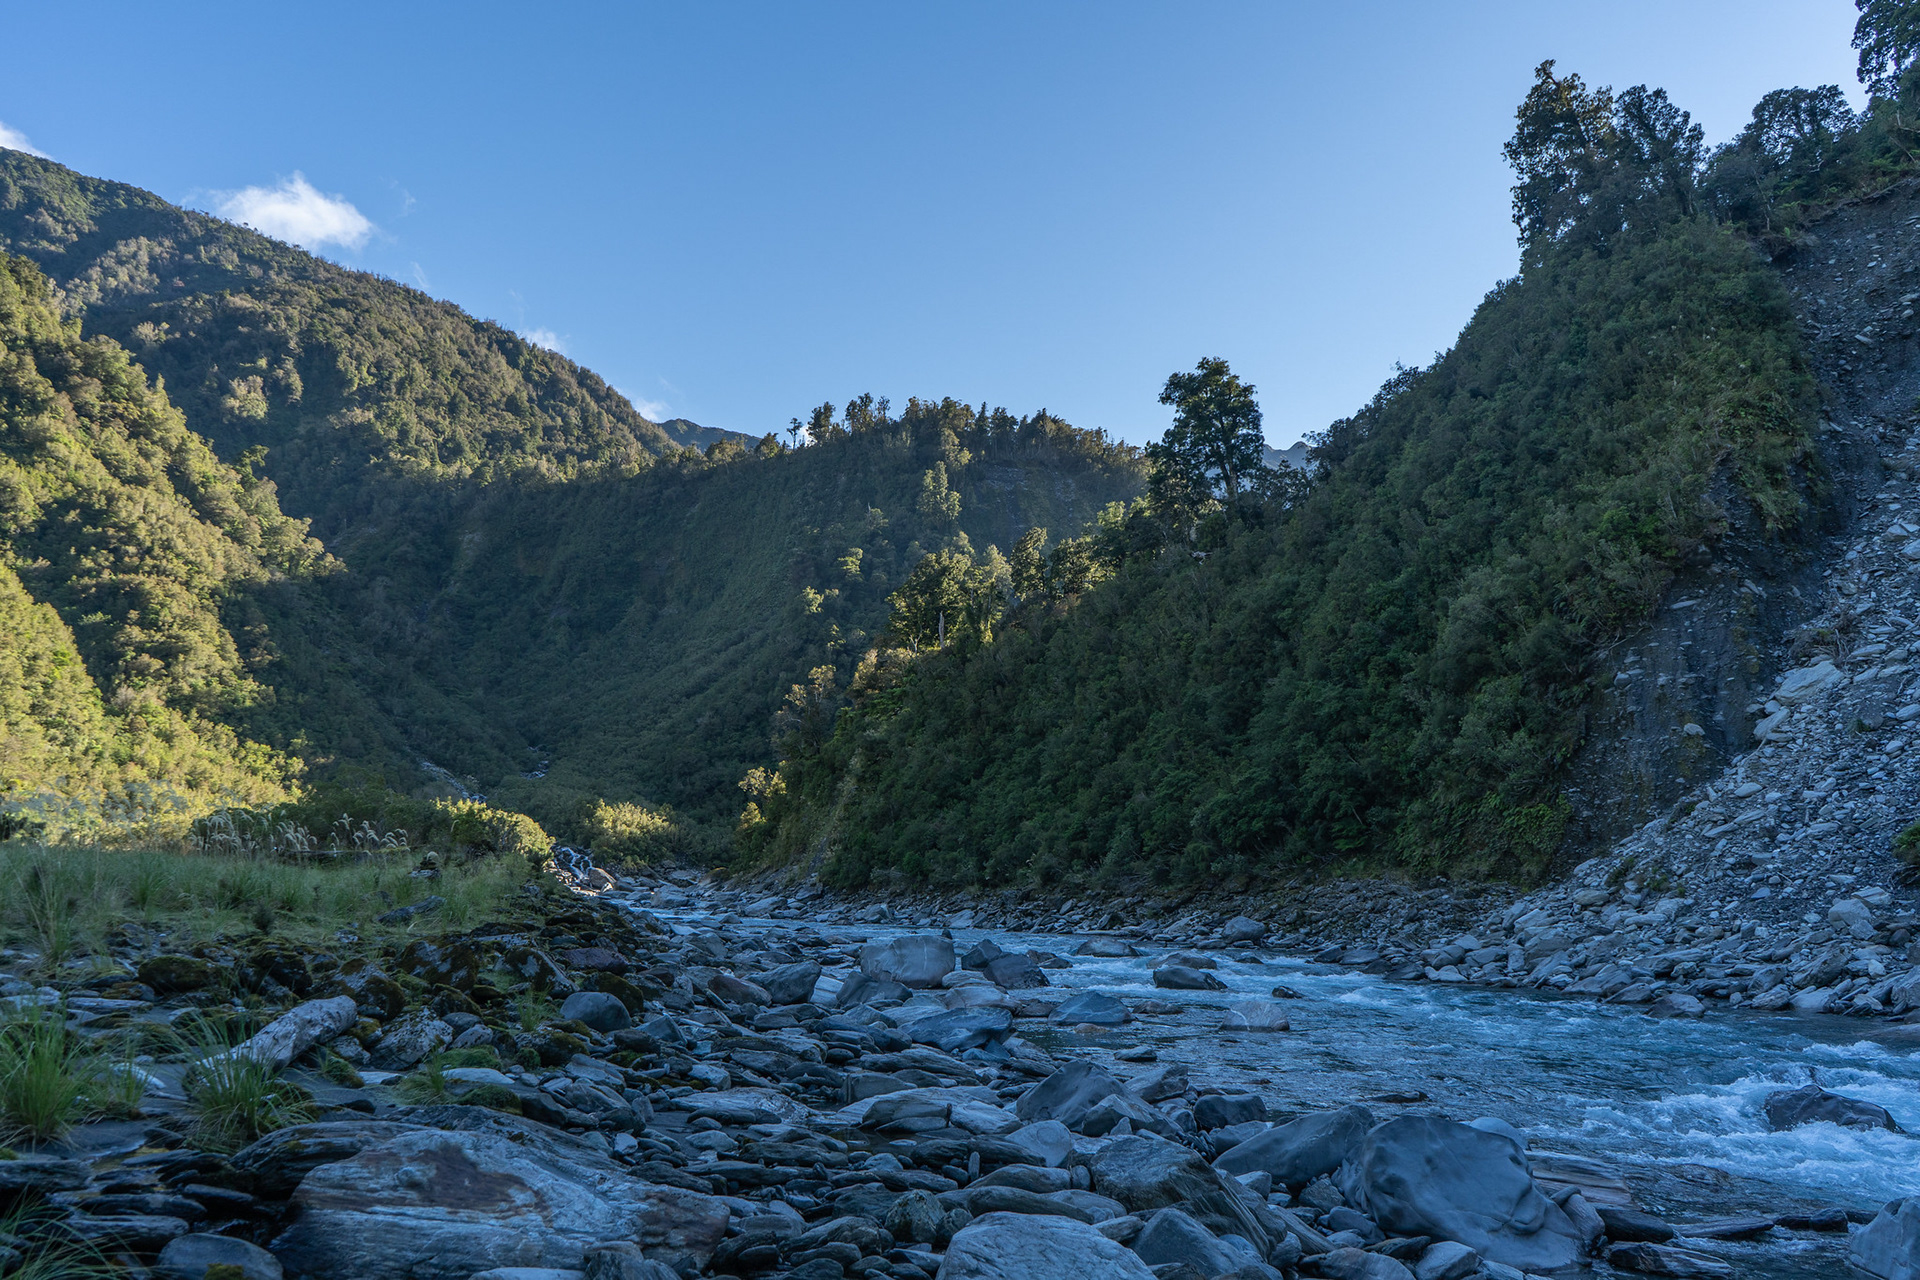
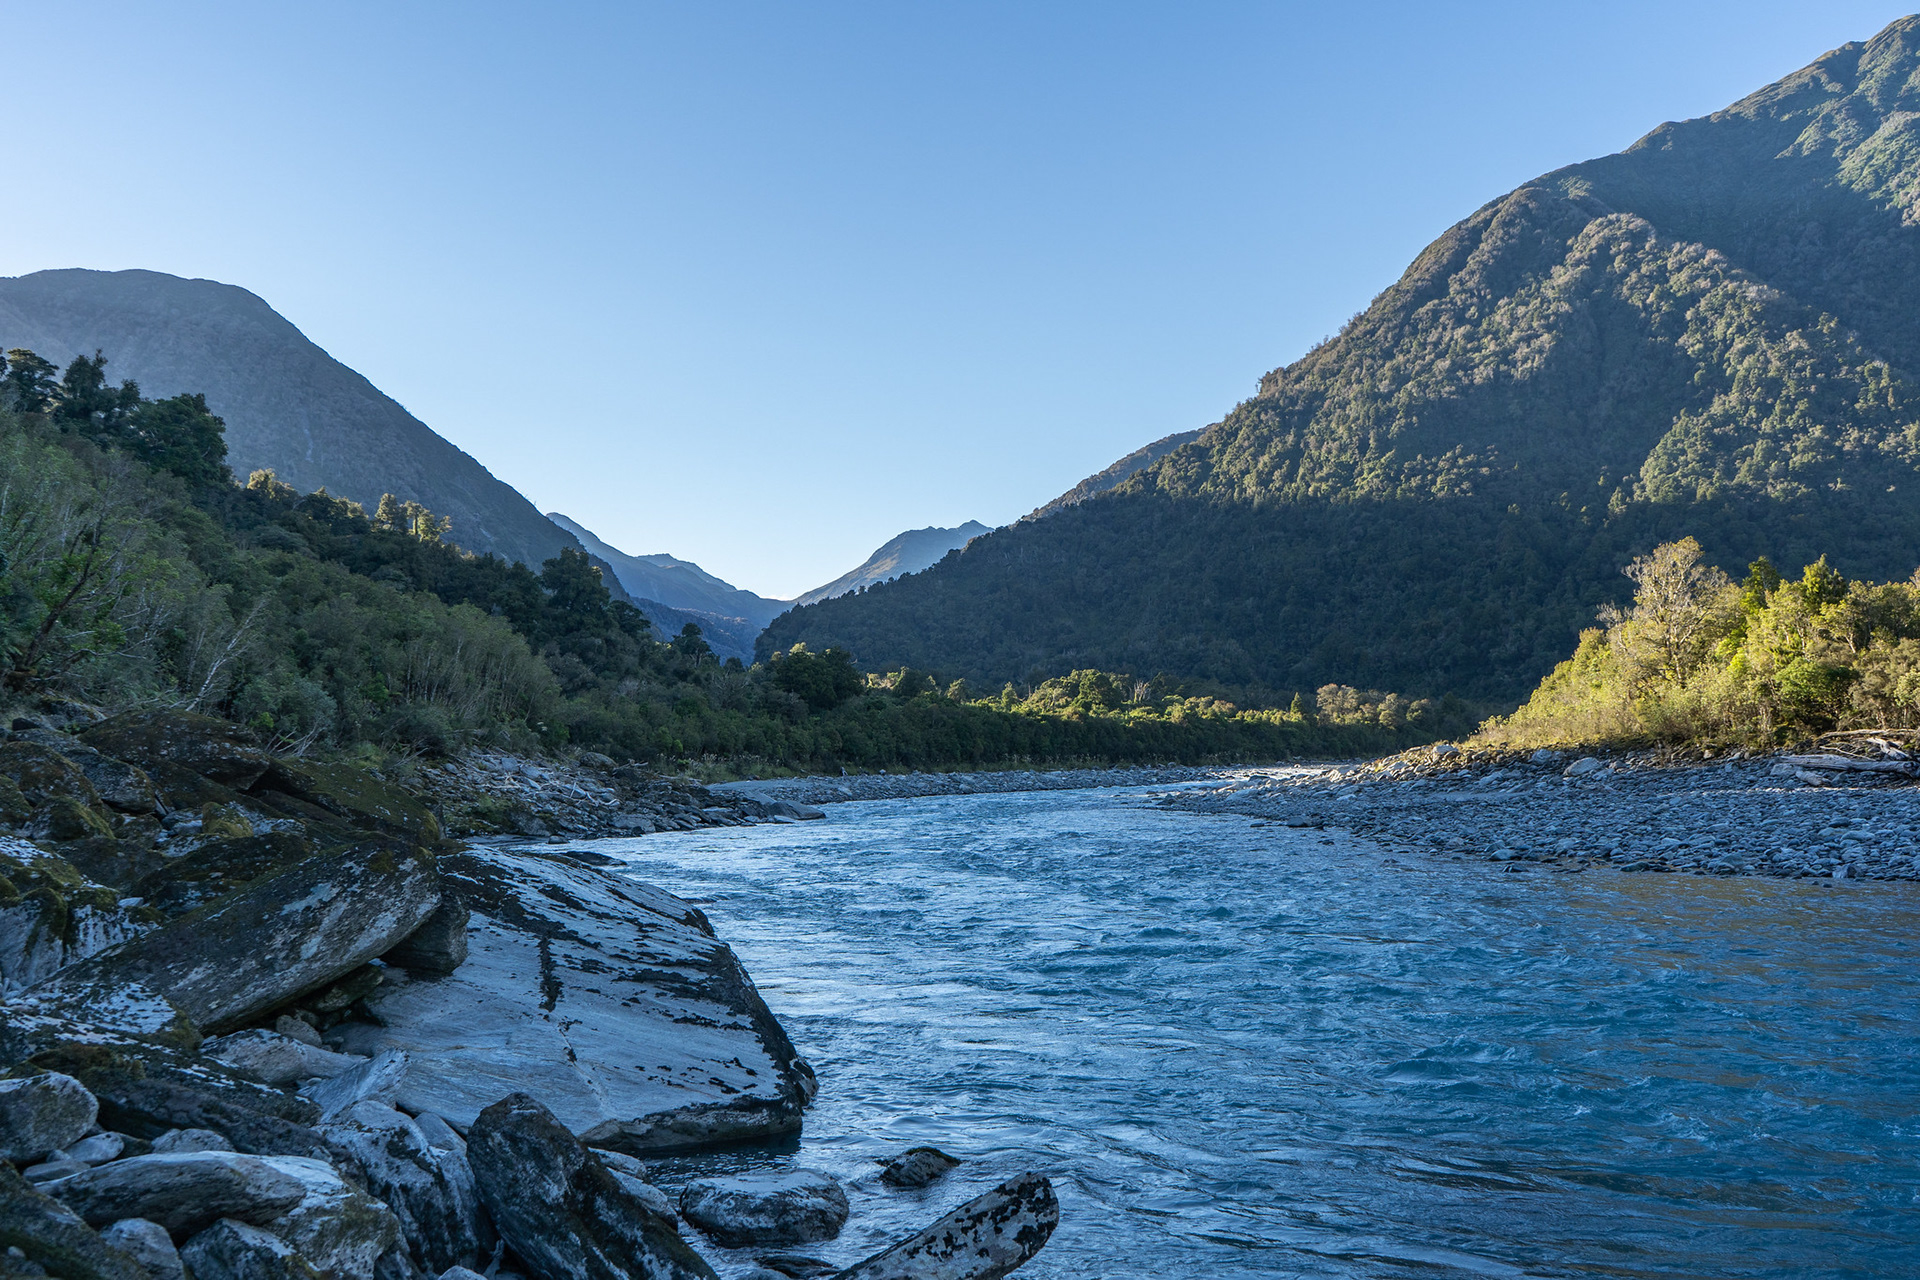
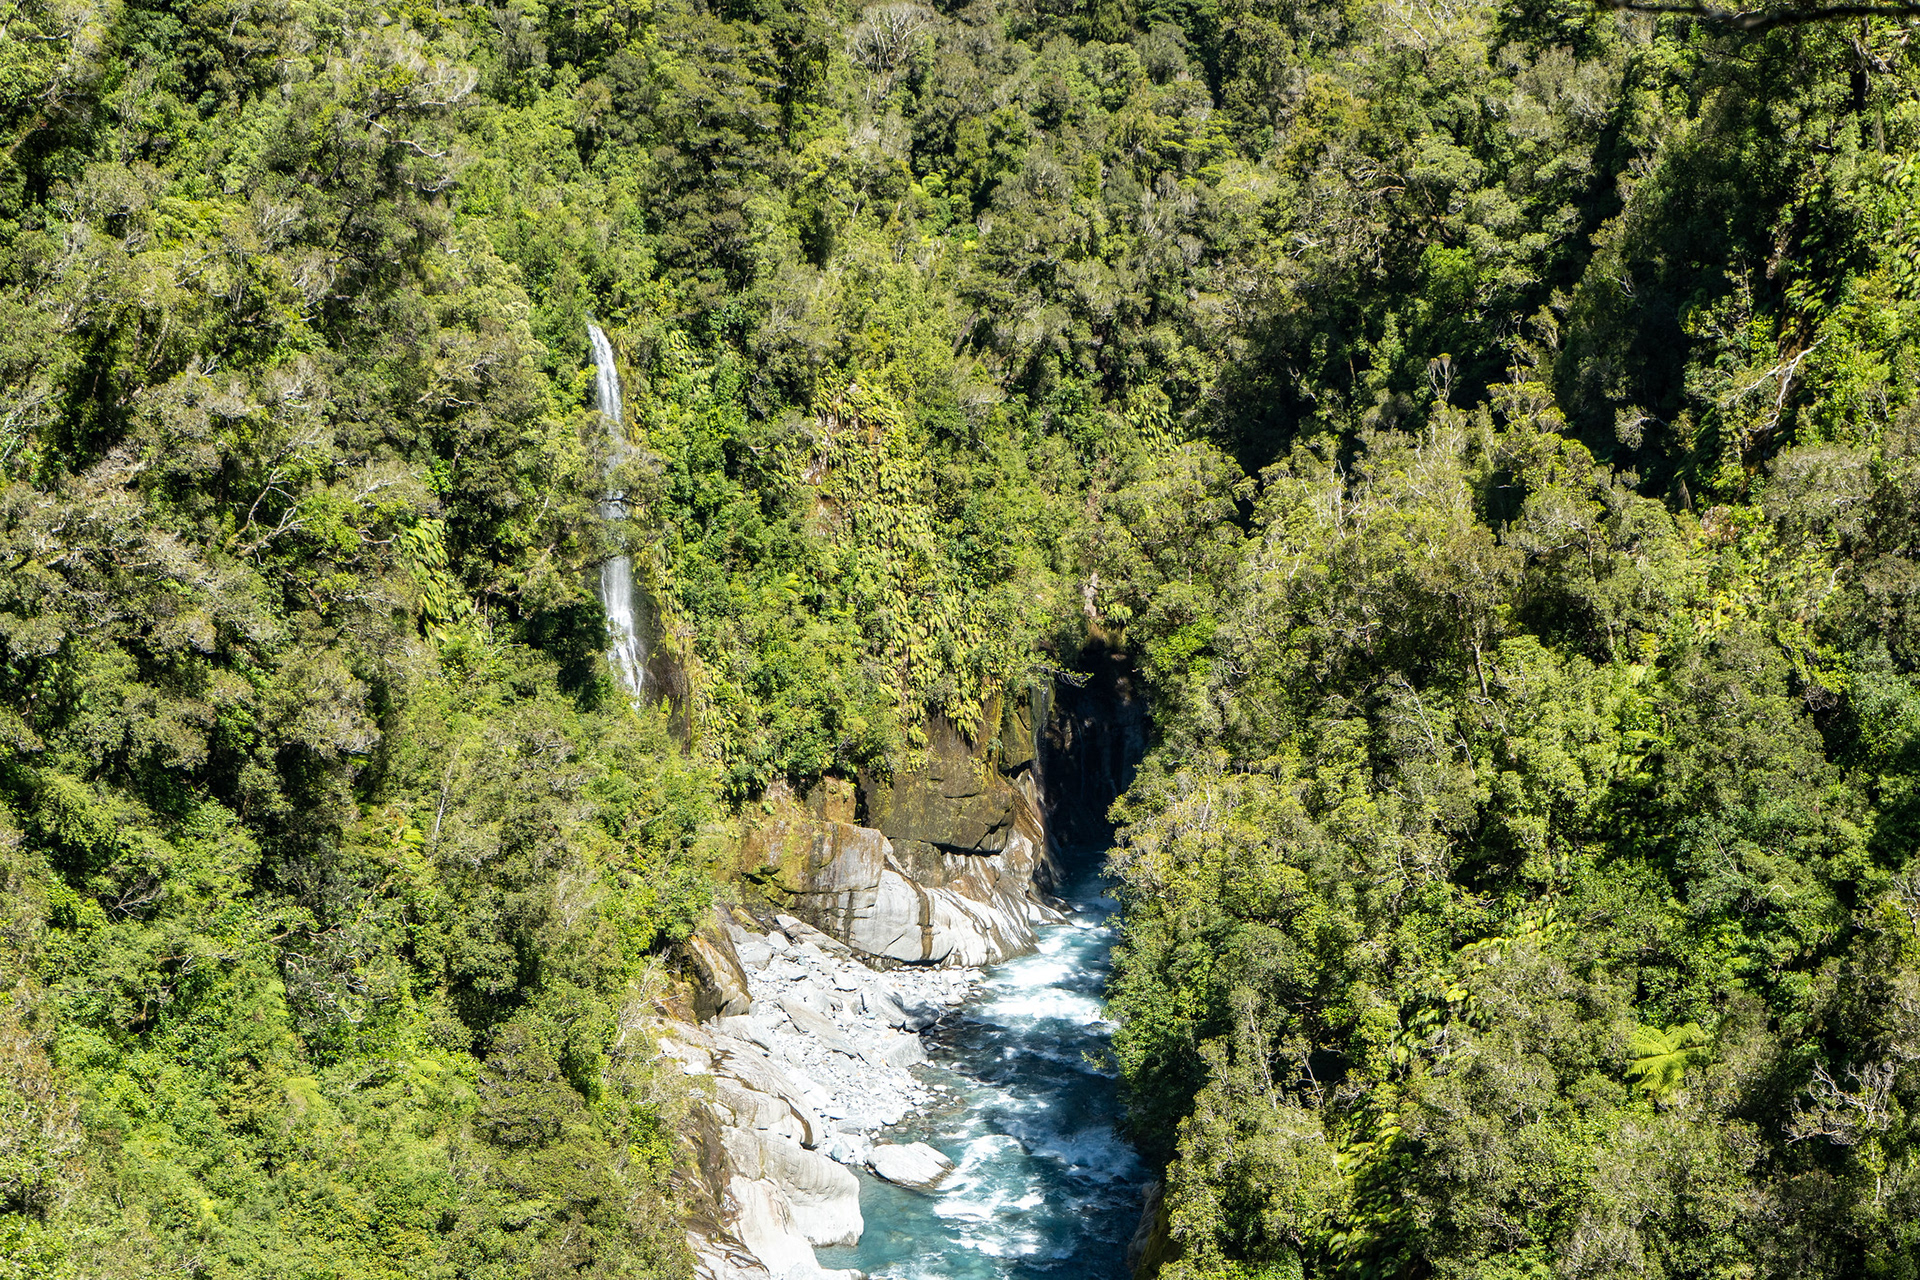
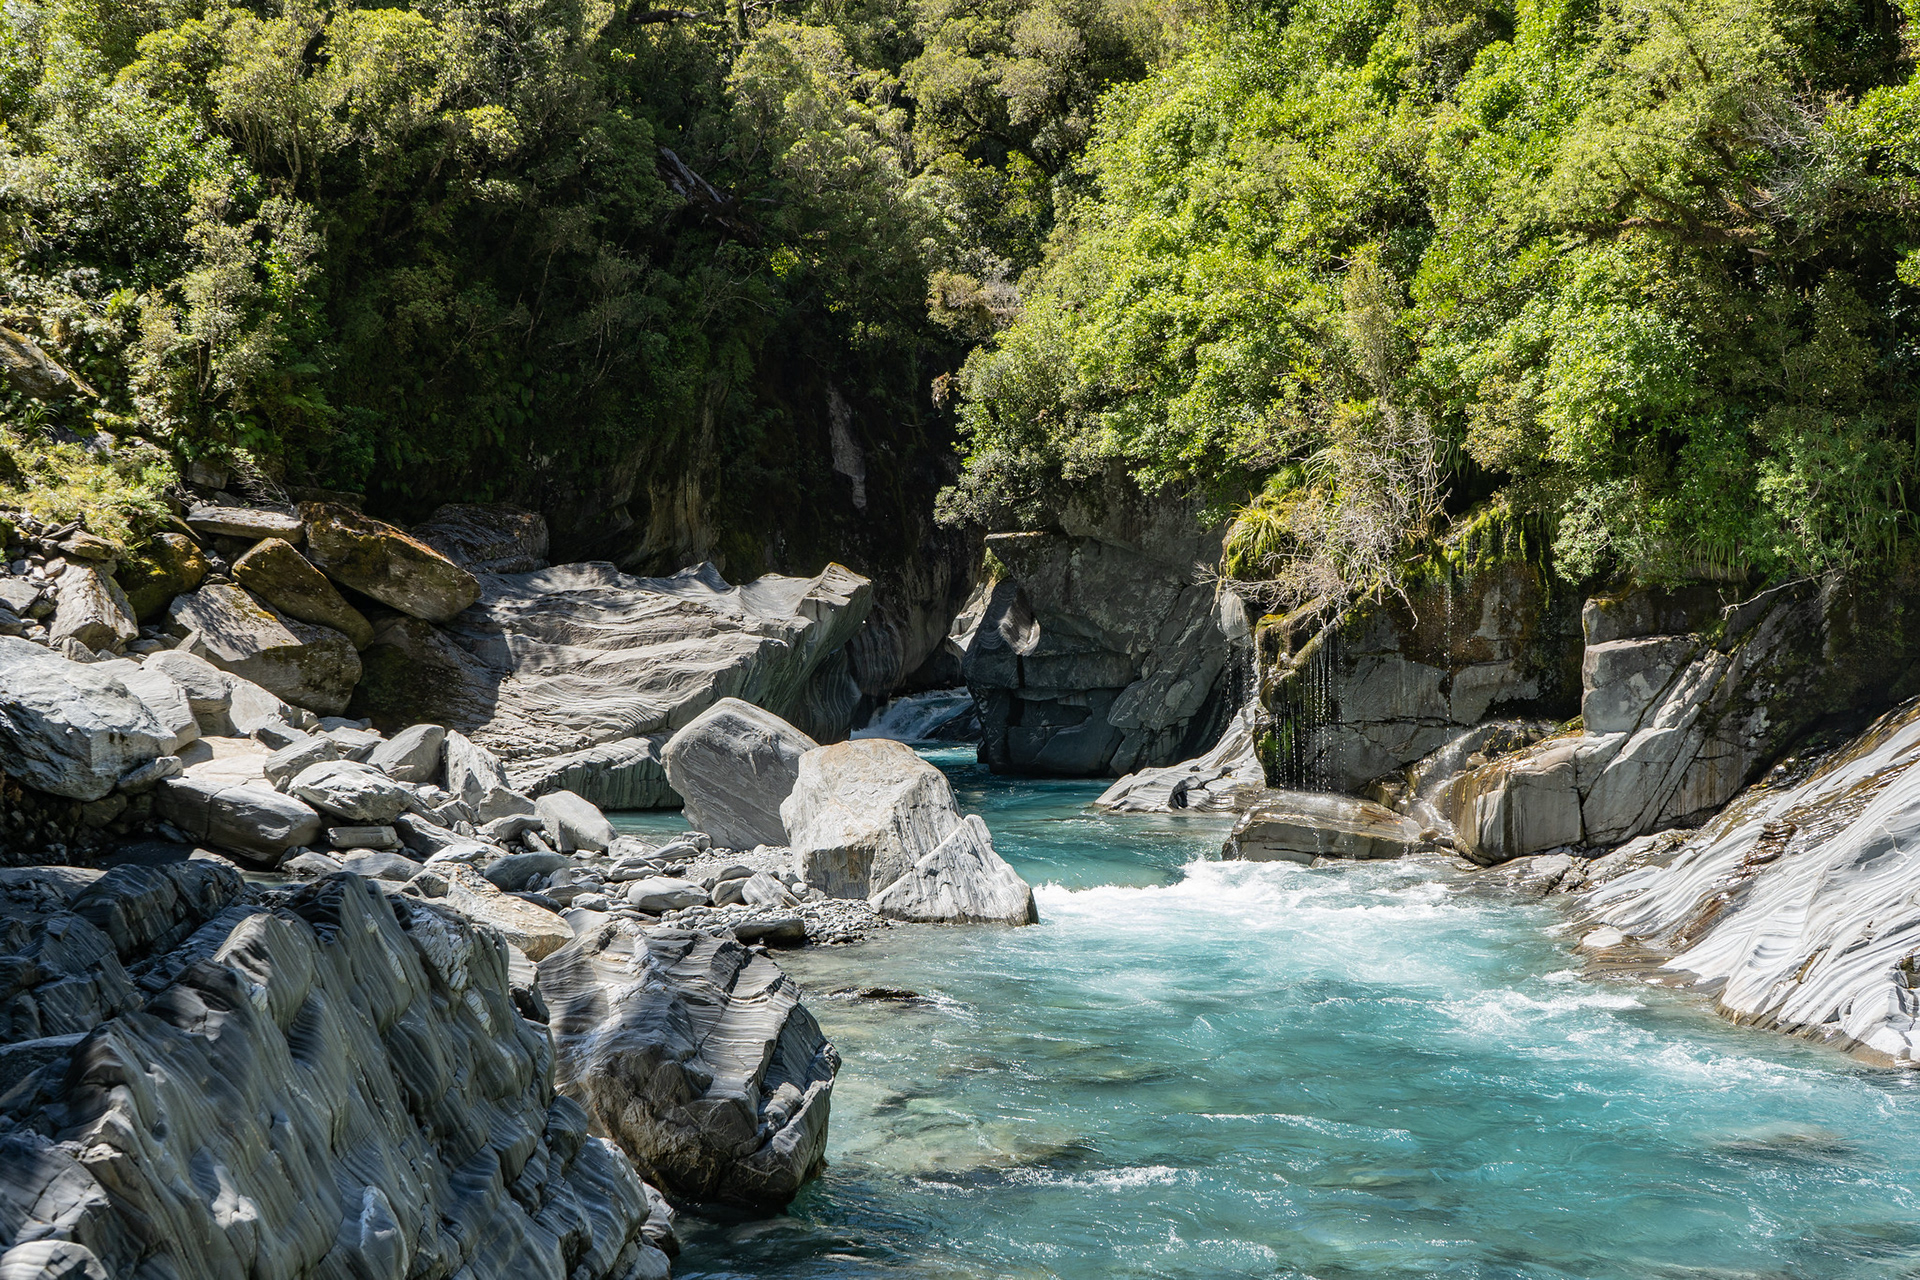
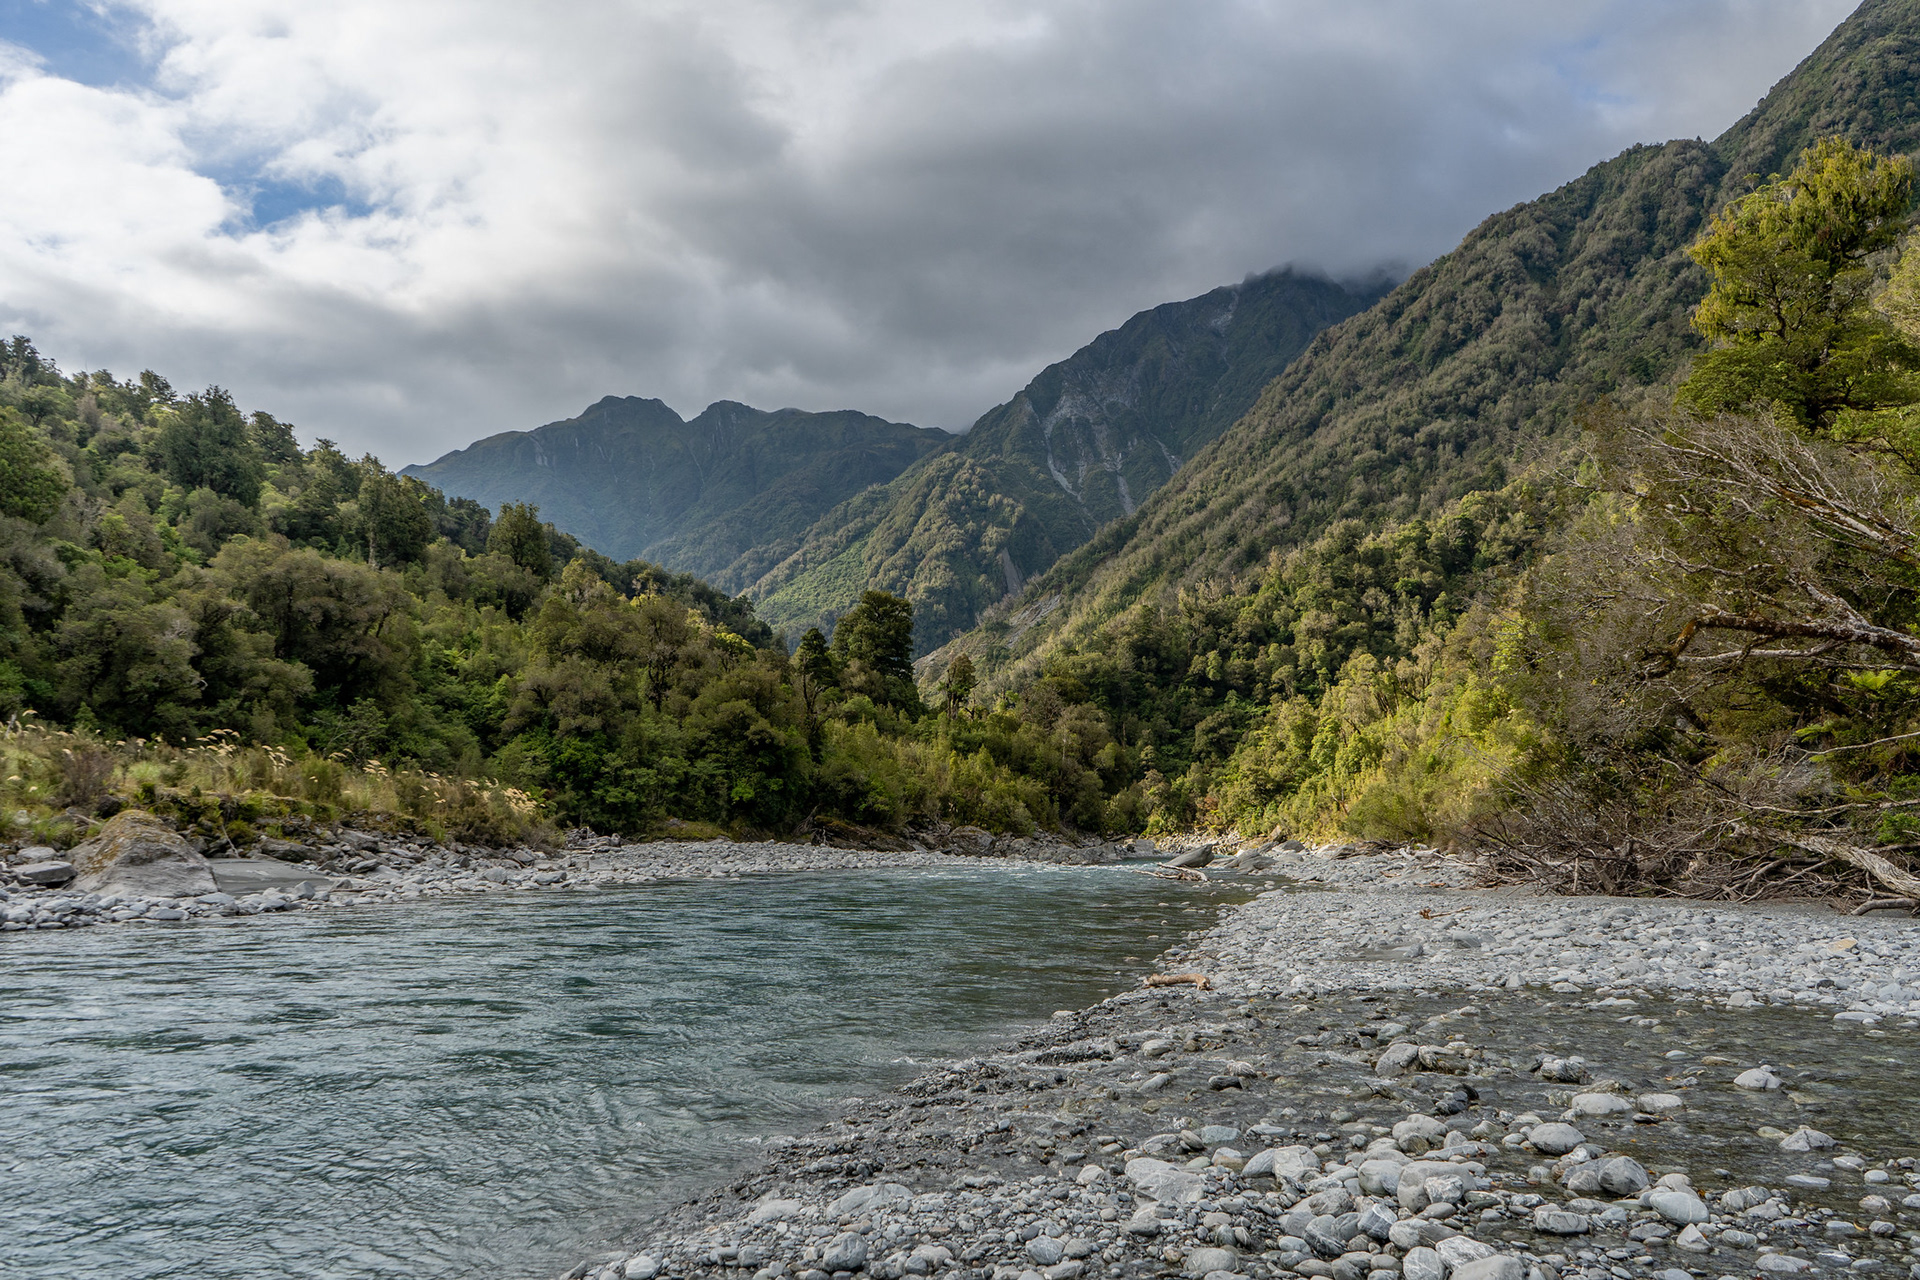
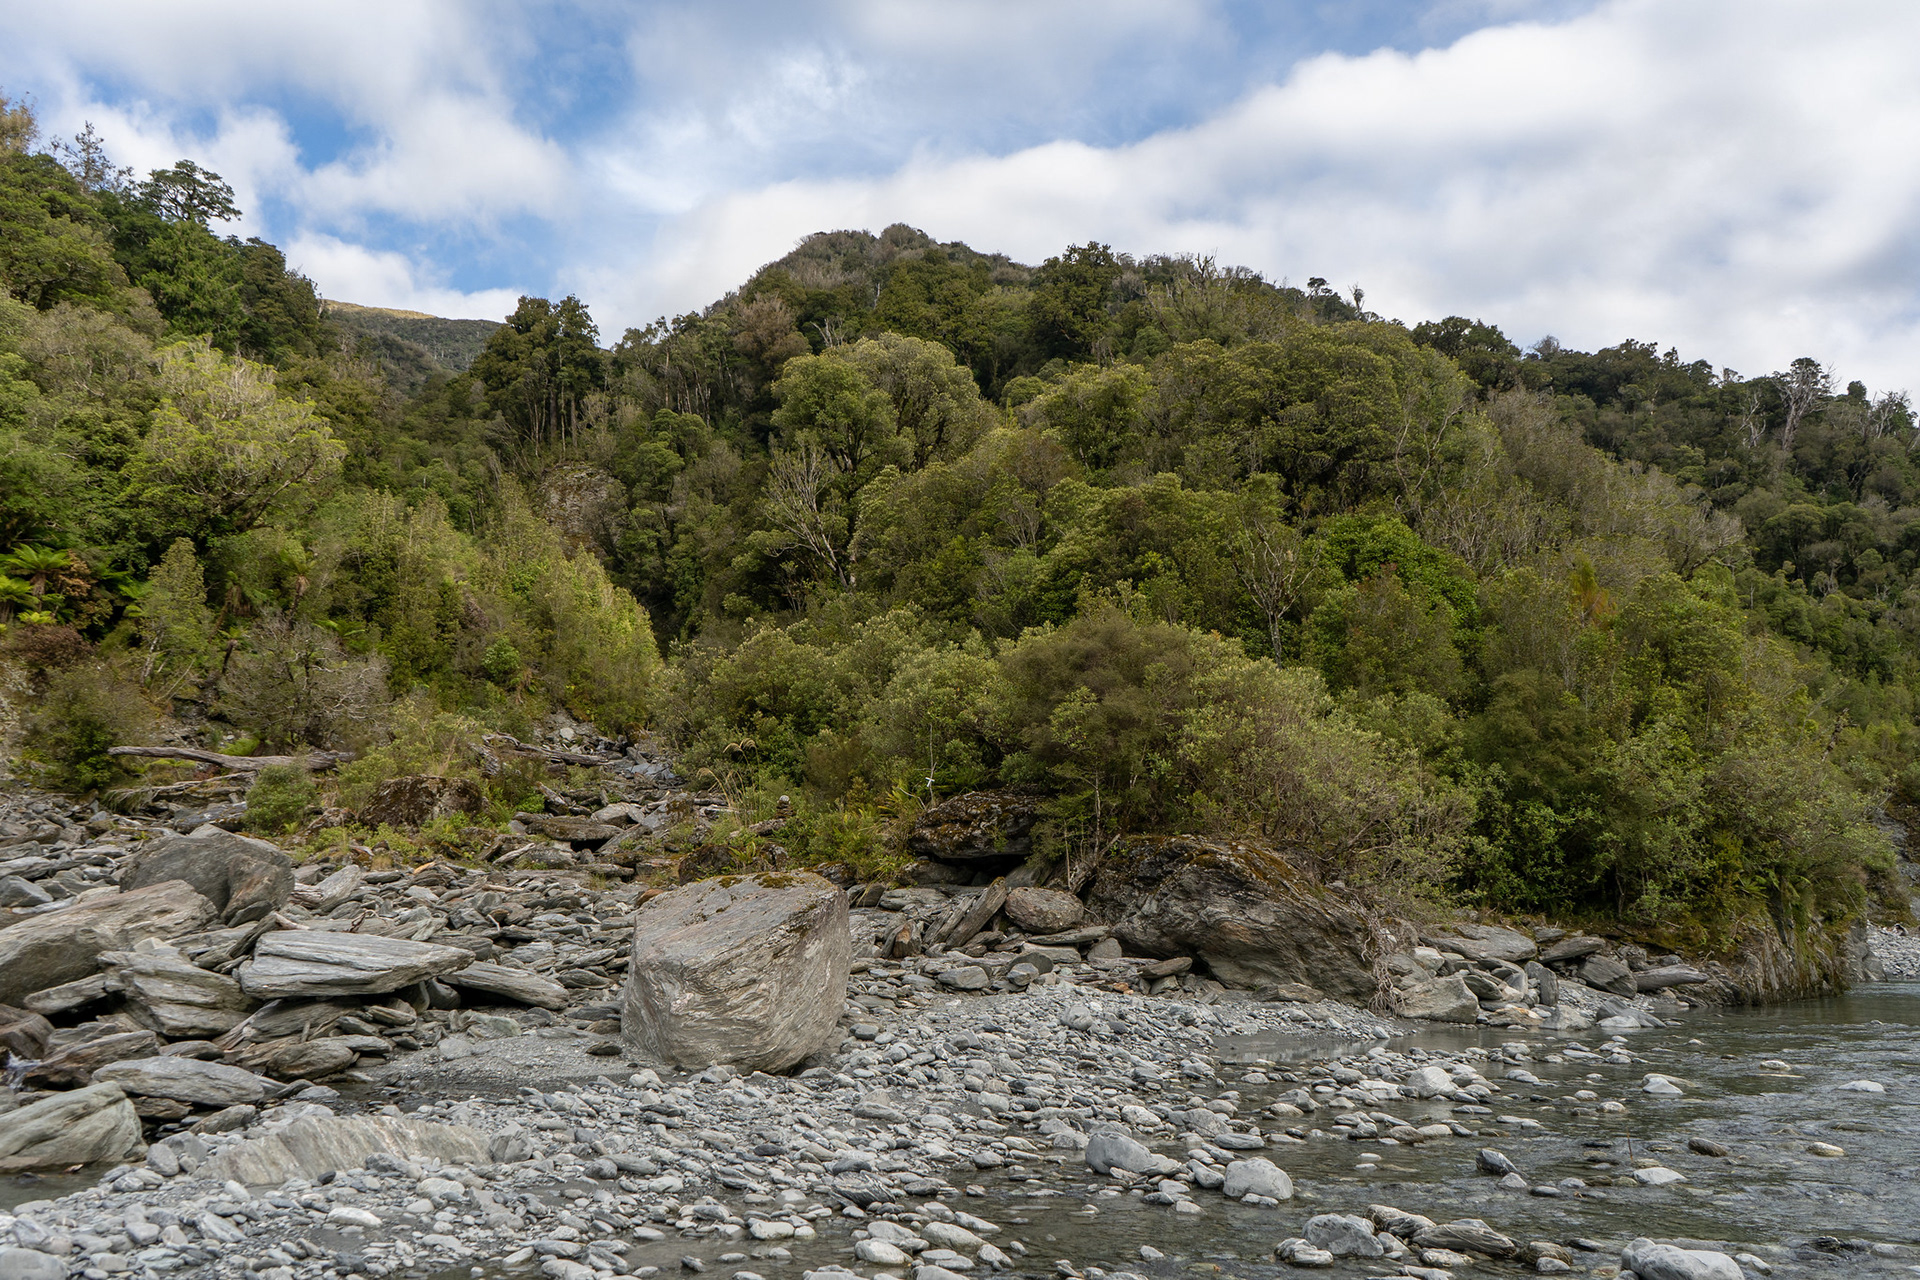
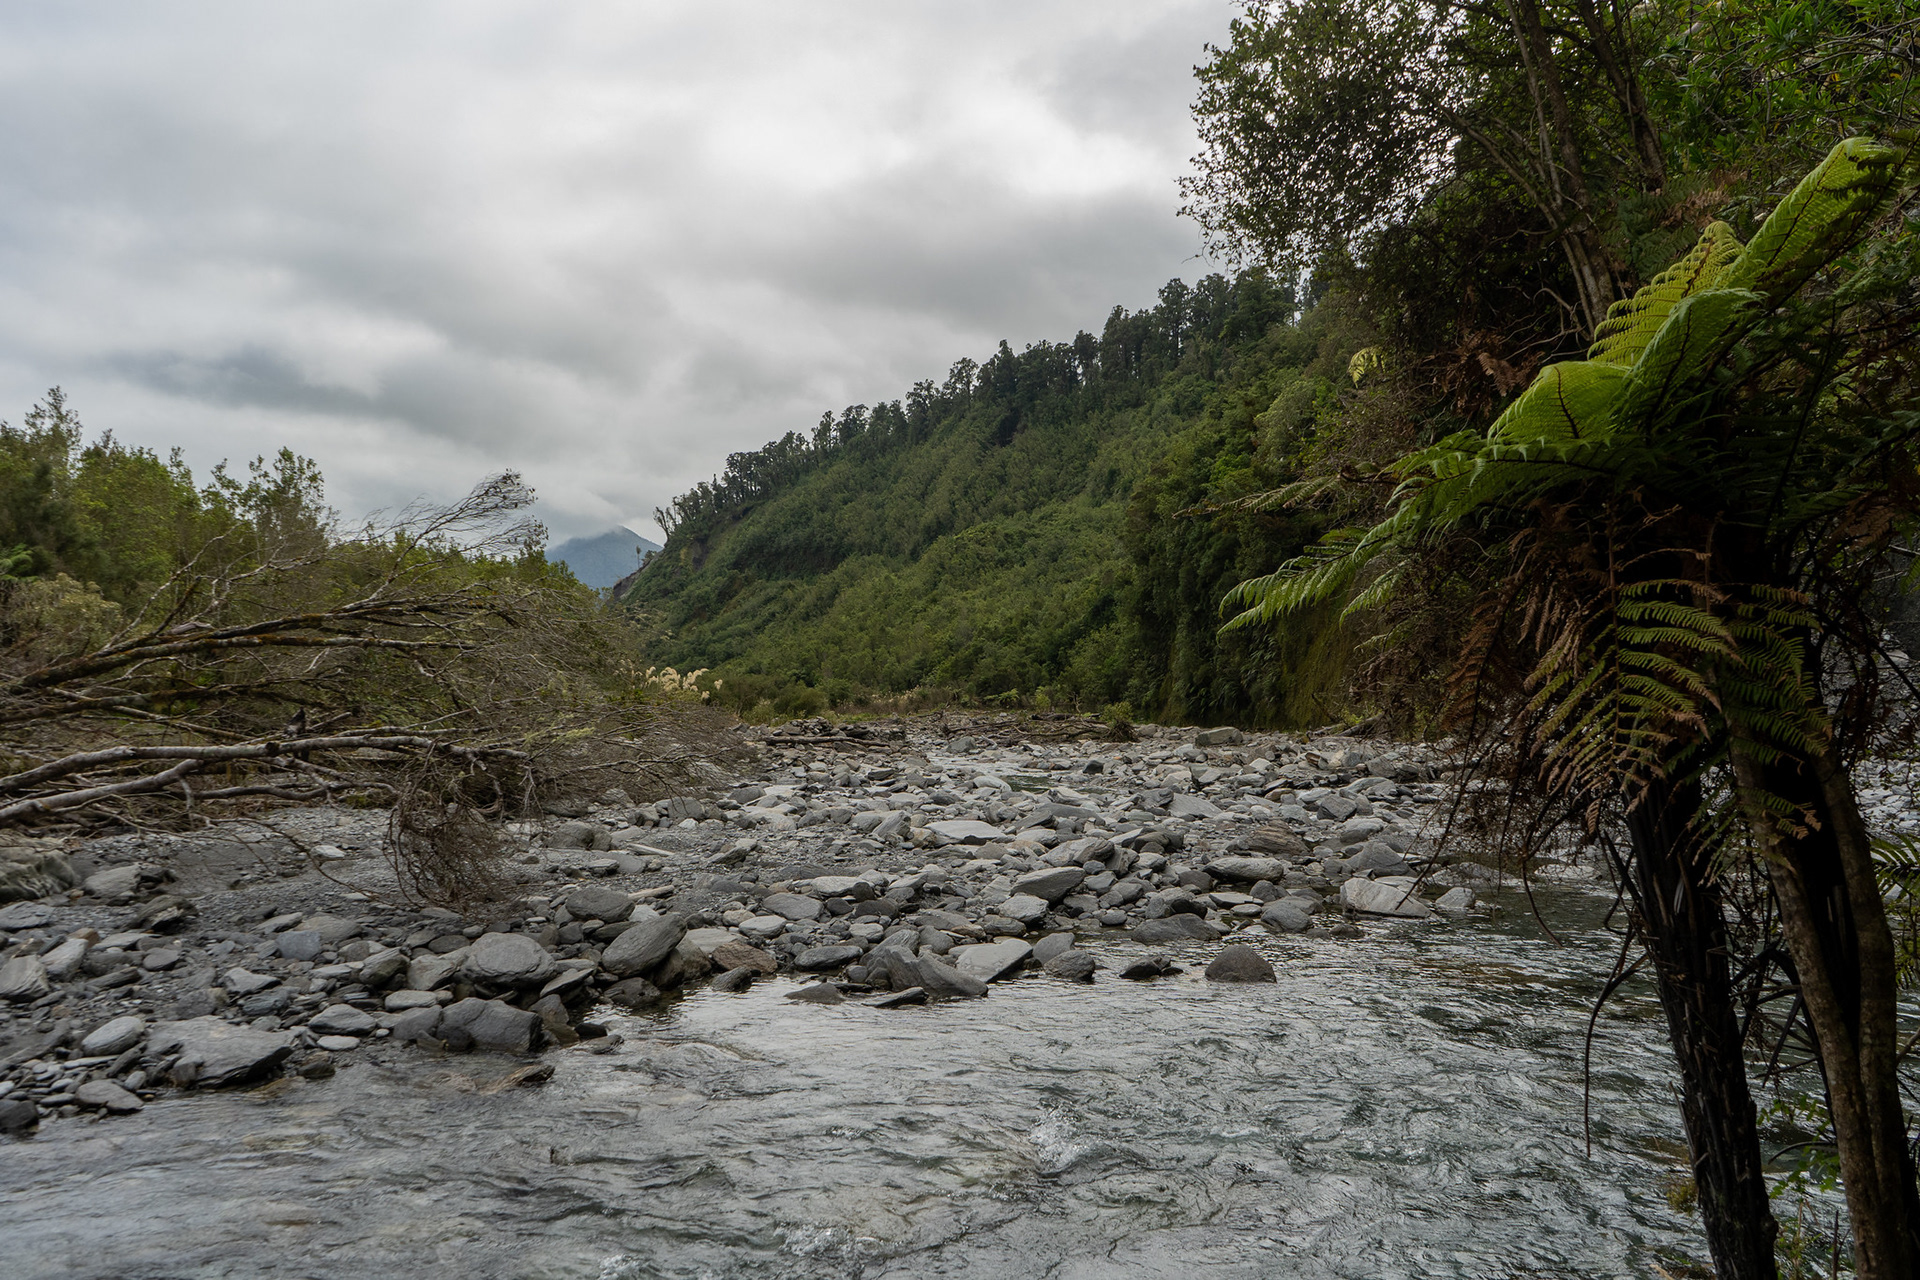
Looking up the Hokitika River, which snakes right into the Kakariki Gorge - the obvious catchment centre left with the sheer bounding ridge is New Year Creek.

This marks the beginning of the harder travel, where you leave behind the comparative ease of the Whitcombe and enter the rigours of the Hokitika proper. It must be noted that this valley used to be rarely travelled, and it's only through the amazing efforts of volunteers that the gorge sidles have been recut allowing reasonable thoroughfare. It's still rarely travelled (around a half dozen parties go through most years), but what was once a multiday testpiece is now doable in a long day.
Having travelled up the lower Hokitika past New Year Creek, the first of the canyons is encountered. This is the Kakariki Canyon, and arguably the most photogenic of the lot. Beautiful sculpted rock forms with tranquil blue water ambling through, it's worth the trip in itself. 

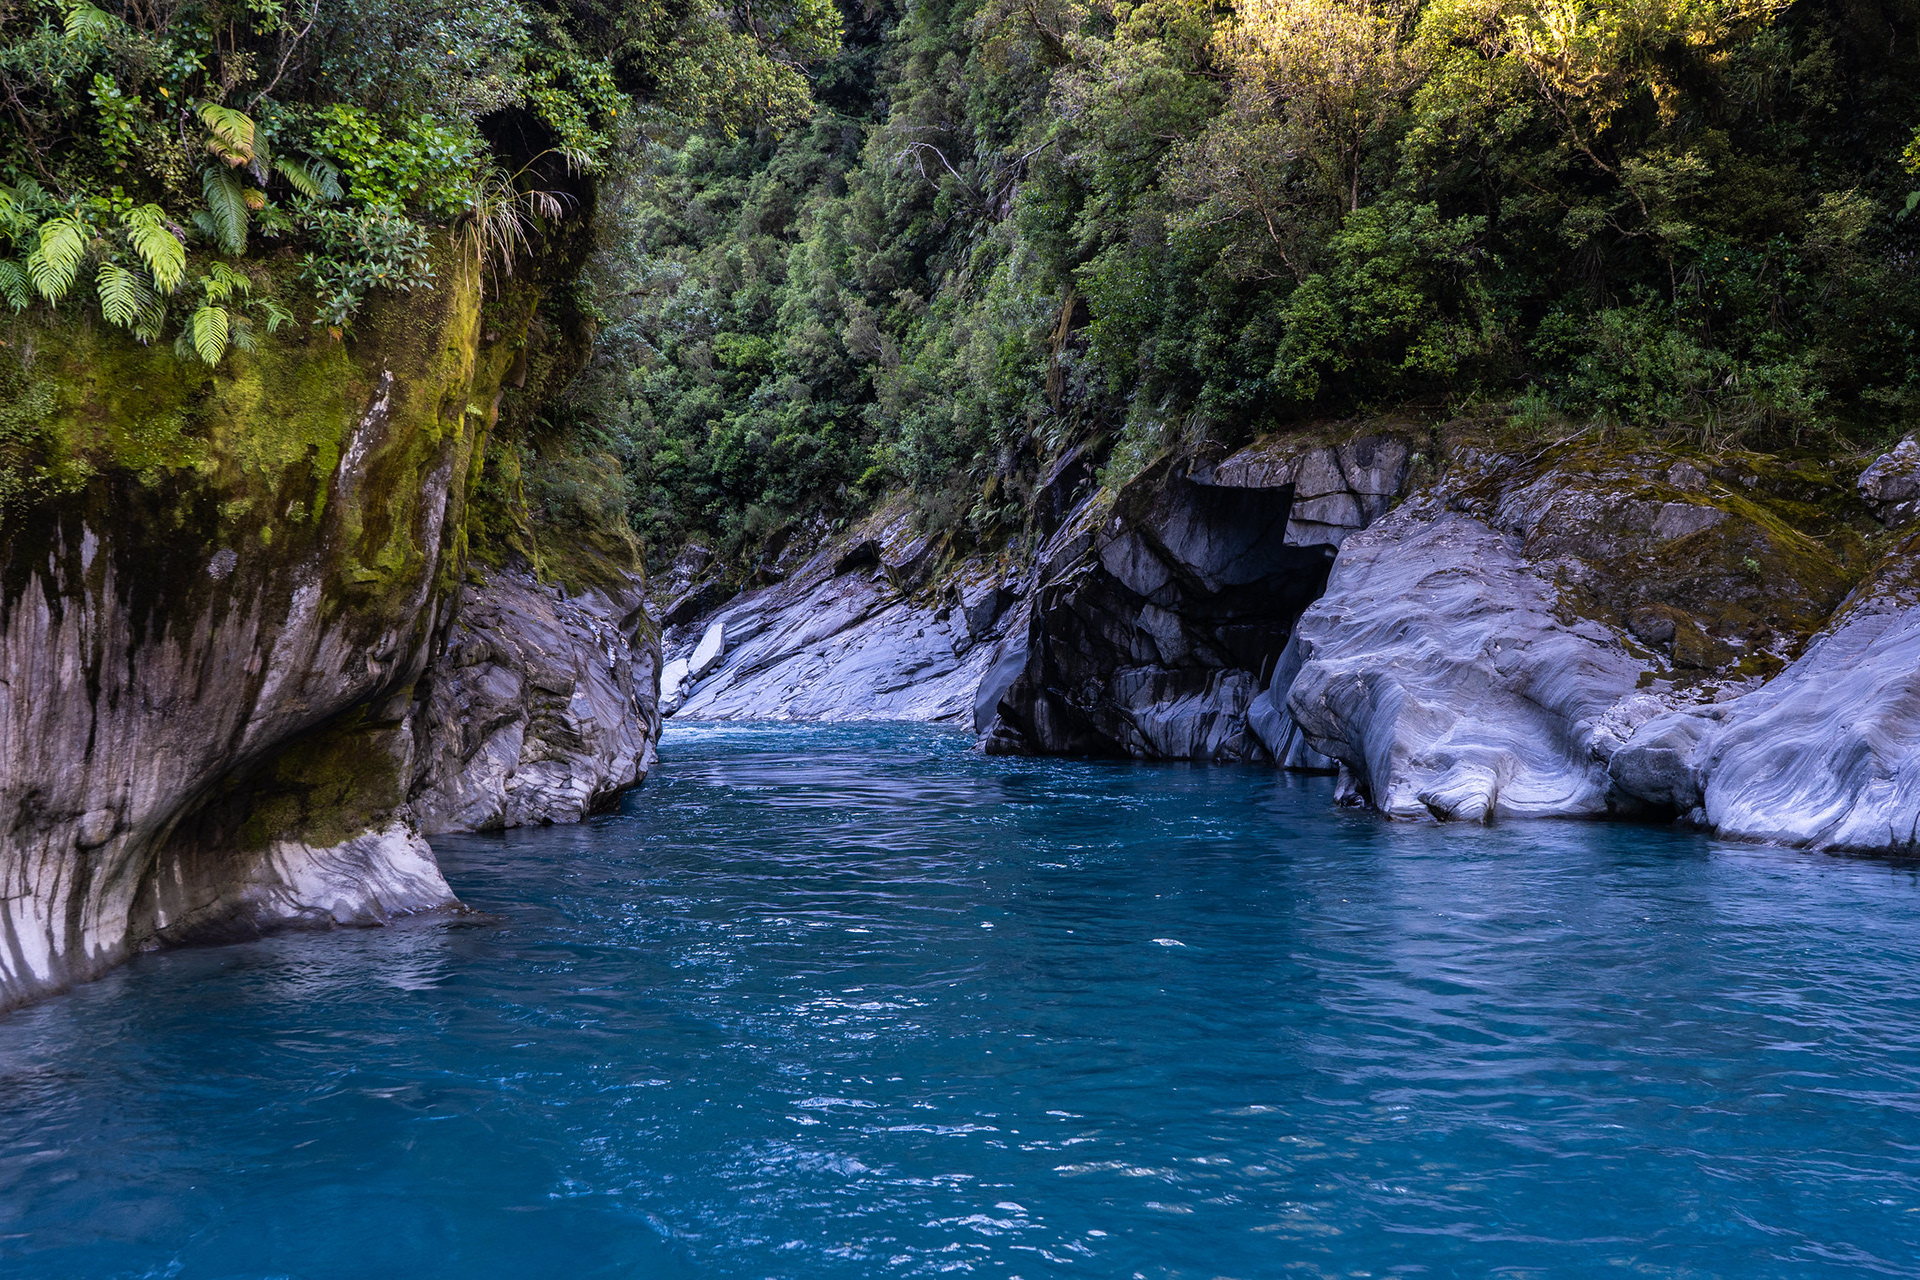
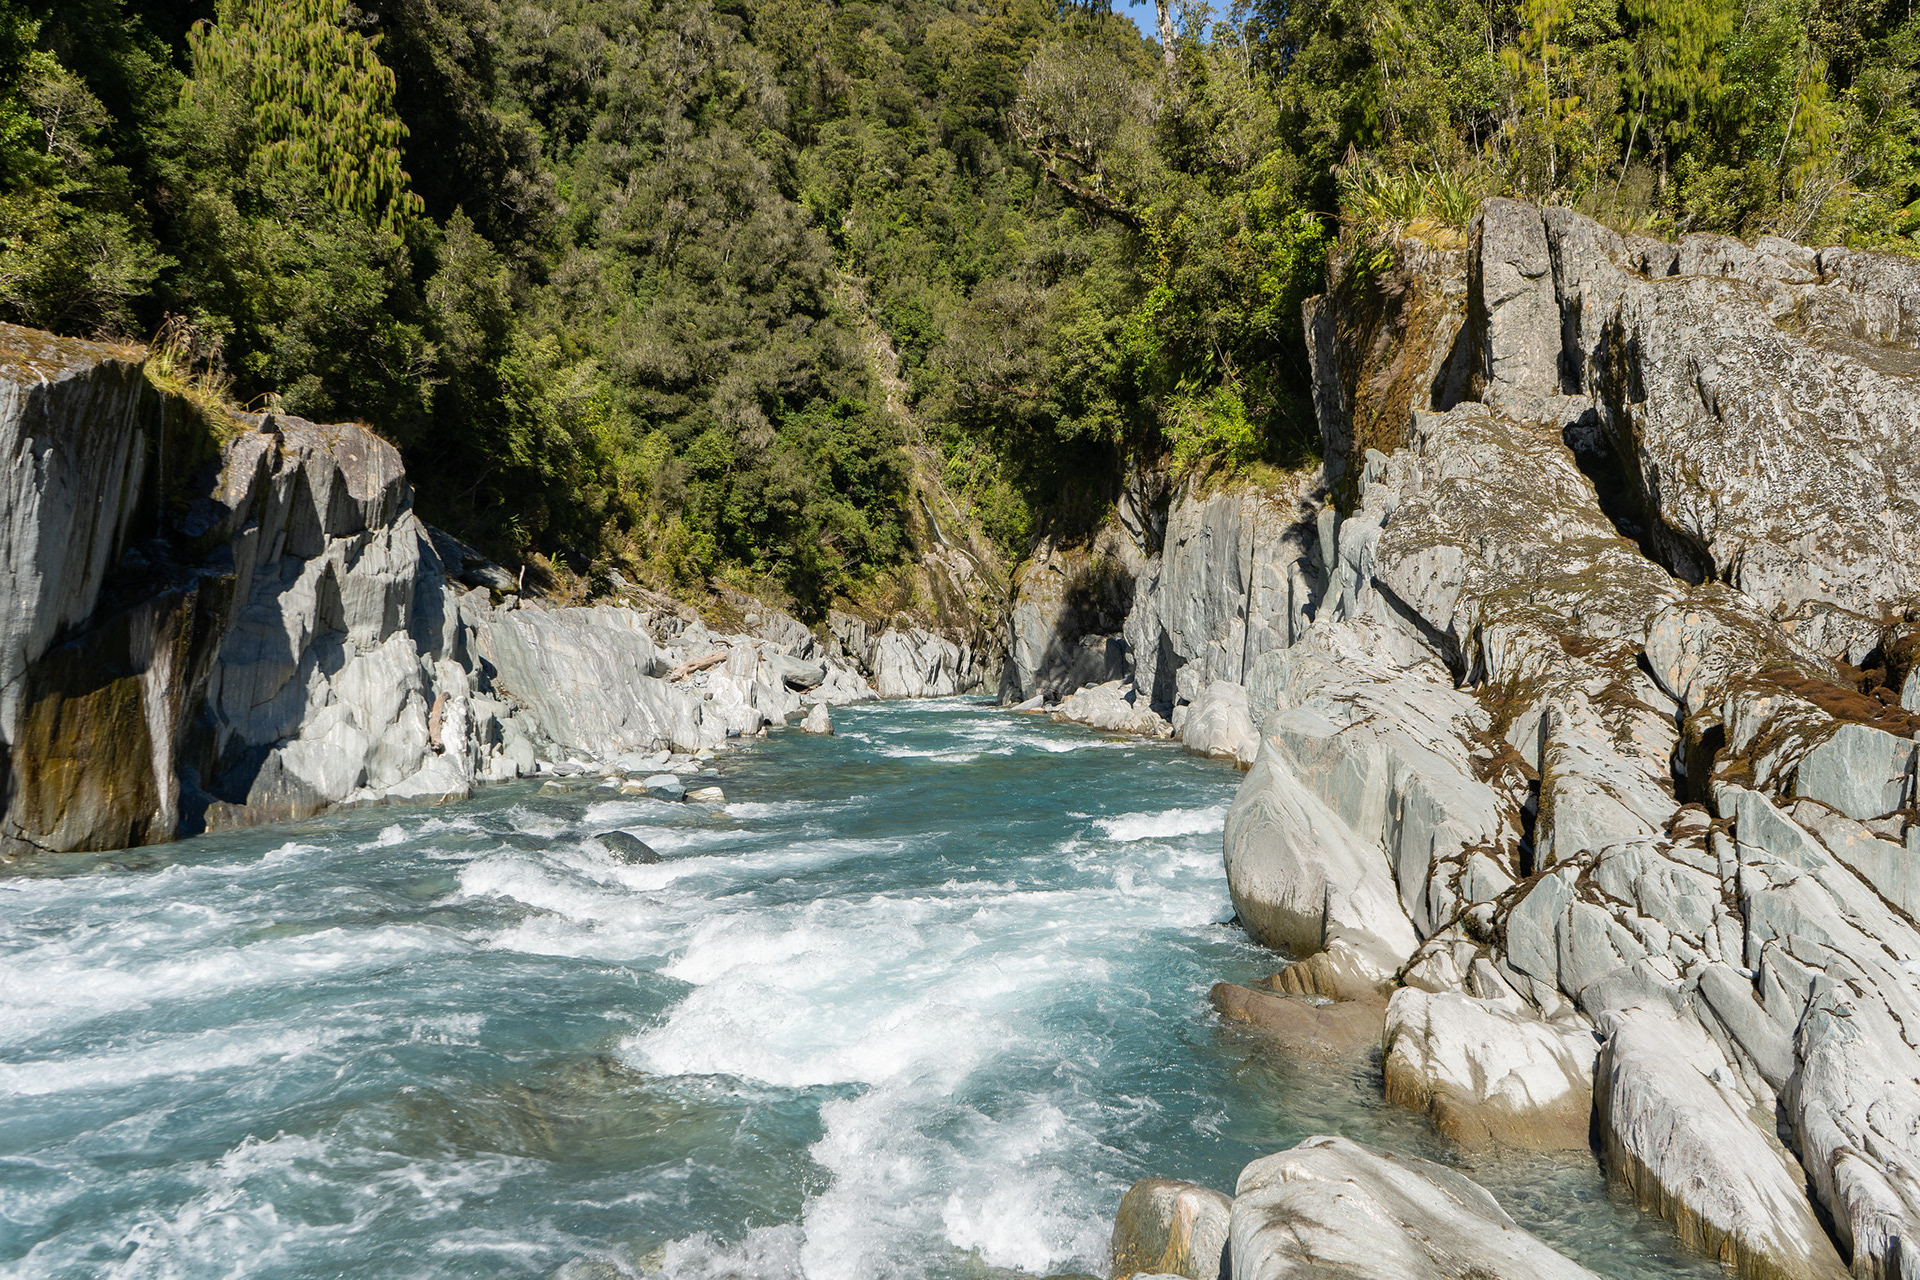
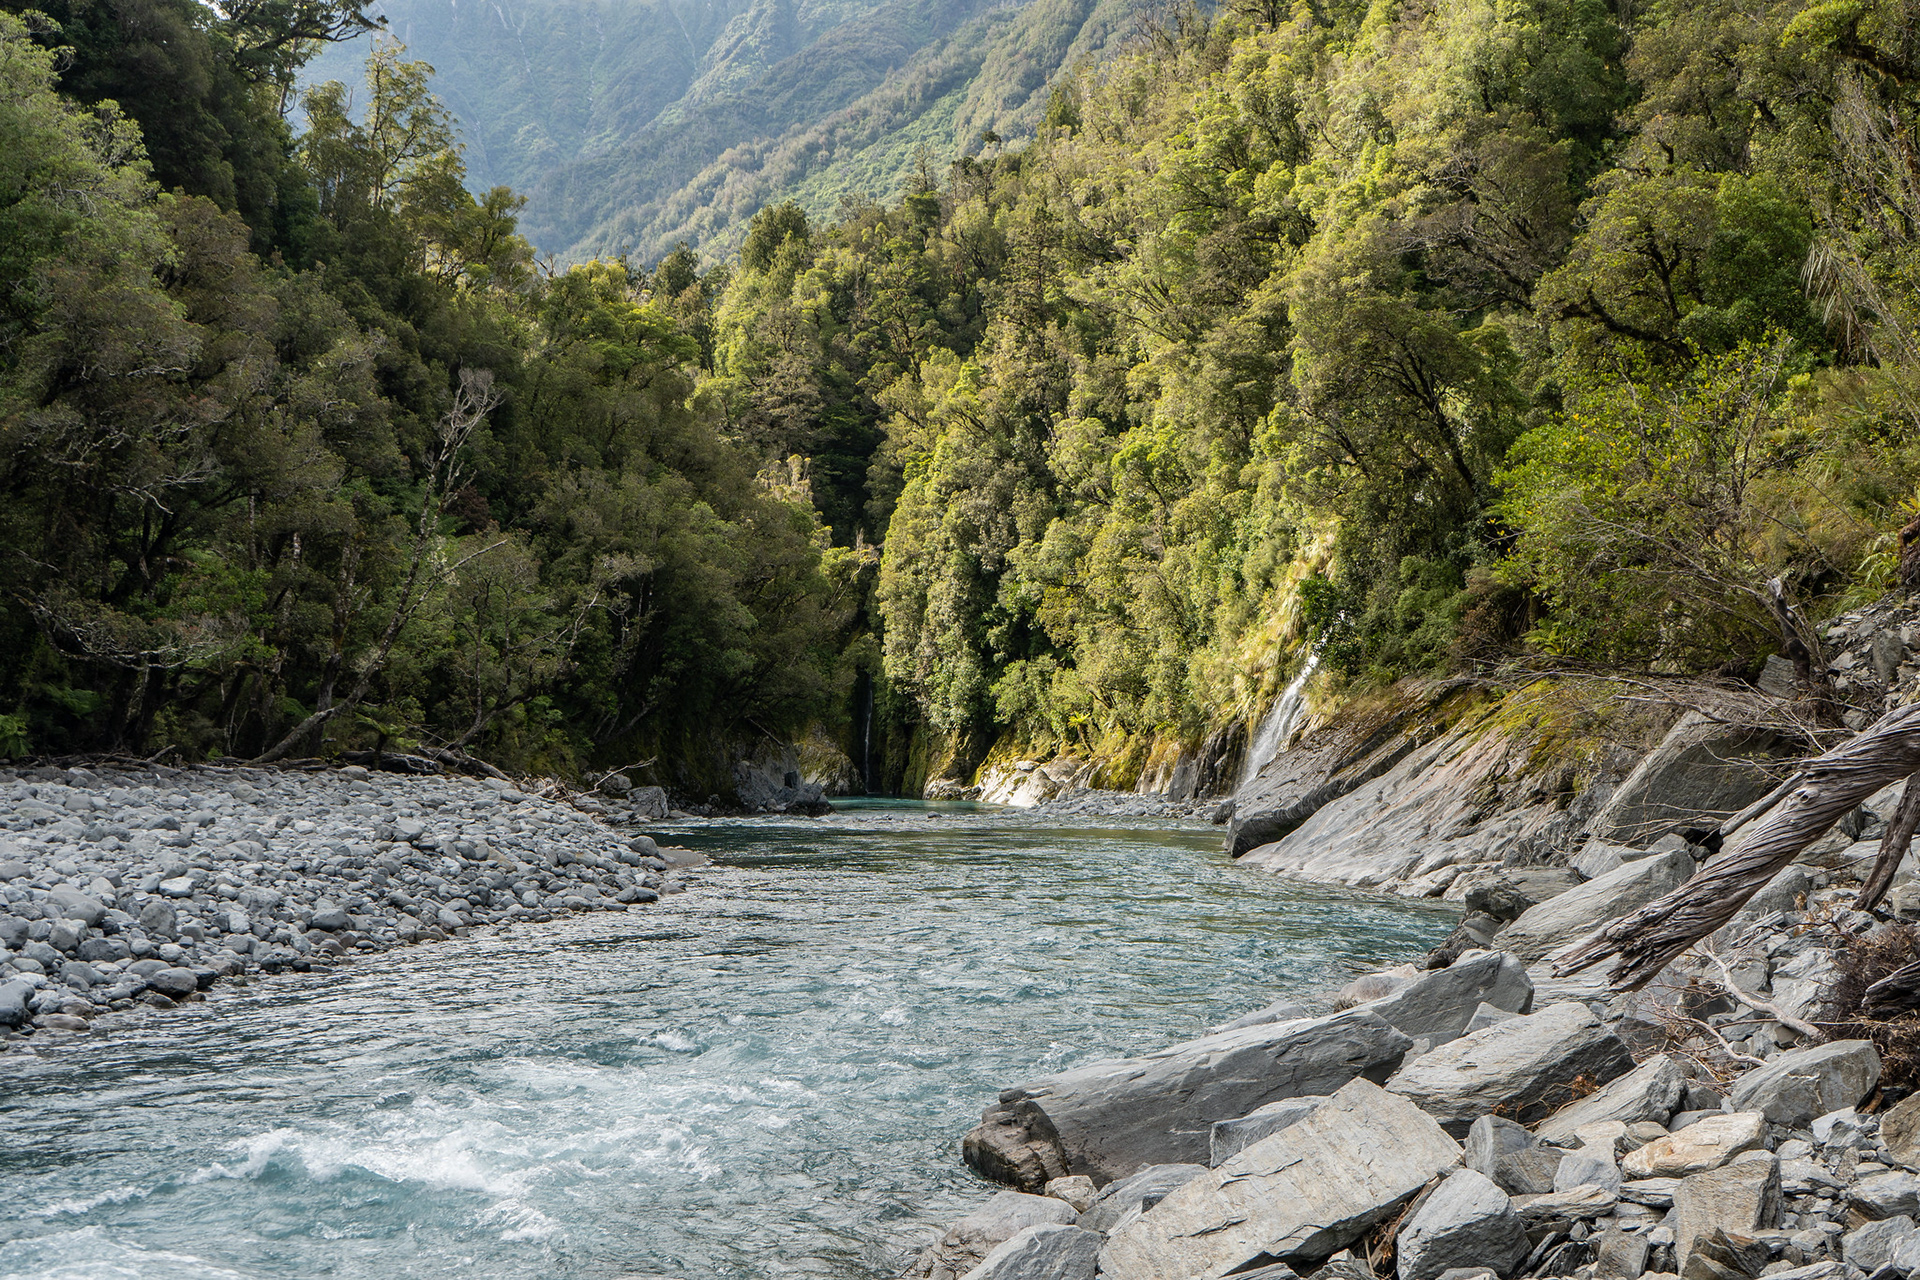
The downstream entrance to the Kakariki Gorge, perhaps the pick of the bunch.

There are actually two canyons which make up the Kakariki, both of which are sidled high. High sidles take up a lot of the day, and are hard going - the tracks are generally steep and direct, and the elevation gain all adds up. Going from Rapid Creek Hut to Frisco Hut is circa. 1500m of climbing, despite there being <800m of elevation differential between the two. The linkage tracks are also reasonably sparsely cut, but at least they are cut - I will never complain about the state of volunteer tracks, when the alternative is so much worse.

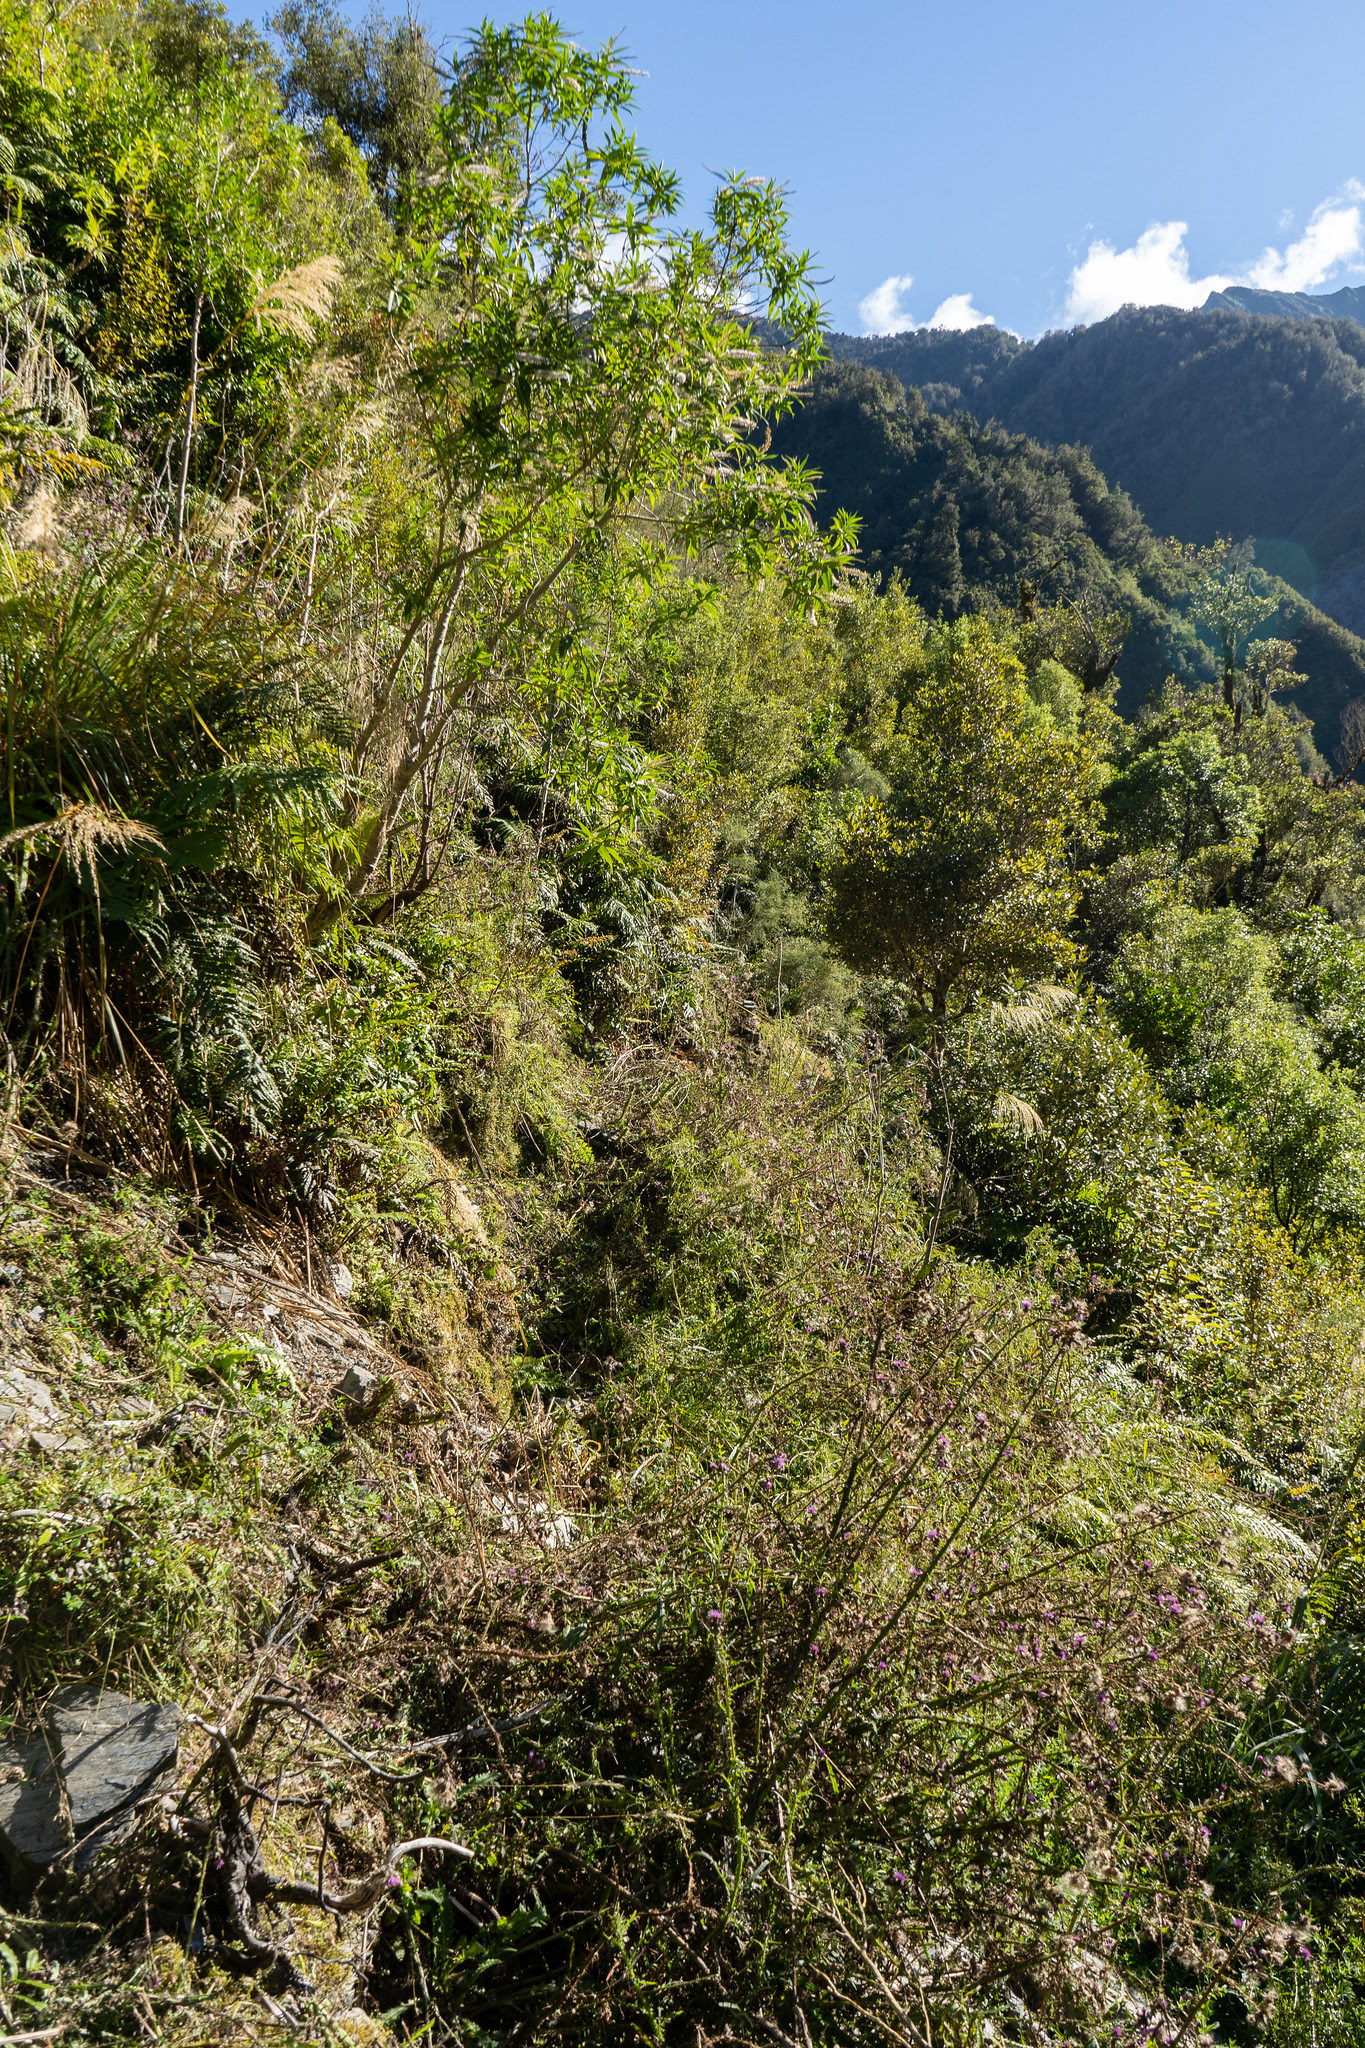
Typical section of cut track between the Kakariki Canyons - it's a bit scrappy, but very much appreciated.

The upper Kakariki Canyon is perhaps a bit less scenic, but nonetheless a worthwhile addition to the day's pilgrimage.

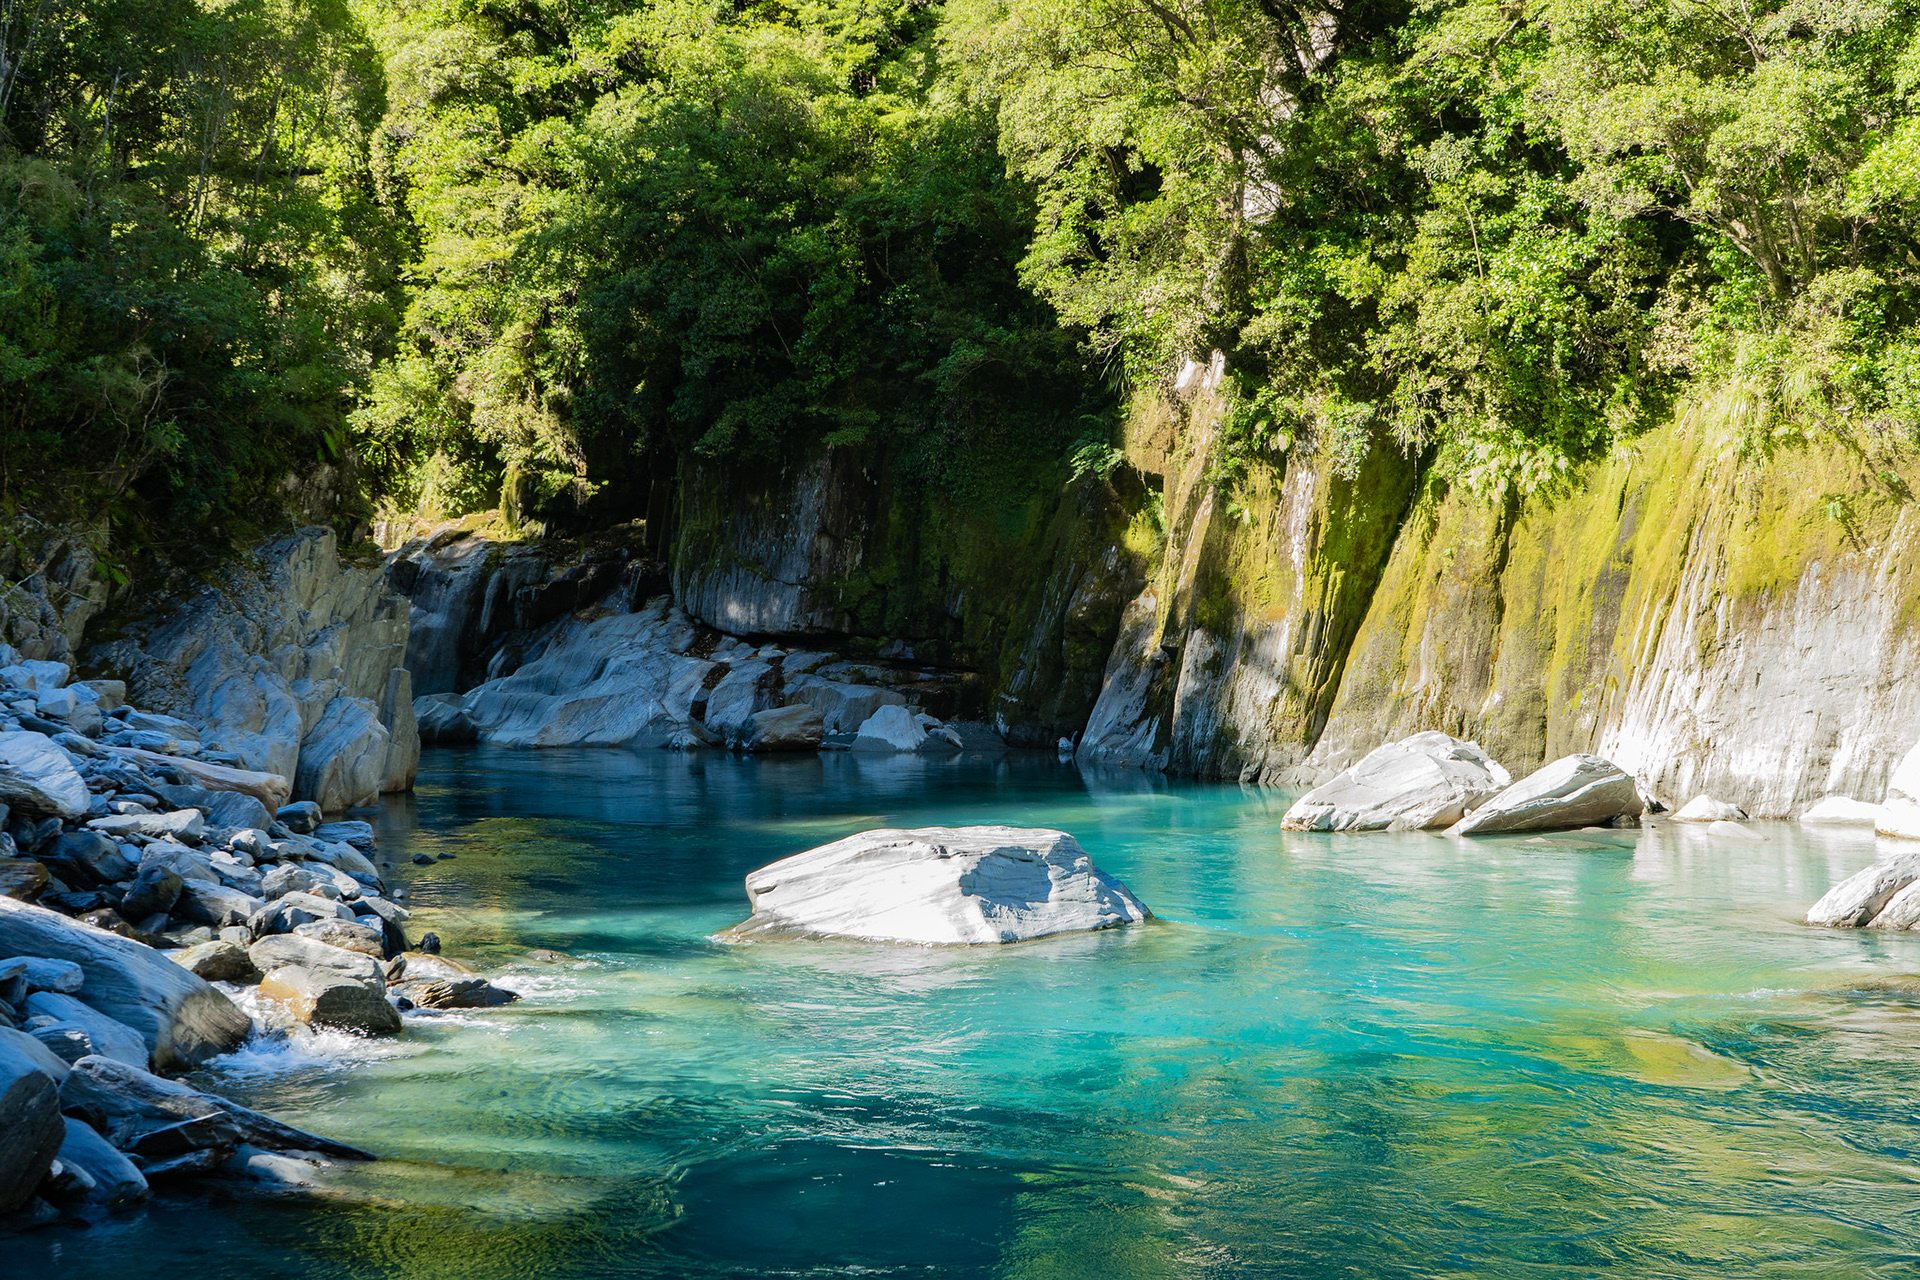
The downstream entrance to the upper Kakariki Canyon.

And the upper entrance, these gorges are a popular-ish whitewater kayaking trip.

A short section of riverbed travel took me to the Kawau Gorge, whose sidle is reasonably protracted but not unduly difficult. The track does cross Whitehorn Creek quite close to where it careens over bedrock into the canyon below, which requires some care. In addition, the drop down on its upstream end terminates in a blank rock face which is mercifully protected by a fixed rope.

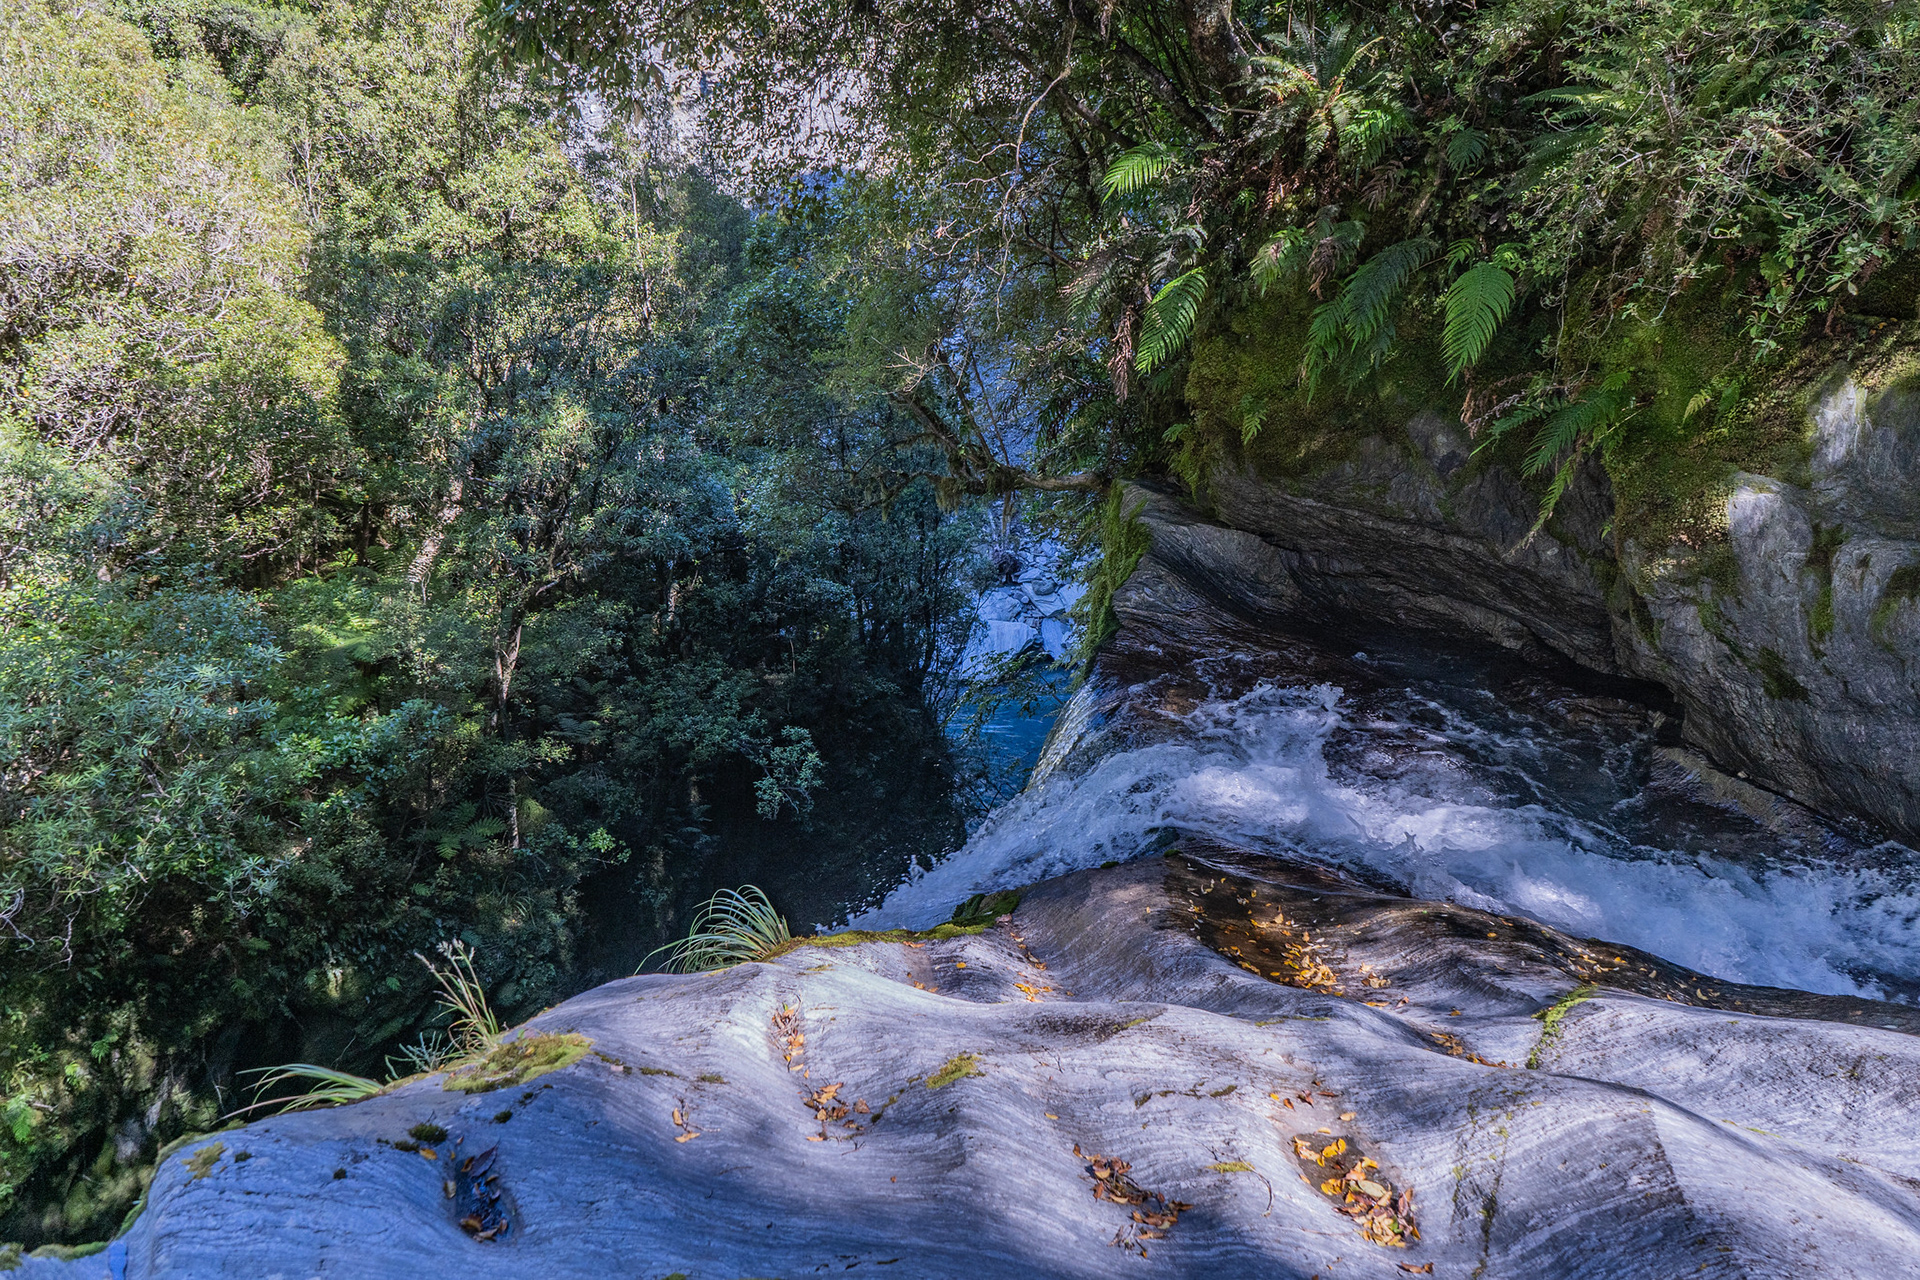
The top of the Whitehorn Falls, Kawau Gorge below. The route passes close by, but in dry conditions the watercourse can just be jumped - however, this could be treacherous if the sculpted rock adjacent were wet.

Looking back into the Kawau Gorge, visually stunning but a committing spot to be.

It was lunchtime by the end of the Kawau Gorge, and there was a fortuitously nice spot at the base of the terminal rock face to sit and enjoy the view upvalley.

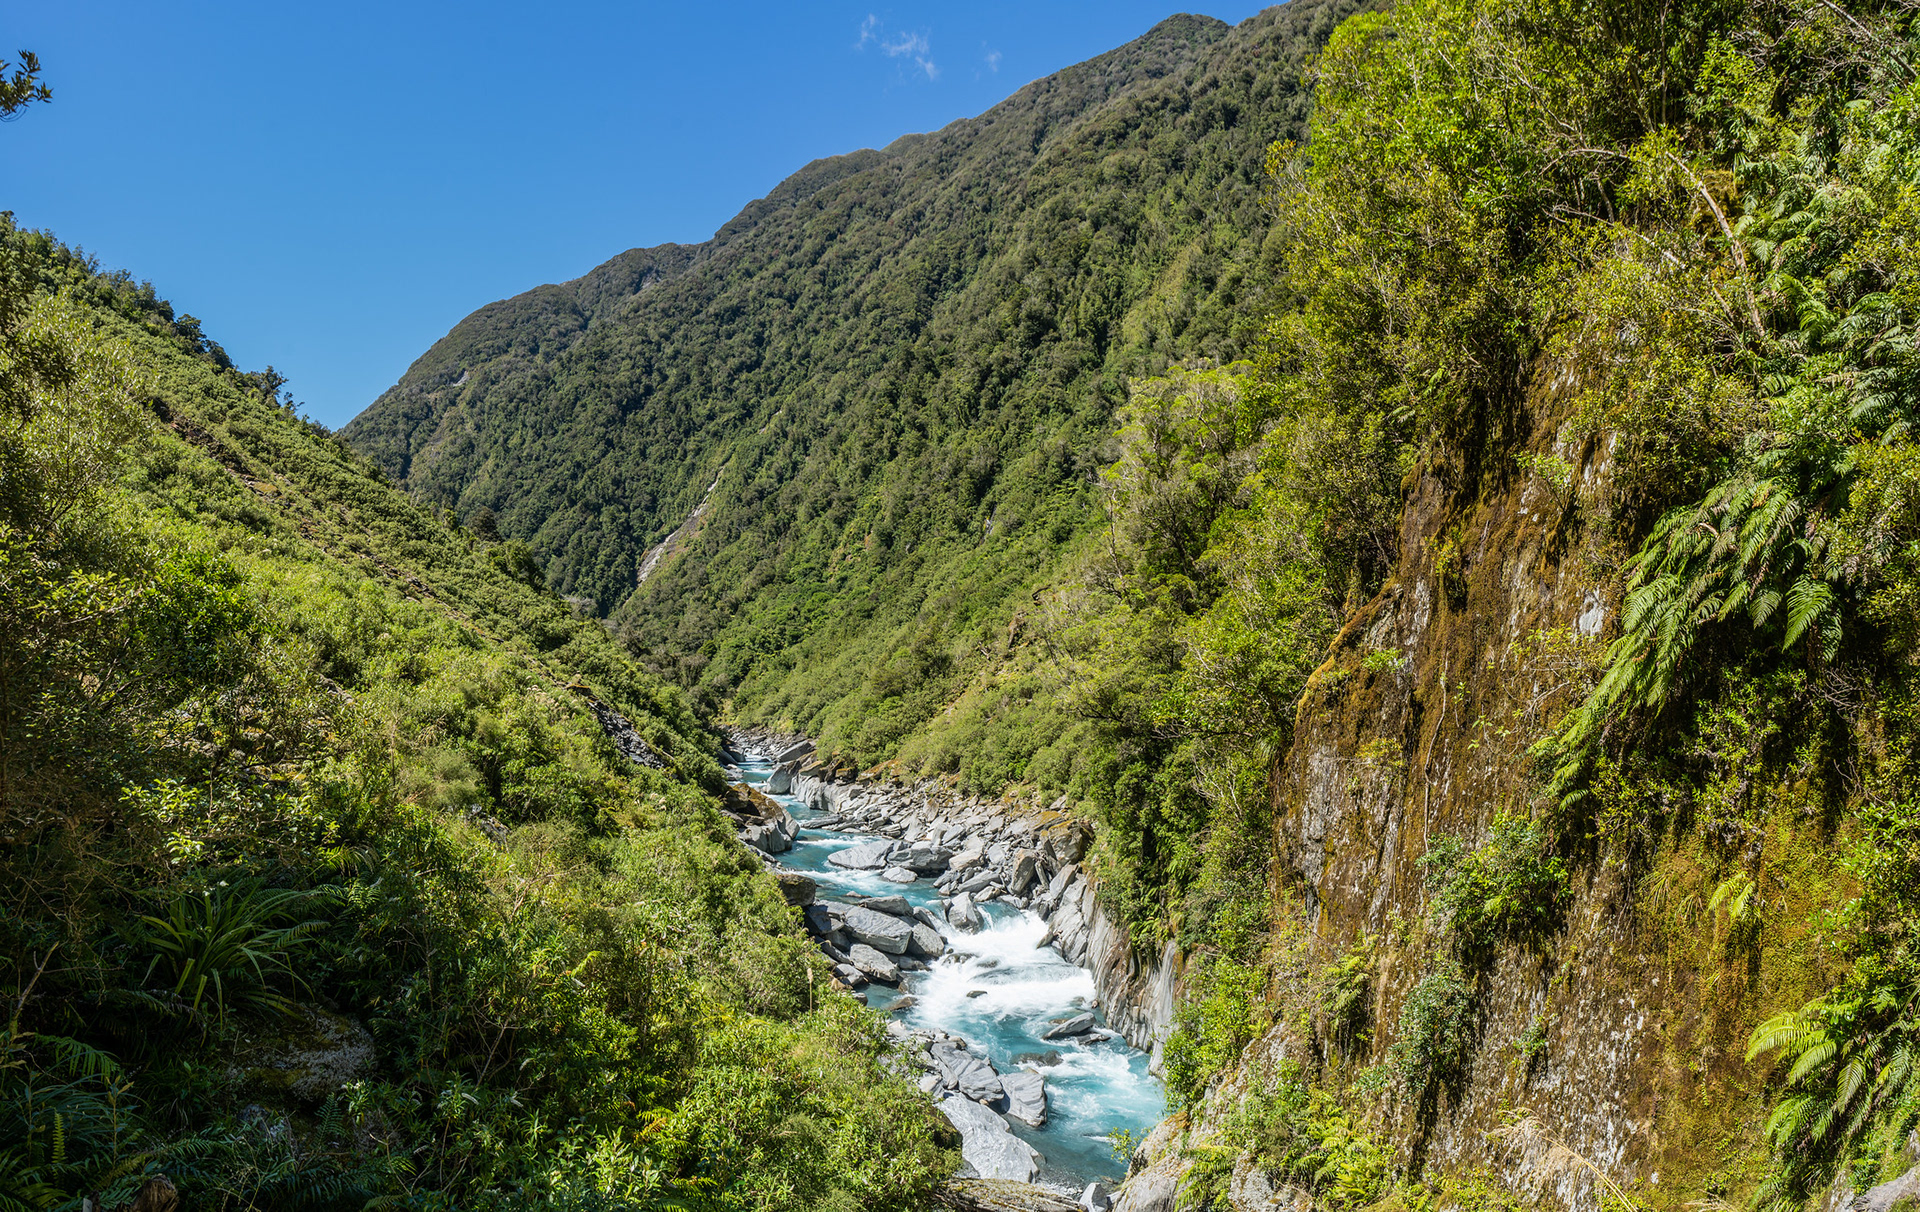
Looking up the Hokitika Valley from the top of the Kawau Gorge, the rock face on the far right is descending with the help of a fixed rope.

The next section is travelled mostly on the face, despite no track being shown on the topo maps. Like the rest of the travel, it's physical and scratchy but it does goes in a reasonable manner. The lower Omatane Canyon is encountered, and it's also very scenic with sculpted schist blocks and sheer sides.

Approaching the lower Omatane Canyon.

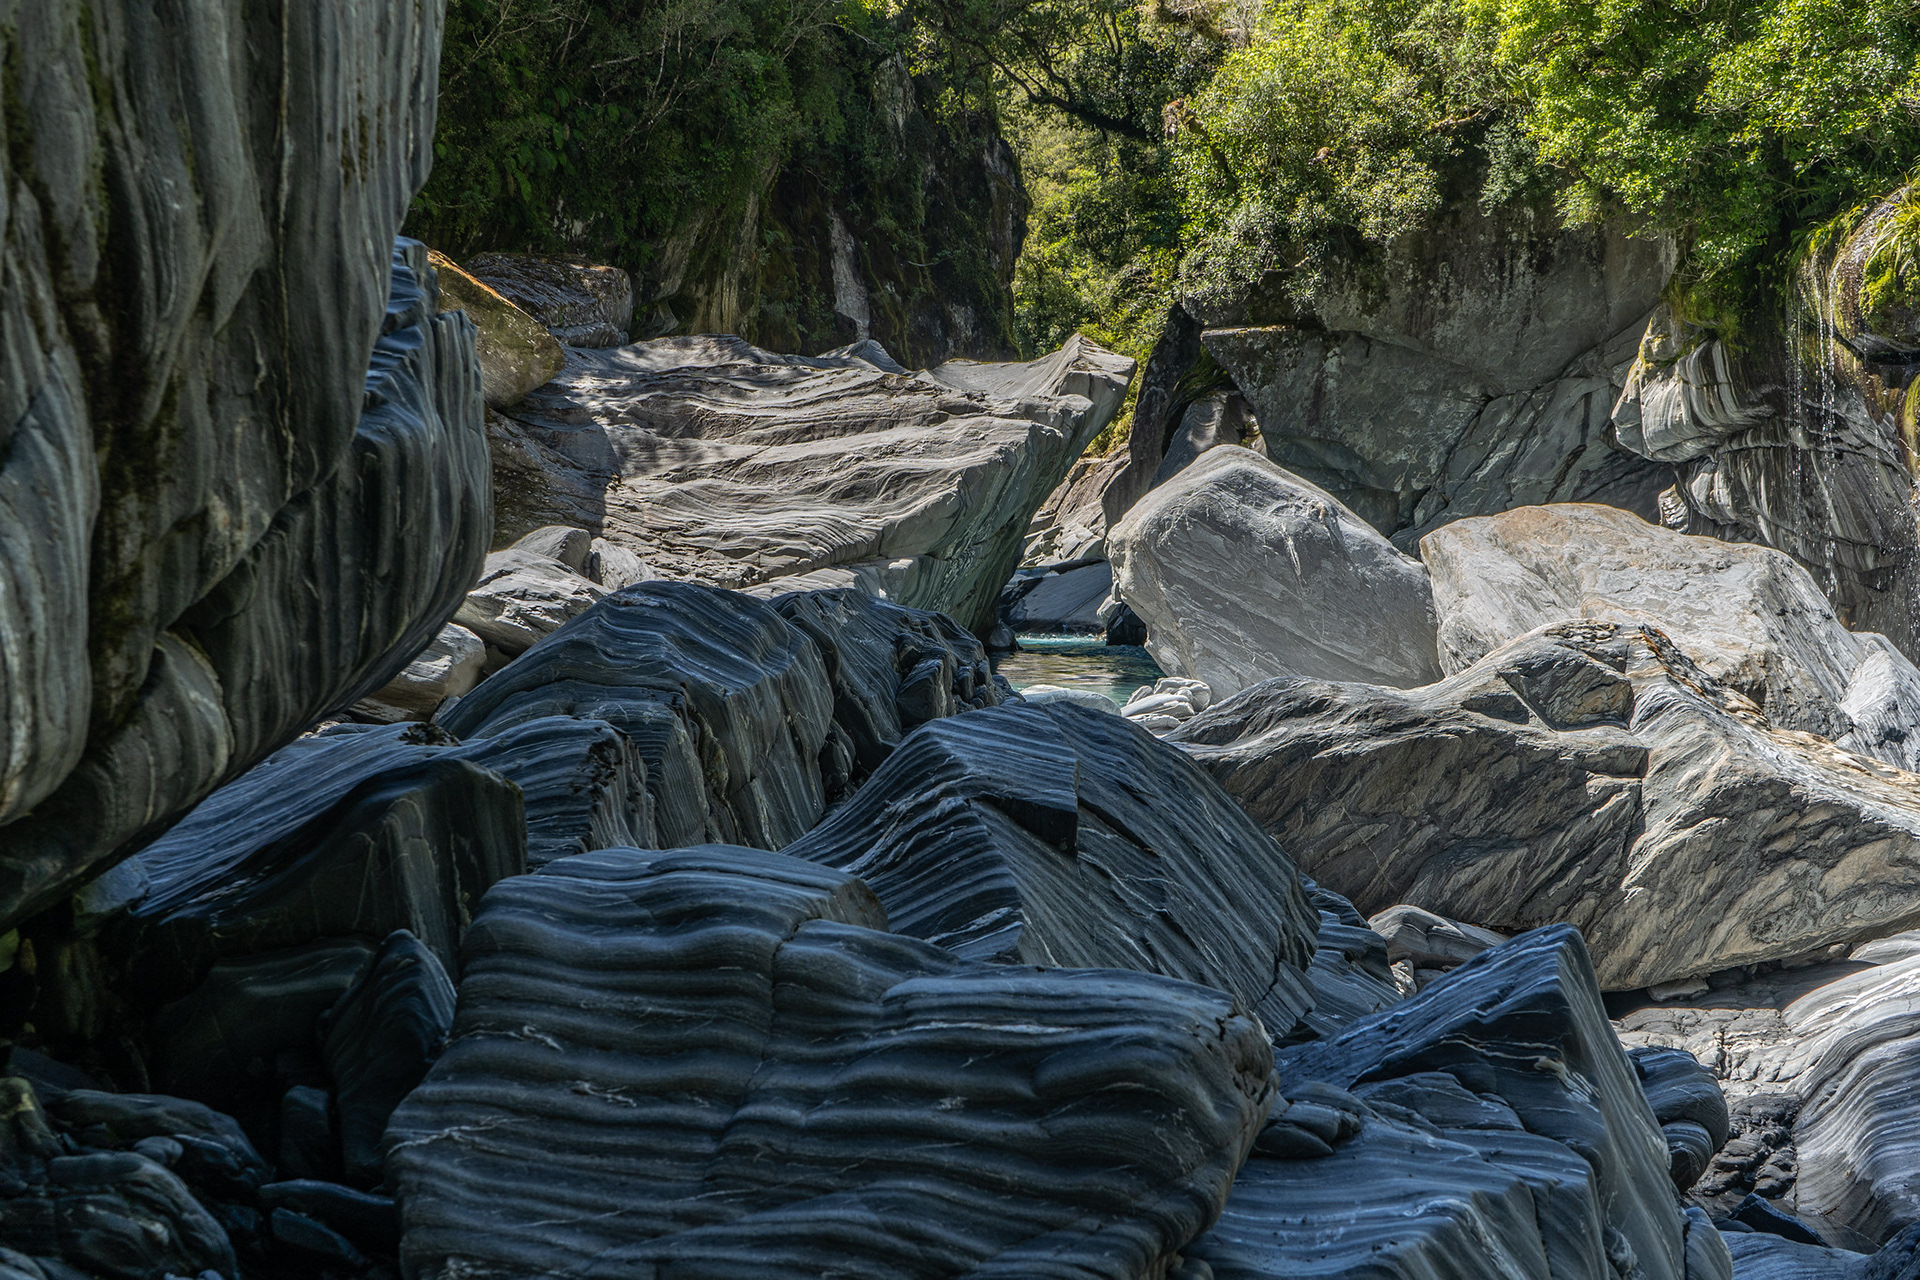
More boulder hopping on the approach, some of the striations and foliation on the rocks is stunning.

While the lower Omatane Canyon is terrain dreams are made of, the upper Omatane Canyon is horrible. I should be a bit more specific - the approach to the upper Omatane Canyon is horrible. There are two large slip faces immediately downstream, separated by a tongue of thick scrub. The first slip is crossed near the river line, but when I was there in 2021 the cairned route seemed improbably blocked by sheer unstable silt cliffs. After much toing and froing, I eventually climbed up the slip to a point where its margins were less vertical and dragged myself up onto the tongue. The thick scrub stopped me descending to the cairn, so I bashed across only to find the other side of the tongue was also vertical. A battle downhill led to an unpleasant dismount and traverse across the face until the second slip was obtained. The route from the second slip wasn't completely obvious, but I hit out and up and eventually dug out the markers on the bush edge.
It needs to be highlighted that regions like this are extremely dynamic, and I did this trip in 2021 - I understand it has suffered further damage since then, making this an increasingly cruxy portion of an already difficult trip. There used to be a very exposed traverse on a narrow ledge too at some point (cannot remember specifically where unfortunately), where a slip would drop you the 30m or so down a near sheer face into one of the gorges - I'm not sure if this is still here as it appears to have been removed off the Permolat website. There was the option to bypass this grubbed ledge by climbing higher into forest, which would have been the better option for those who are vertigo-inclined.
Despite the above, it's not to say don't do this trip which is stunning and worthwhile - however, it would be remiss to not acknowledge that it's better suited to those with an advanced skillset. Parties with lots of experience but lesser levels of fitness might benefit from overnighting at Serpentine Hut, to allow more wiggle room in resolving the difficulties in the various gorges.
The actual sidle above the Omatane Canyon is reasonably easy, and upvalley is comfortable river travel again. After the rigours of the valley travel, the short climb up to Serpentine Hut is hard on the legs but it's a stunning setting. Lovely views downvalley, and a bathtub of all things - must be a nice tub if the tadpoles were anything to go by. 

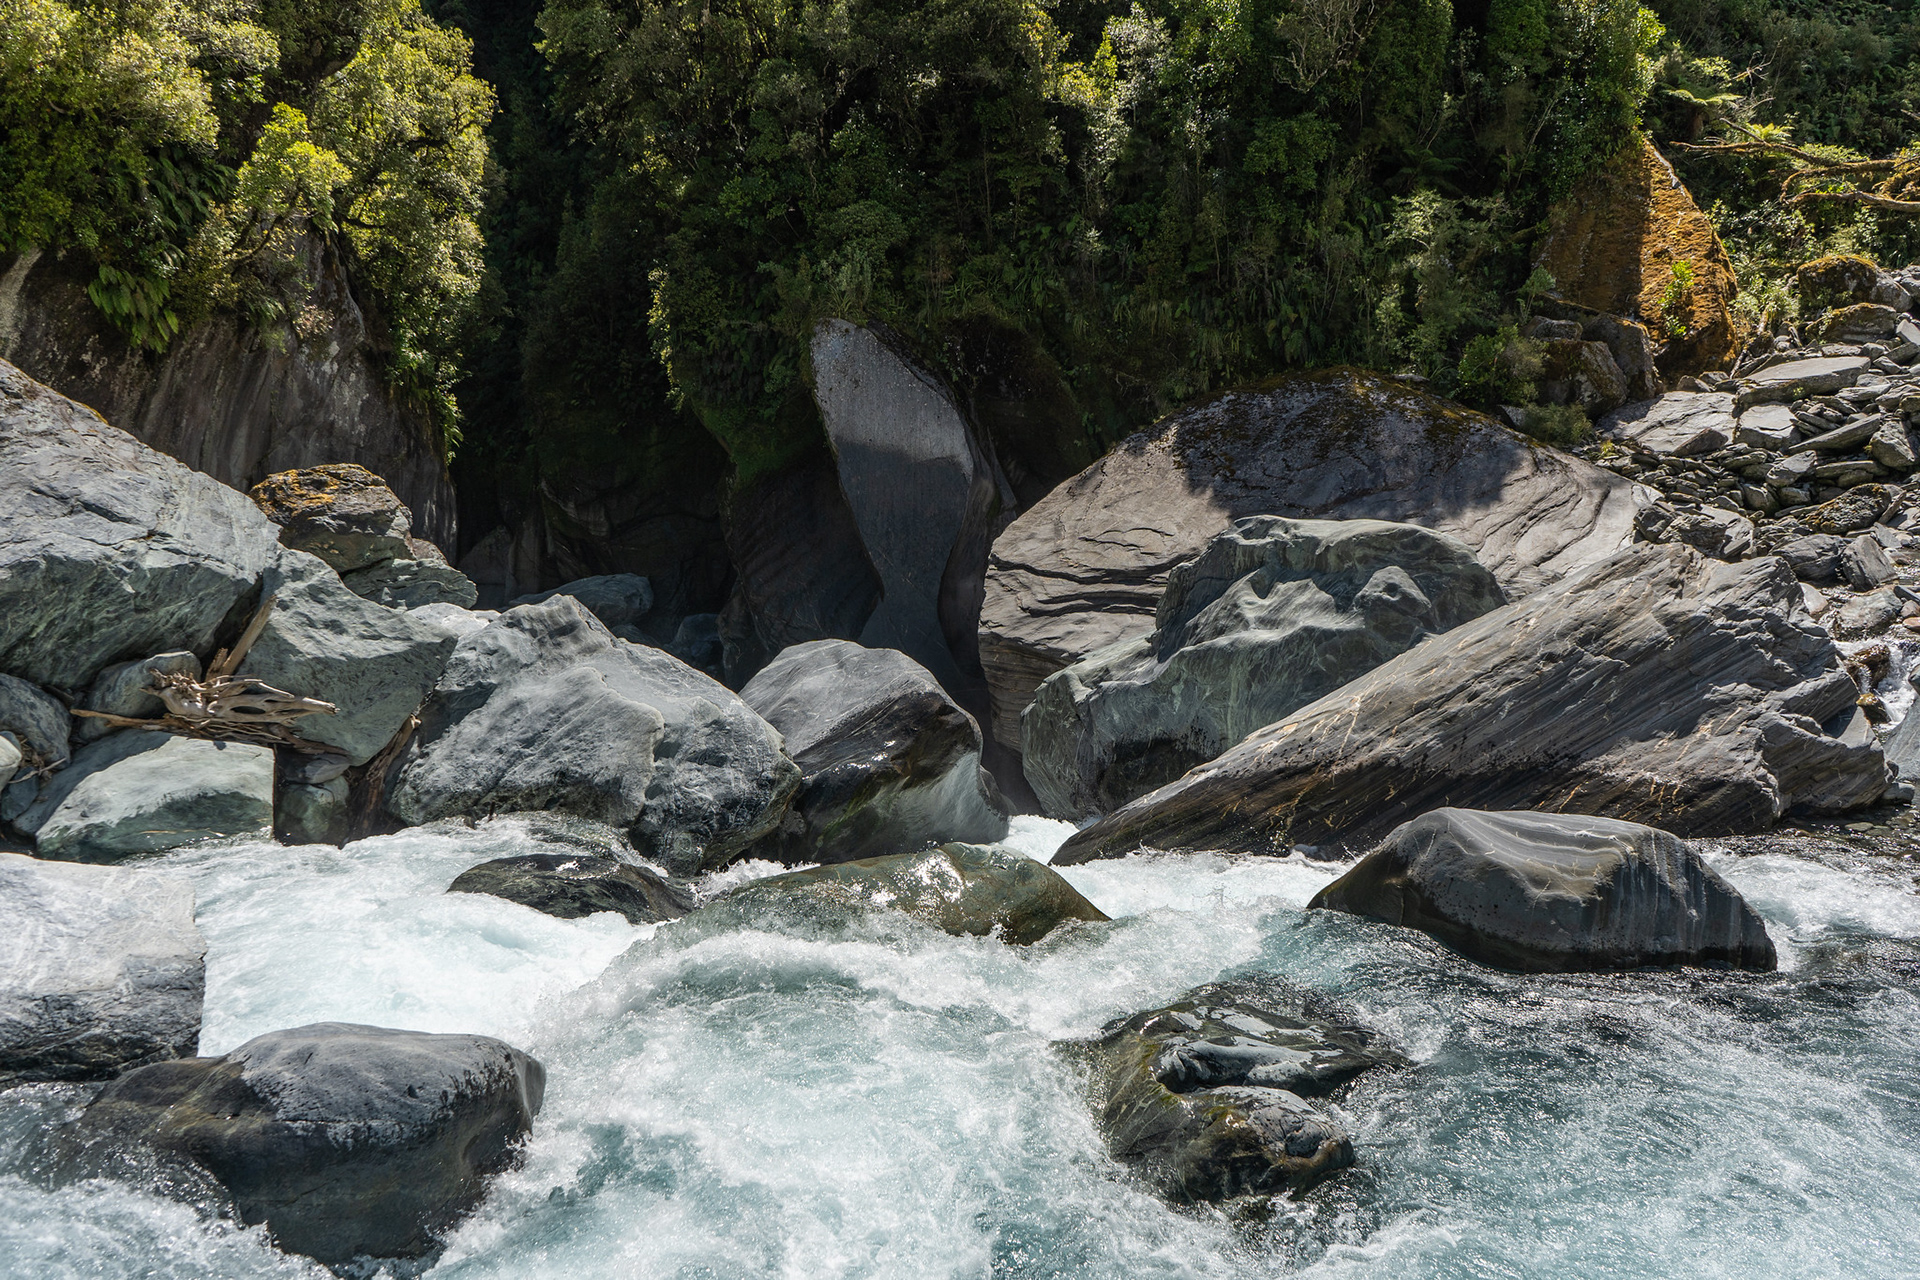
Looking back into the upper Omatane Canyon, it's always beautiful just watch the powerful river simply disappear into the landscape.

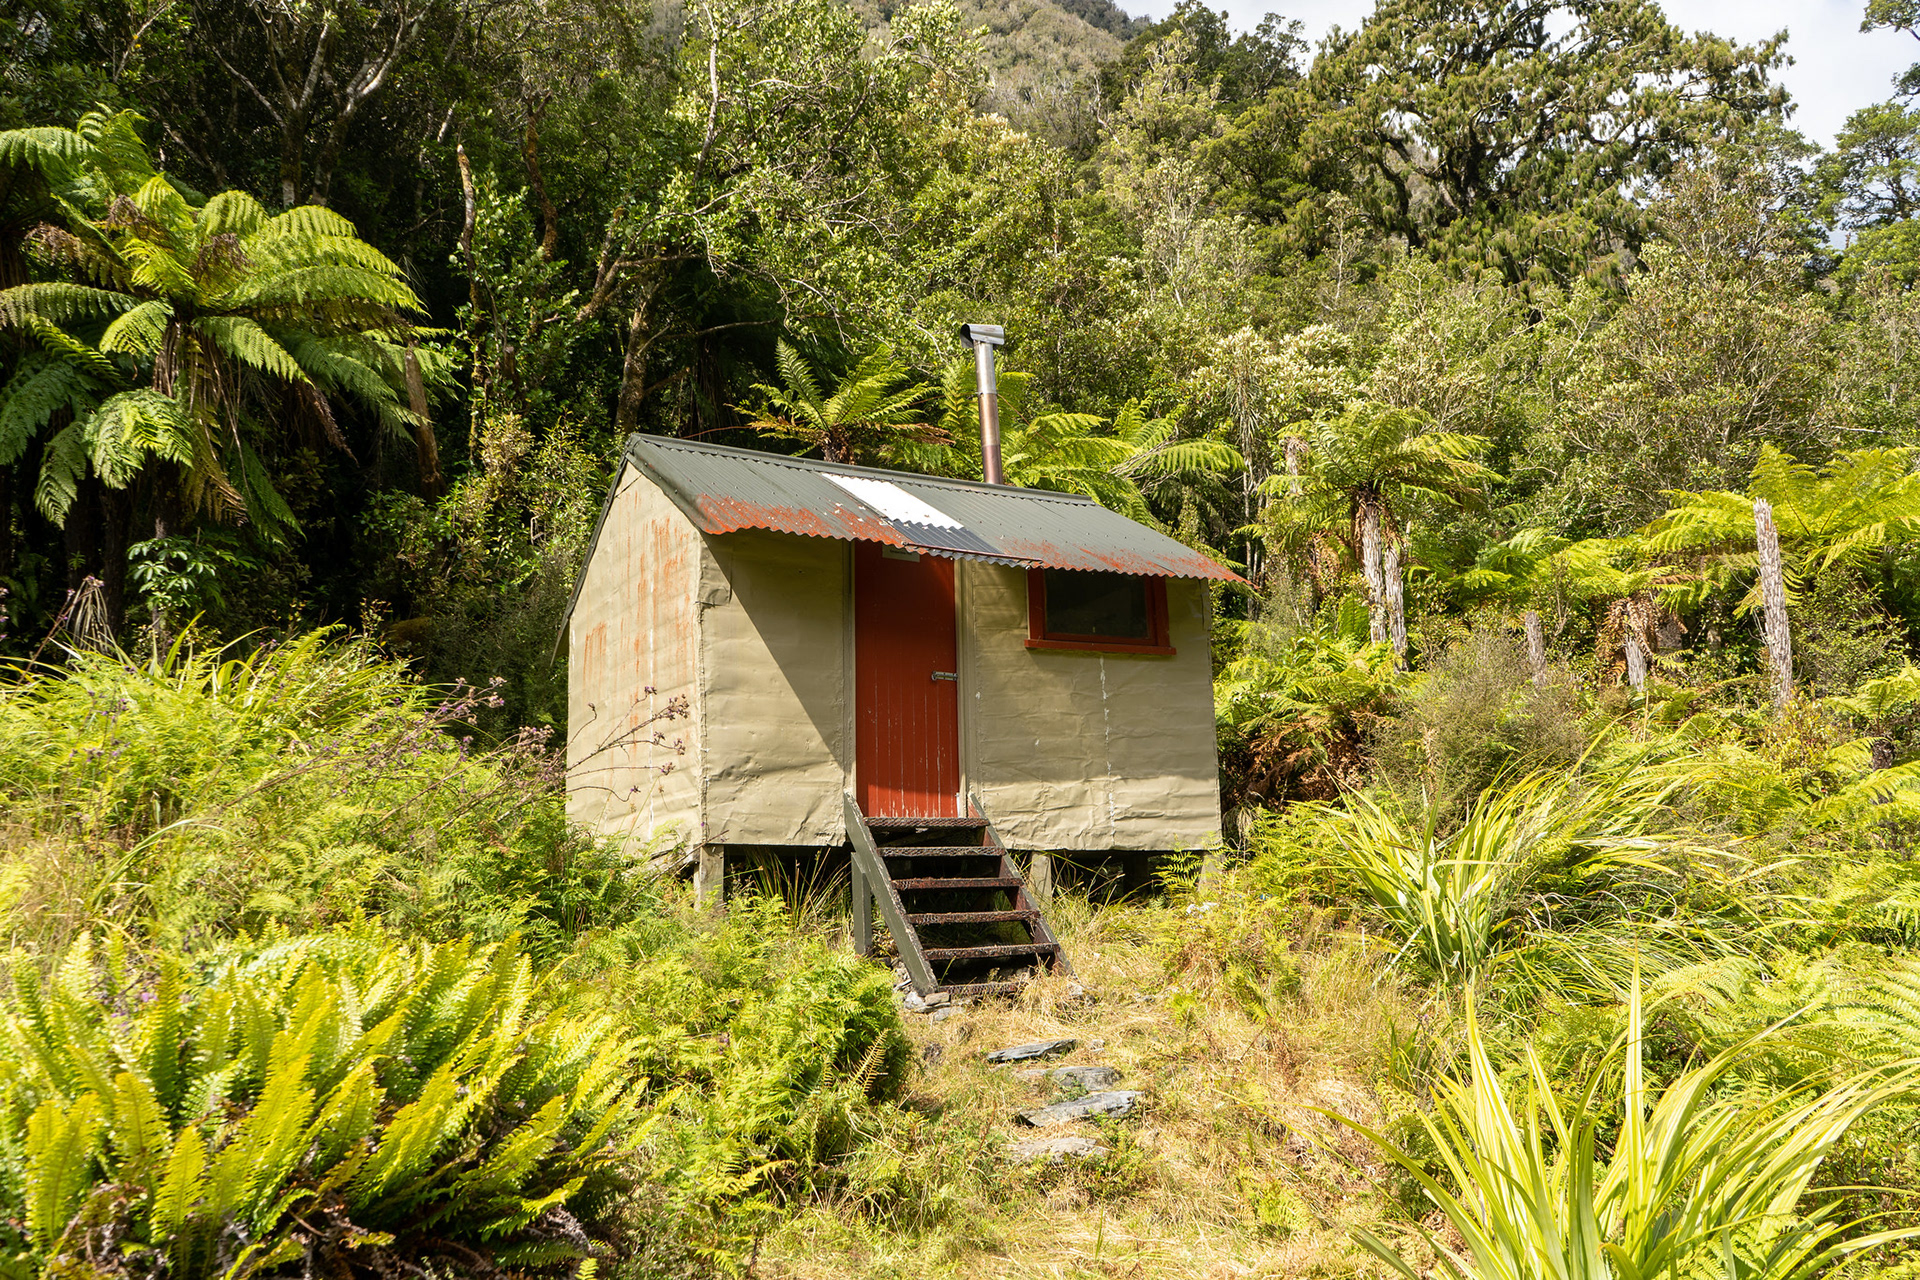
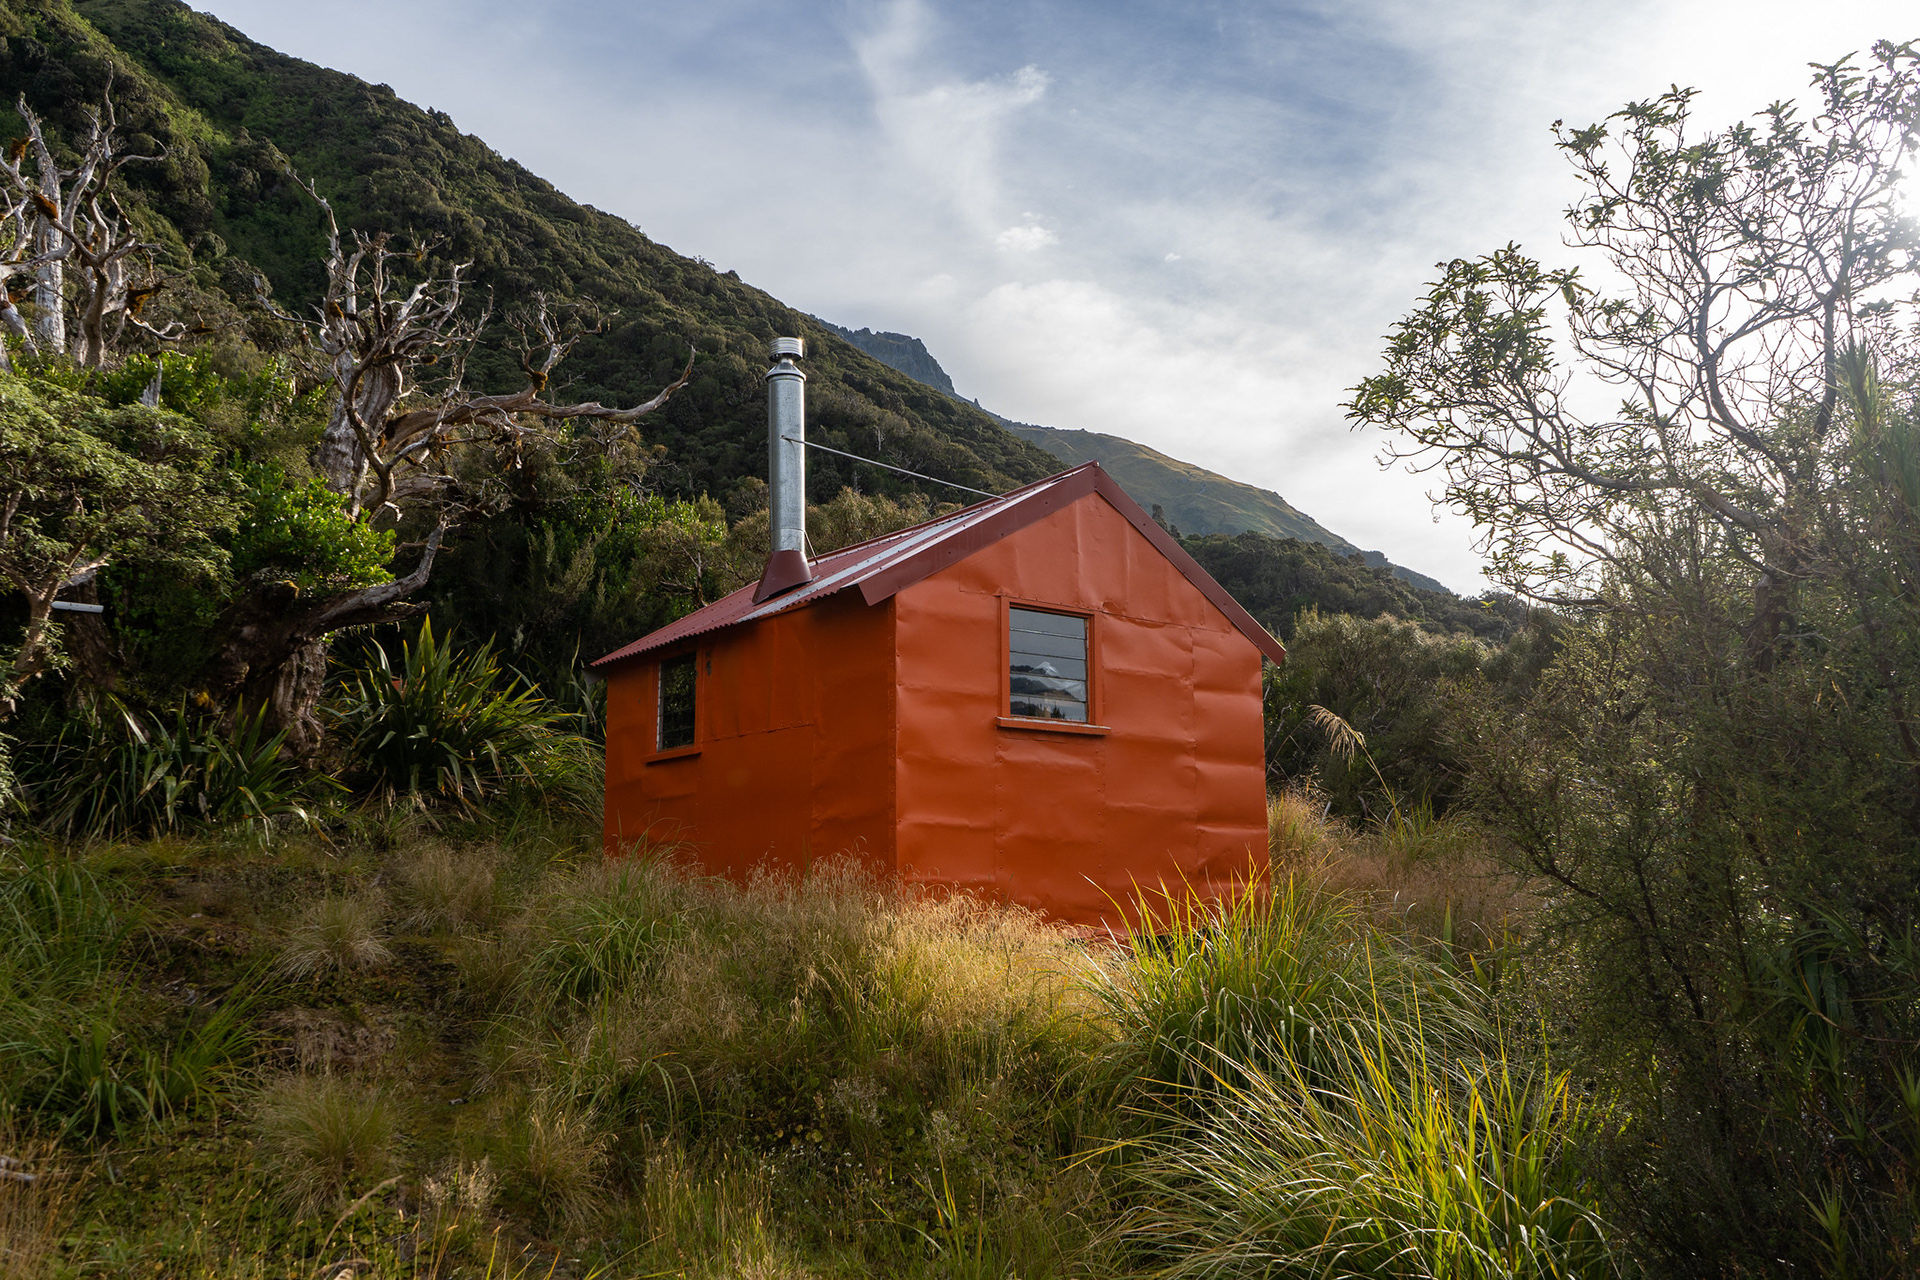
Serpentine Hut, one of the lesser visited Permolat huts. There were four parties who visited in 2023, the last year Permolat gives figures for - pretty quiet. Nice spot though, sleeps four.

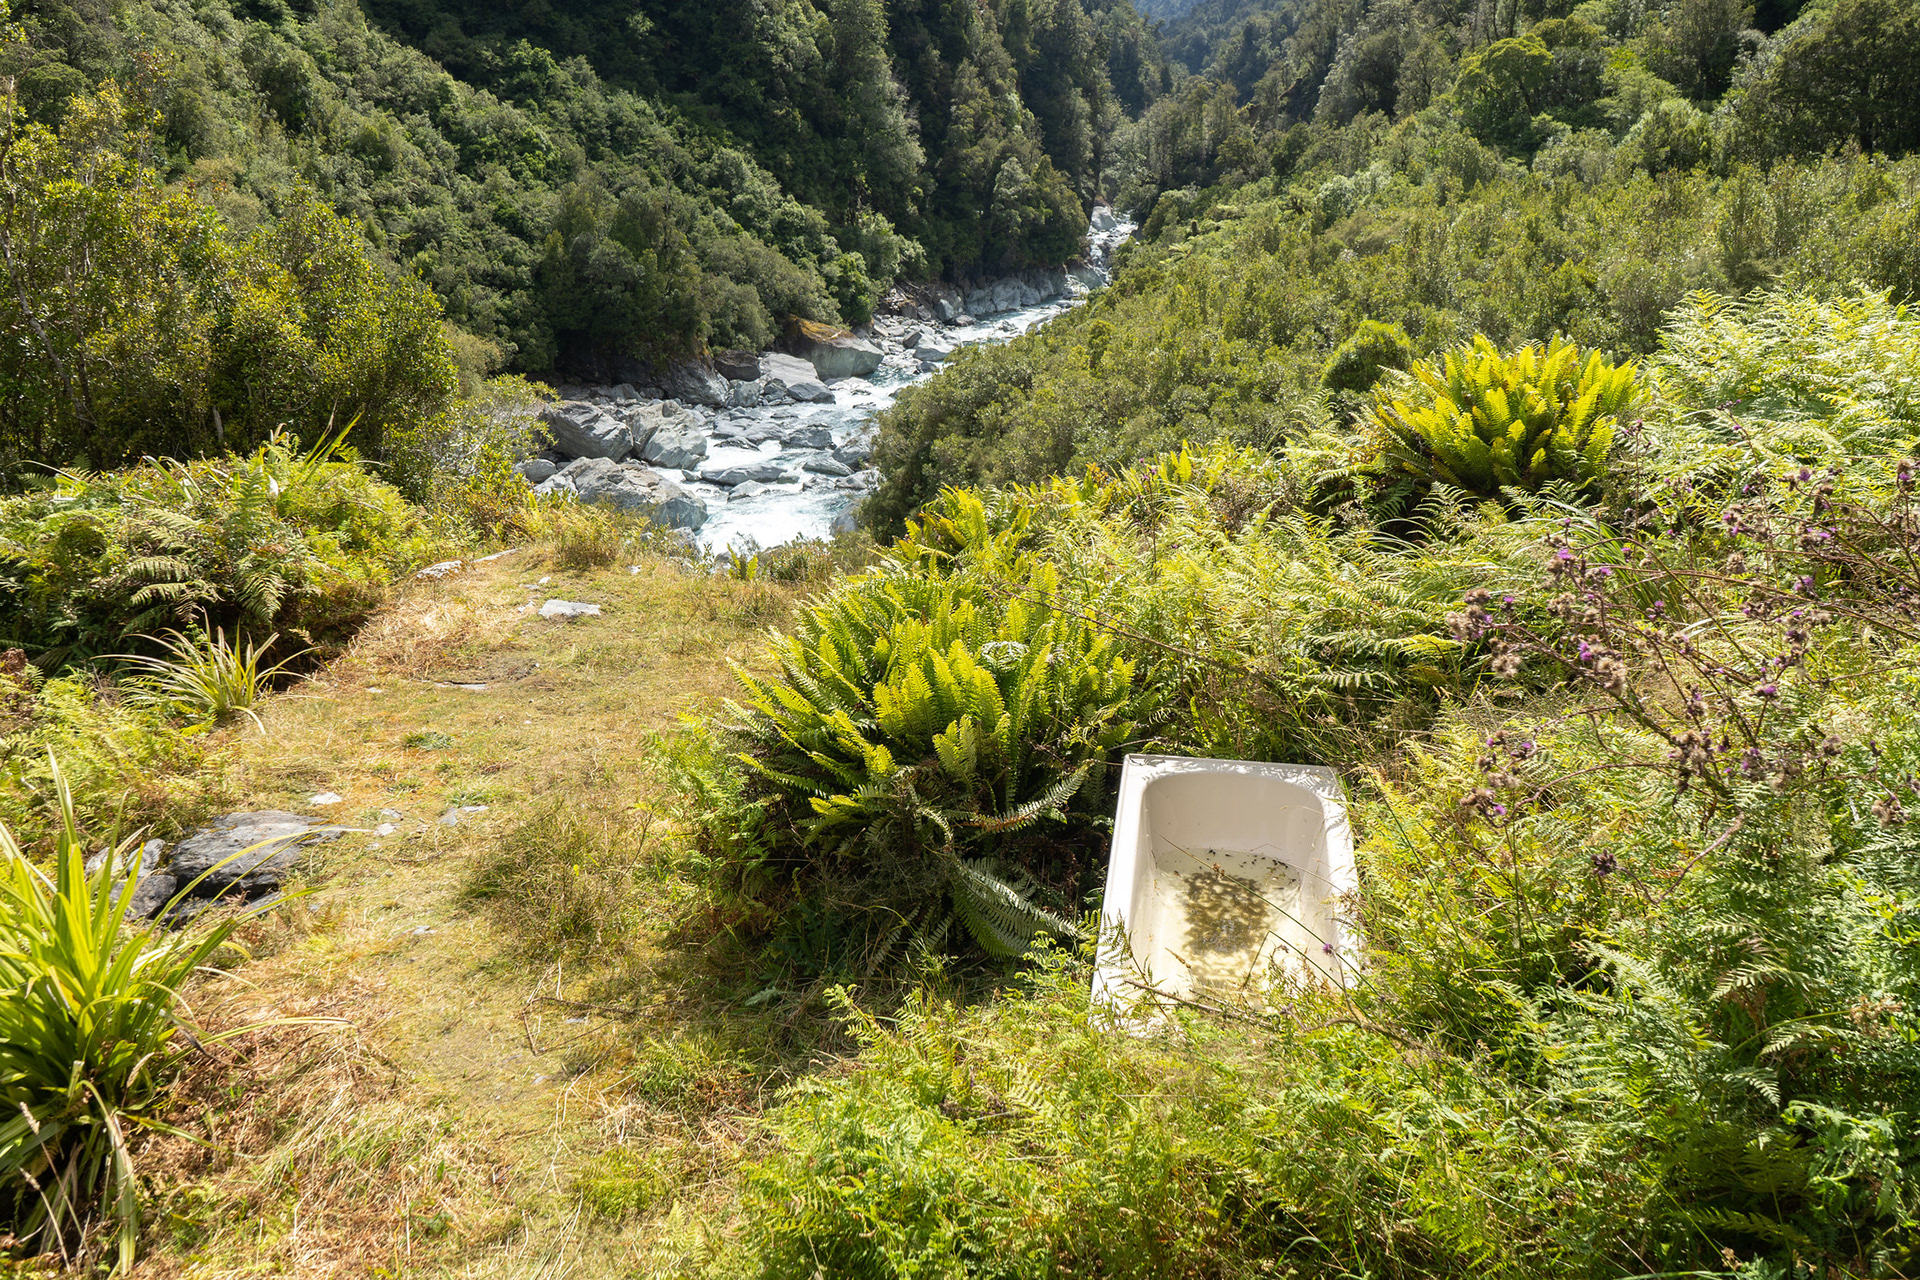
The view downriver from Serpentine Hut, complete with bathtub.

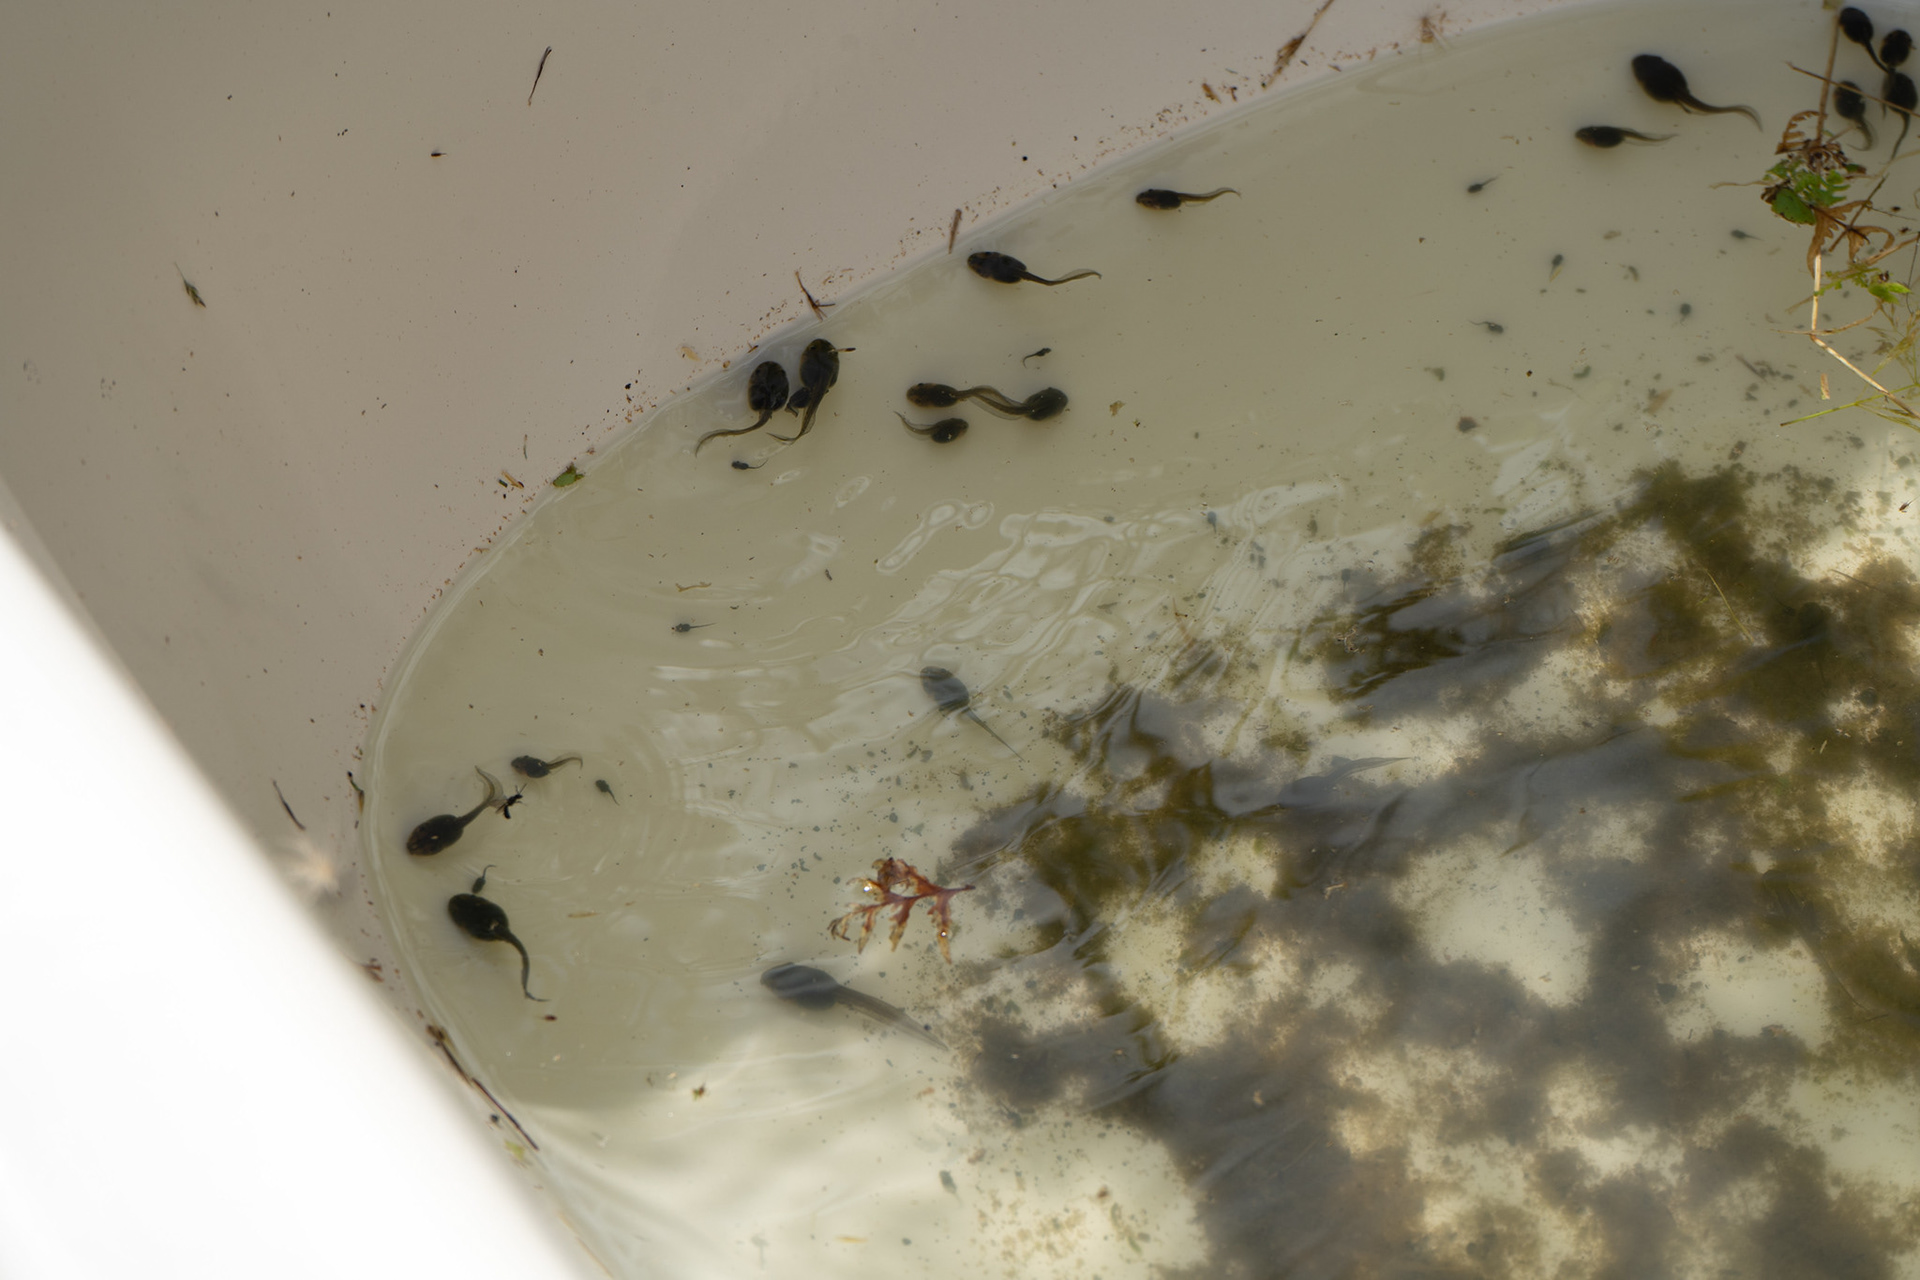
Even the tadpoles rate the spot. I have no idea how they would escape, though perhaps there is a booming frog population in the valley these days.

I had earlier made the decision to push on to Frisco Hut, which was probably foolish with hindsight and my limited level of fitness. I'd come off a period with minimal exercise and had to be home on the Monday, and it had already taken 8h to reach Serpentine Hut. Worse still, the clouds were beginning to mass. With a schedule to meet however, I set off mid-afternoon for Frisco.
The travel upvalley from Serpentine is easier, though there are a number of high sidles to get around further gorges. At least one of these seemed unnecessary, but the Permolat website warned that crossing to the true left was generally not possible (to avoid the high sidle) so I headed on uphill. In hindsight, I probably should have given the crossing a go - it's not a high consequence crossing, it looked to be within my capabilities and the climb to get over the gorge was almost 100m of altitude gain. Alas, it's much better to suck up unnecessary climbing than to incur the consequences of a failed river crossing.

Looking downvalley into one of the unnamed gorges above Serpentine Hut.

A few hours after departing Serpentine Hut, I reached the confluence with Nogo Creek and quickly picked out the permolat T at the base of the spur. The confluence is actually a very pleasant spot, the creek trickling across broad banks with expansive views downriver to the high faces under Mt Robinson.

Nogo Creek flowing into the Hokitika, Mt Robinson in the distance.

The base of the Nogo spur, permolat markings visible.

The route up the spur is well formed and seems to largely follow an old vegetation survey line, but I was running on fumes by this point. It was over 10h since I left Rapid Creek, past dinner time and sunset was fast closing in. I was carrying far more gear than I really needed, and I had overcommitted to a route that was well beyond my limited fitness of the time. Such is hindsight.
From what I do remember of the spur route, it's mostly good travel albeit a few steep pinches in places. It largely follows the crest, and at one point abuts a slip on the Nogo side. There is at least one large log which is carefully traversed to avoid falling down the slip, and on the upper section beyond pt. 910 there are occasional clearings and deer wallows. That's about all that I remember in my depleted state, though to my credit I am writing this four years later without notes!
The last kilometre was an absolute grovel, and I was borderline crawling by the time I reached Frisco as the sun was setting proper. Without energy for photos, I instead managed to get inside the hut and promptly fell asleep - I don't even think I managed to get up on the bunks or get food down. It was a hard day, and one that stretched comfortably beyond 12h of travel.
They say that time heals all wounds, and that apparently counts for physical fatigue too as I woke up feeling surprisingly chipper despite a broken sleep. I headed out to watch the sunrise, which was magnificent. The hut sits on the border of the forested canopy and the scrub zone, the lawn cleared to give views into the heart of Central Westland. To the left is the upper Hokitika, Conway Ridge and the blocky summits between Gerard Peak and Mt Park. To the distant right is Steadman Brow, rising all the way up to Mt Beaumont and the Ivory Lake surrounds - truly gorgeous country. 

Across to Conway Ridge, Gerard Peak in the distance.

The upper reaches of Steadman Brow and The Rotunda.

Even the hut itself is attractive, with its orange paint job shimmering in the morning light.

Frisco Hut perched in its clearing, the fringes of Mt Ross peeking through in the background.

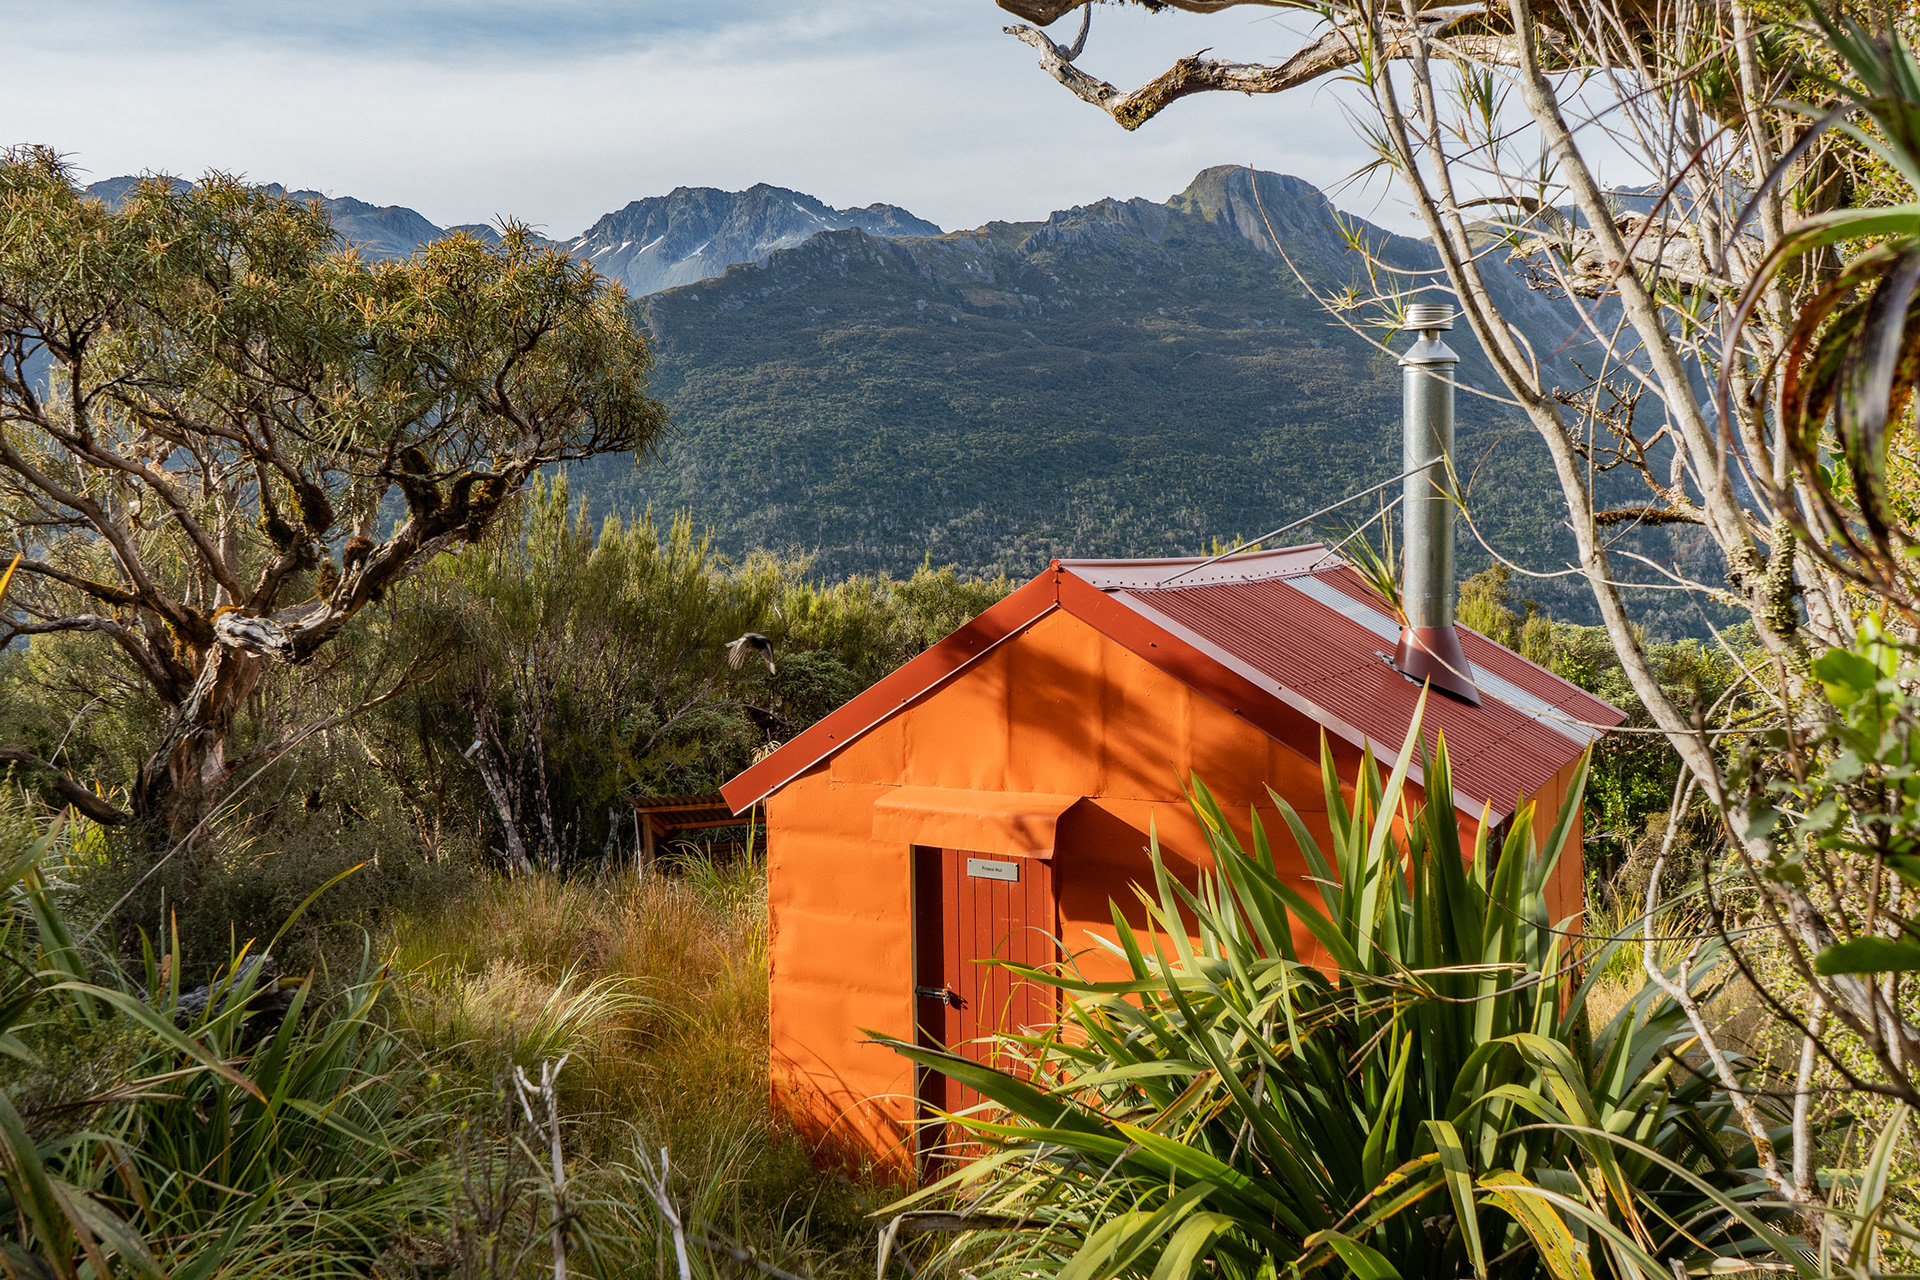
Another view of Frisco and a passing fantail, Gerard Peak and pt. 1523 somewhat prominent behind.

I struck out from the hut, quickly picking up the ascent route onto the adjacent tops. Despite being shown as a track which runs due north up the face, the access swings NNW up a dry watercourse which carves a natural path through otherwise dense scrub. It's reasonably good going, gaining the spur at around 1120m where a cut track continues up into the tussock. From the tussock margins, Mt Evans and Snow Dome come into view.

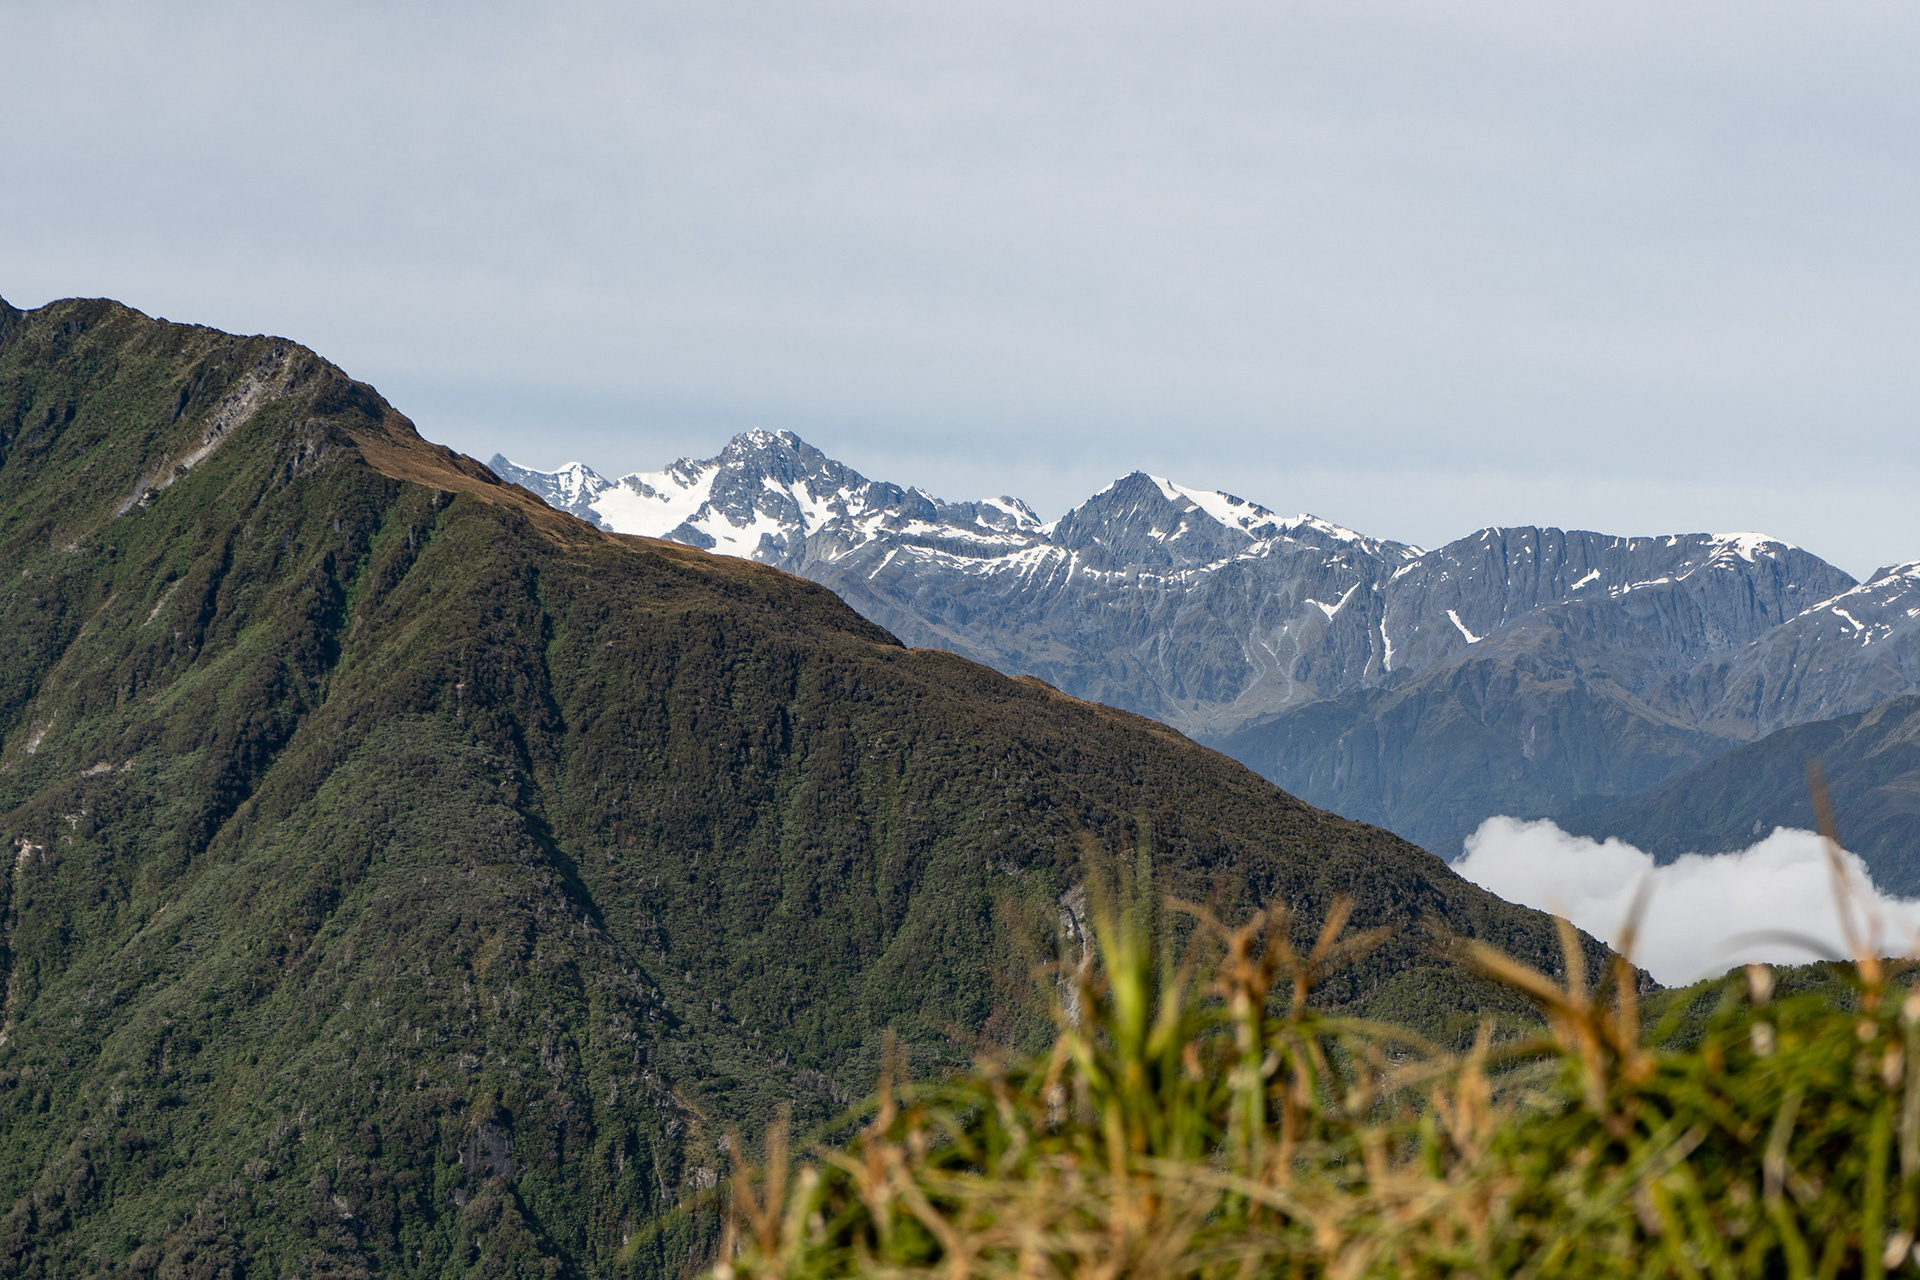
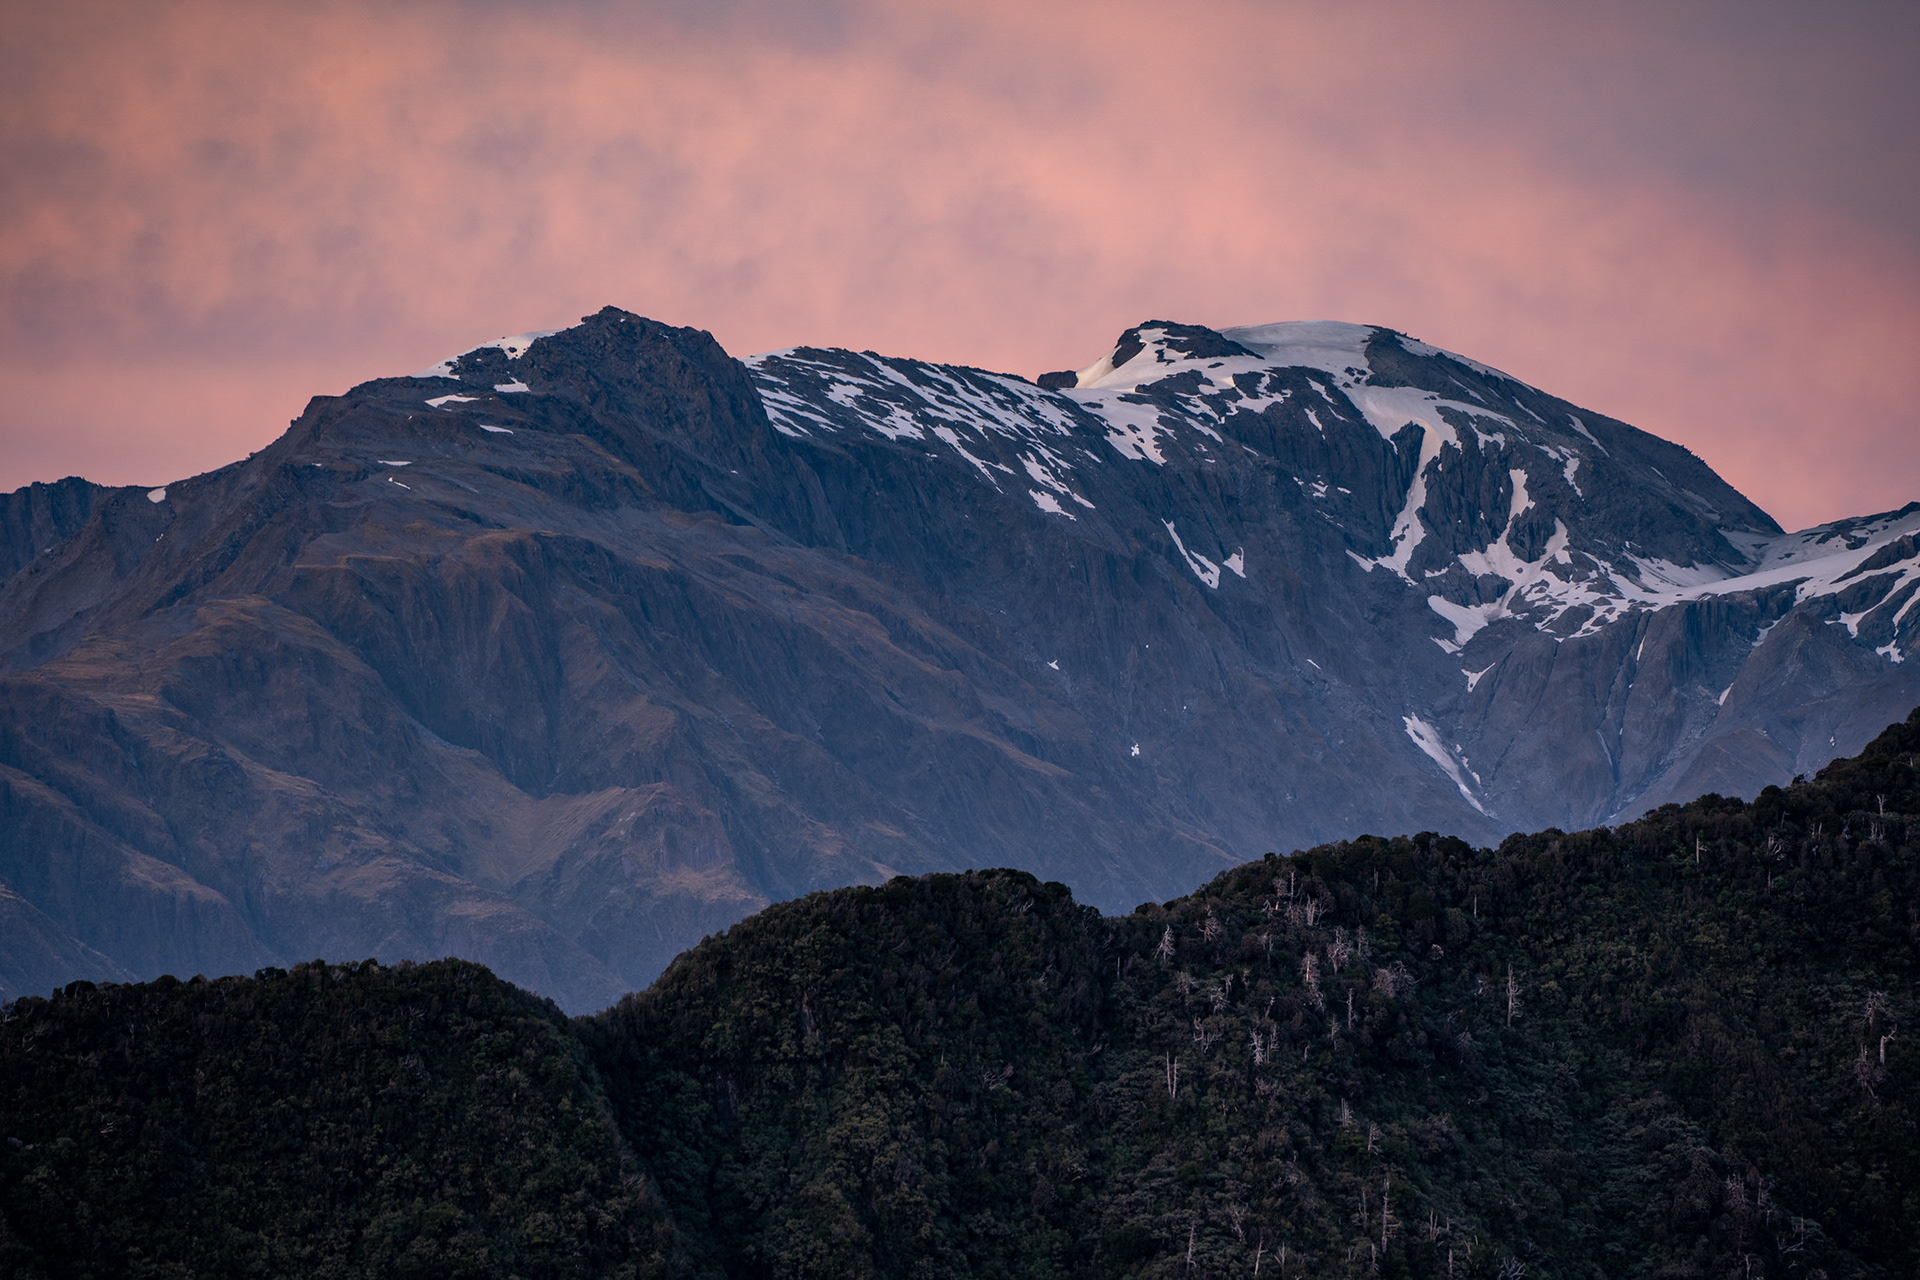
Mt Evans (background left) and Snow Dome (right) in the distance.

Once in the tussock, a remarkable basin is reached. There is a waratah at the lip to mark the entrance of the scrub track, but there is also a deep and pronounced ground trail which runs most of the way up to pt. 1510. I initially thought it might be a deer trail as they are present in the basin, but it seems unusually coherent in an open landscape and quite narrow. Perhaps an old cut trail from the NZFS days, though nothing shows on historic maps. At the end of the basin, there is a beautiful albeit murky heart shaped tarn. I skipped the option of water as the day was young and I had full-ish bottles, but came to regret it as there is no reliable water on the route in high summer for many more hours.

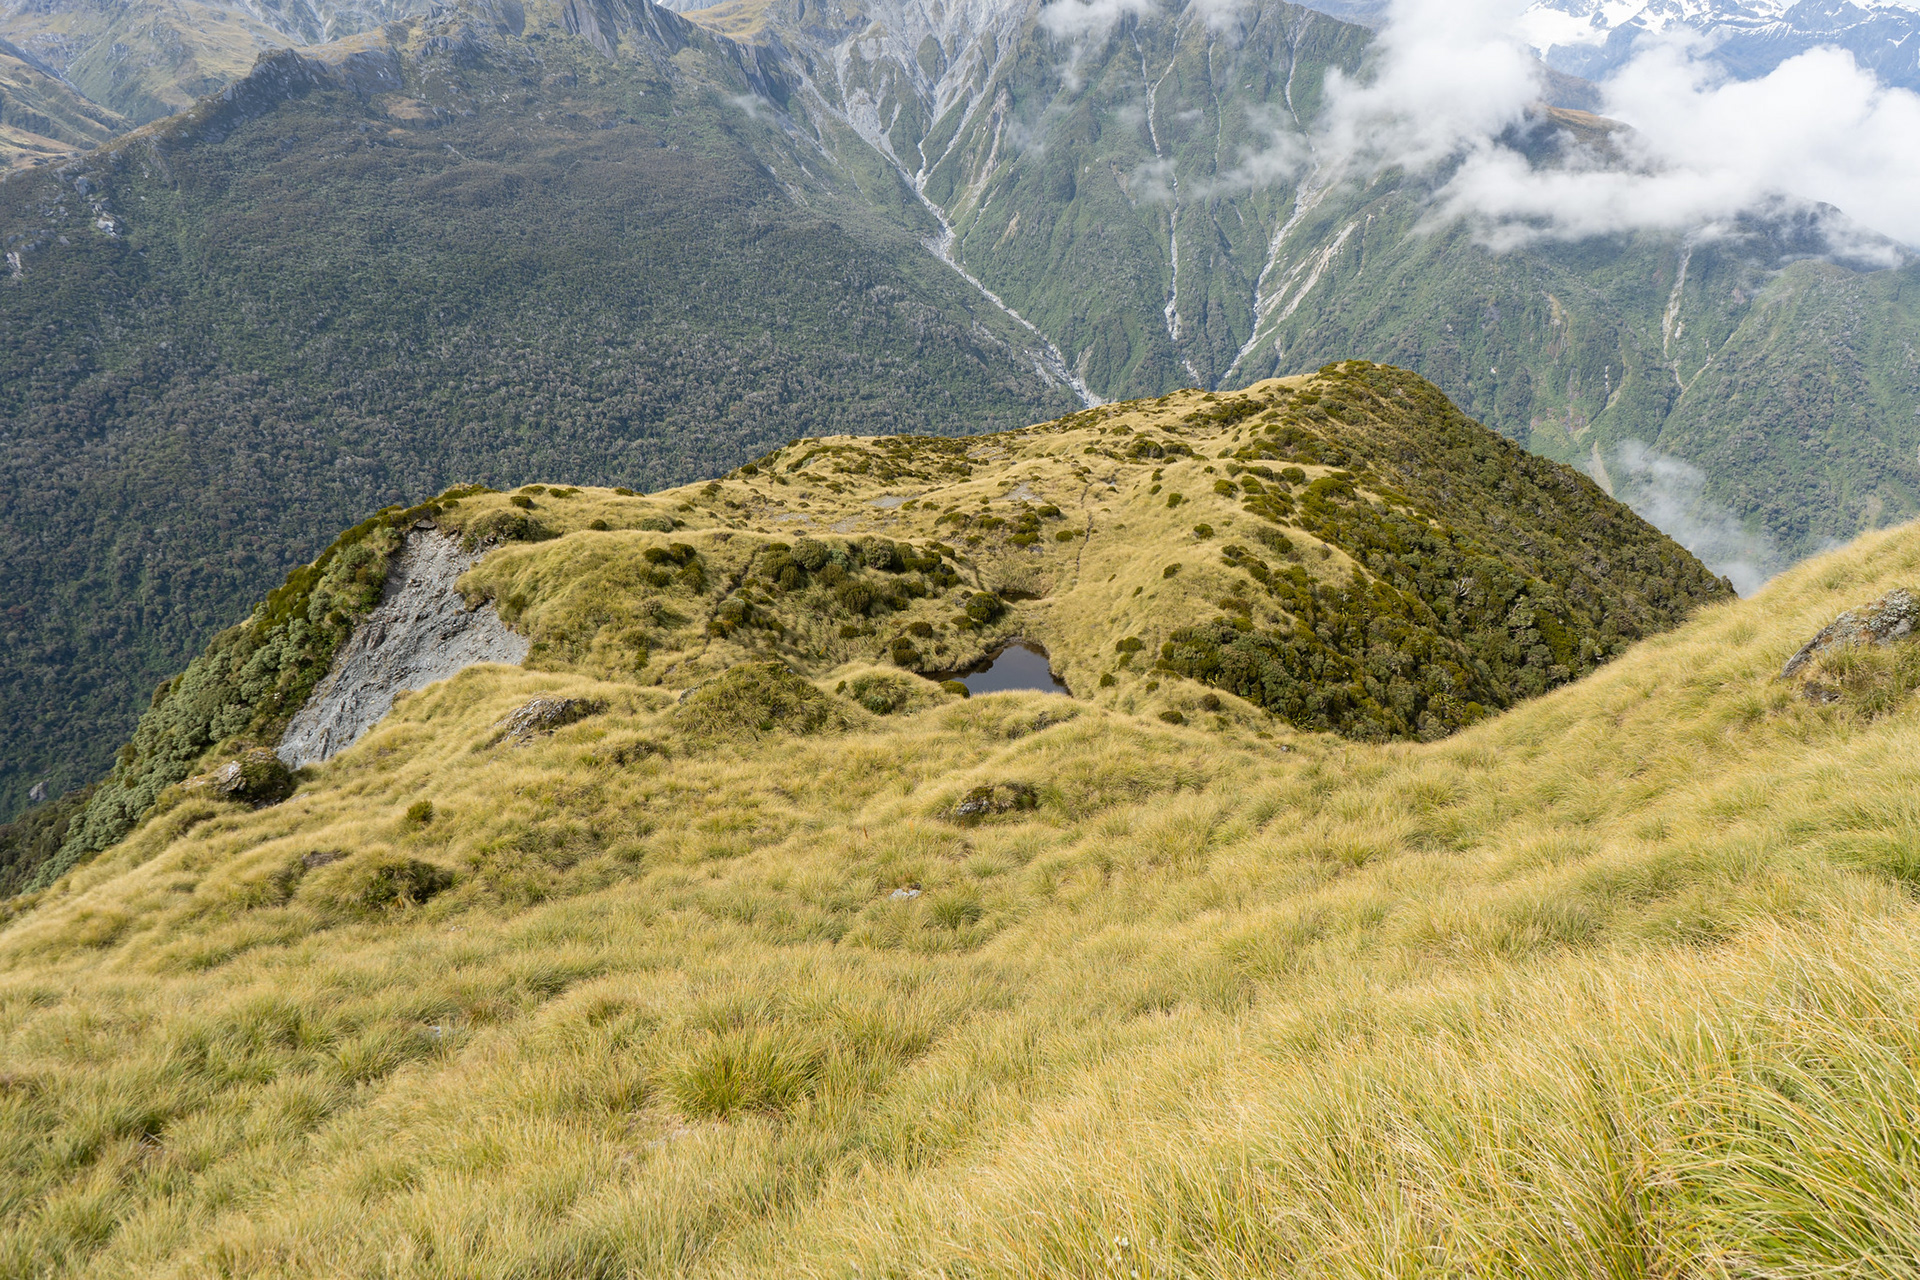
Back down in the bench, with its obvious trail and lovely tarn visible.

Beyond the bench, the ground trail continues up the SW ridge of pt. 1510. The high point is actually quite imposing, with cliff bands studded throughout the ridge's eastern aspect - a lot more severe than the topo map suggests. The trail swings left at 1380m to avoid the crux of the ridge, sidling across the face until the easier WSW ridge is obtained and followed up to the high point.

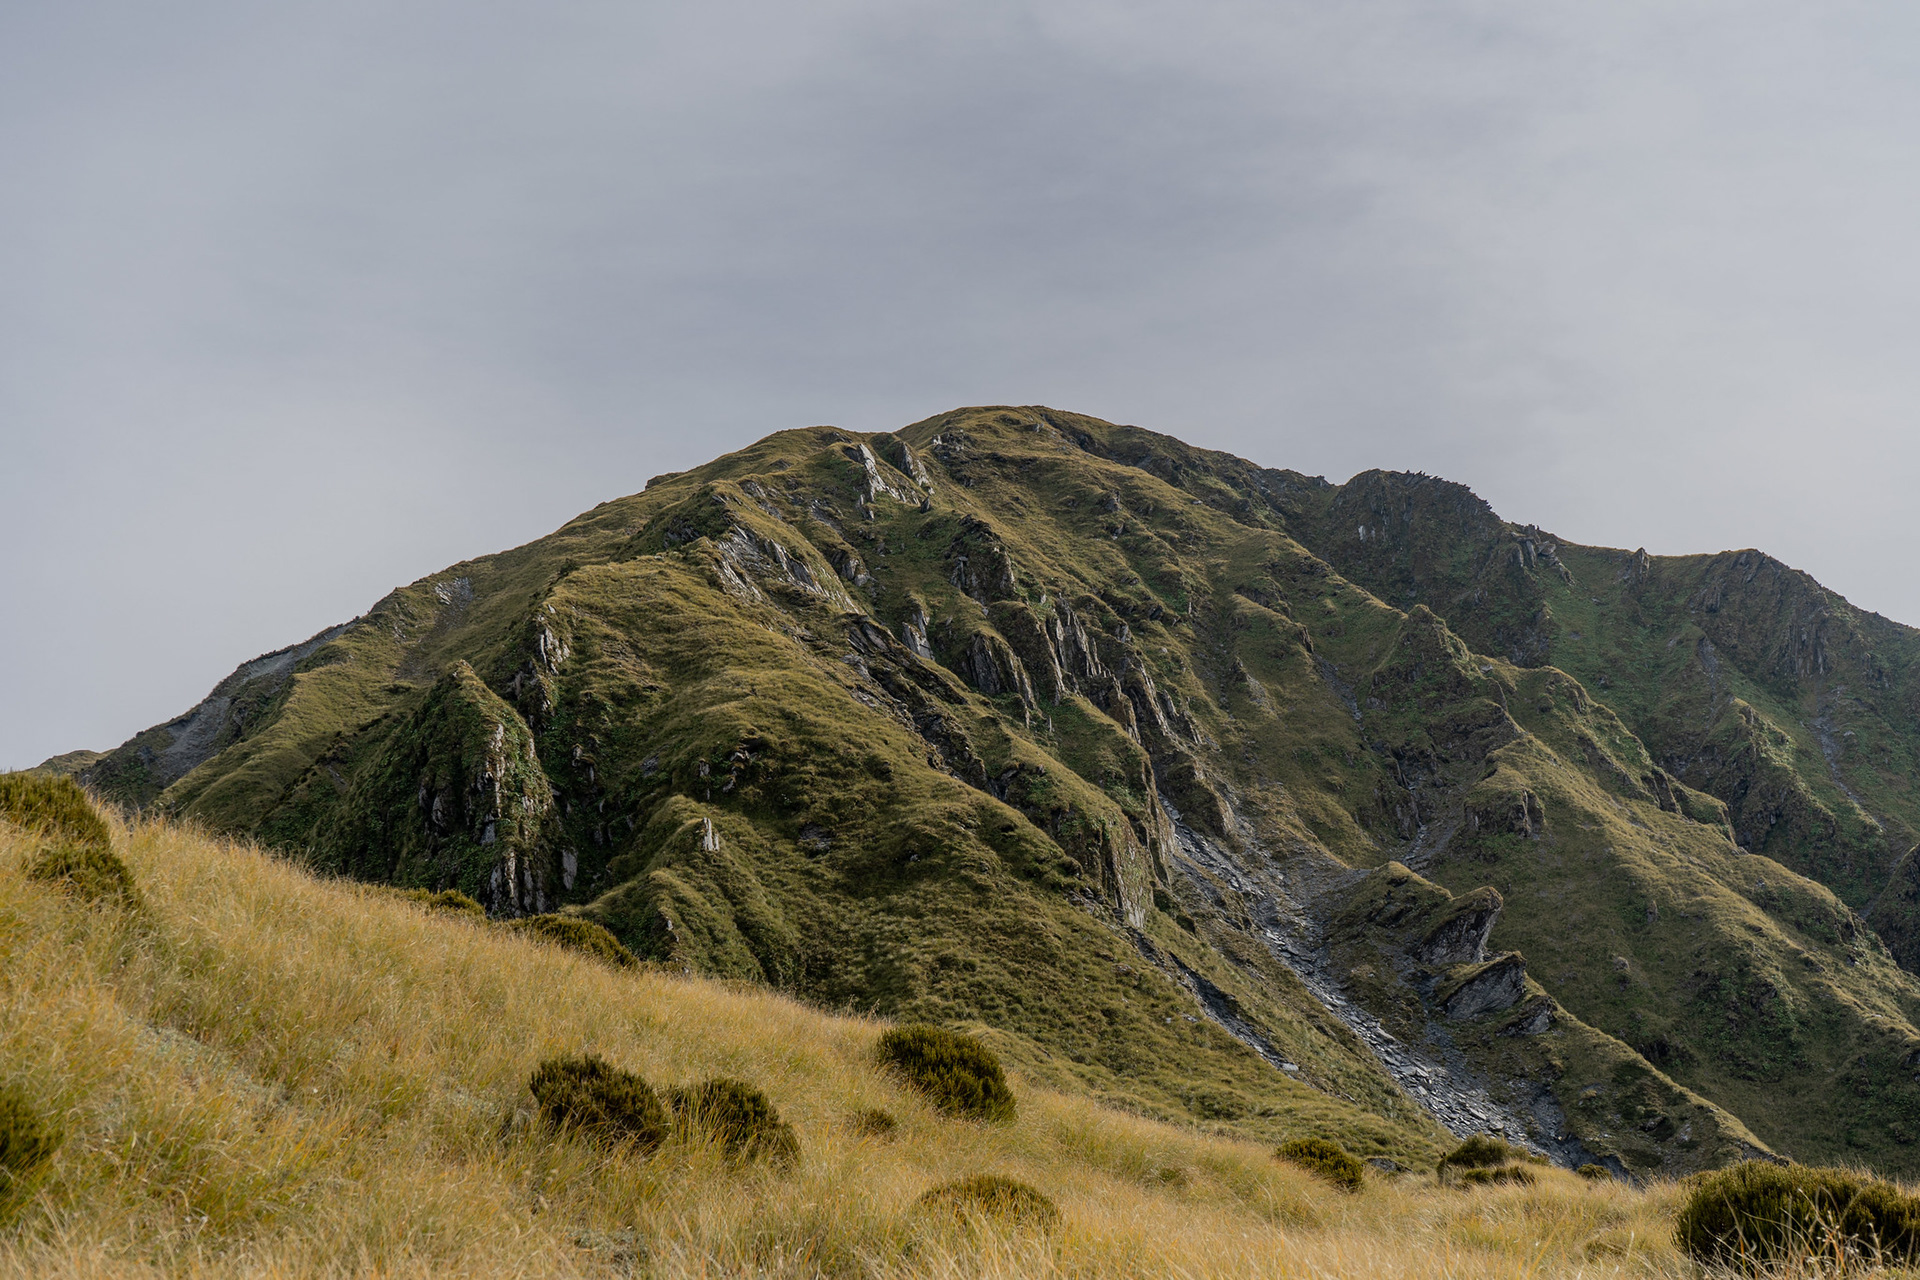
Pt. 1510 and its SW ridge, the route goes about two thirds of the way up then swings left to follow the left-hand skyline.

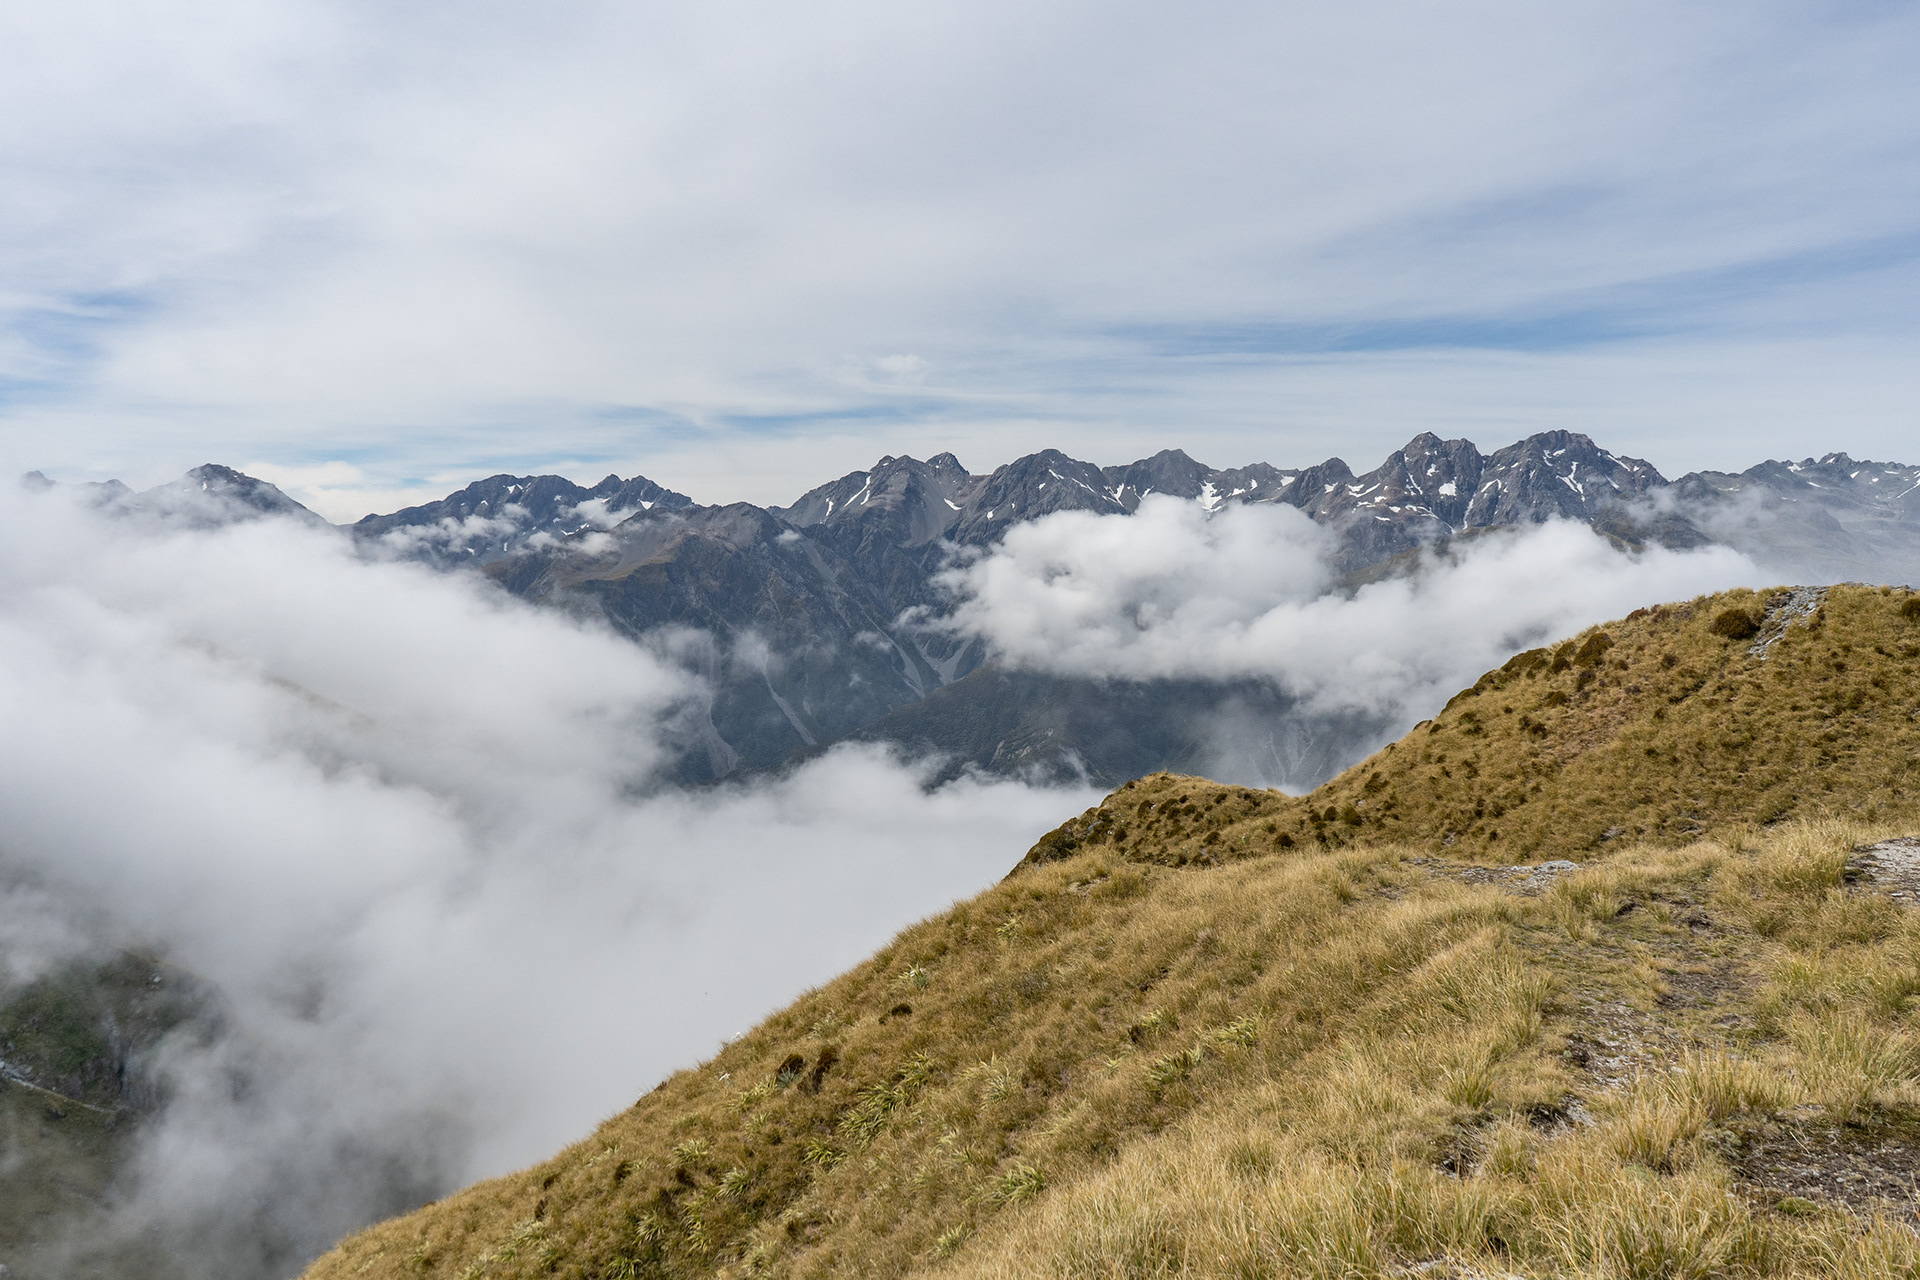
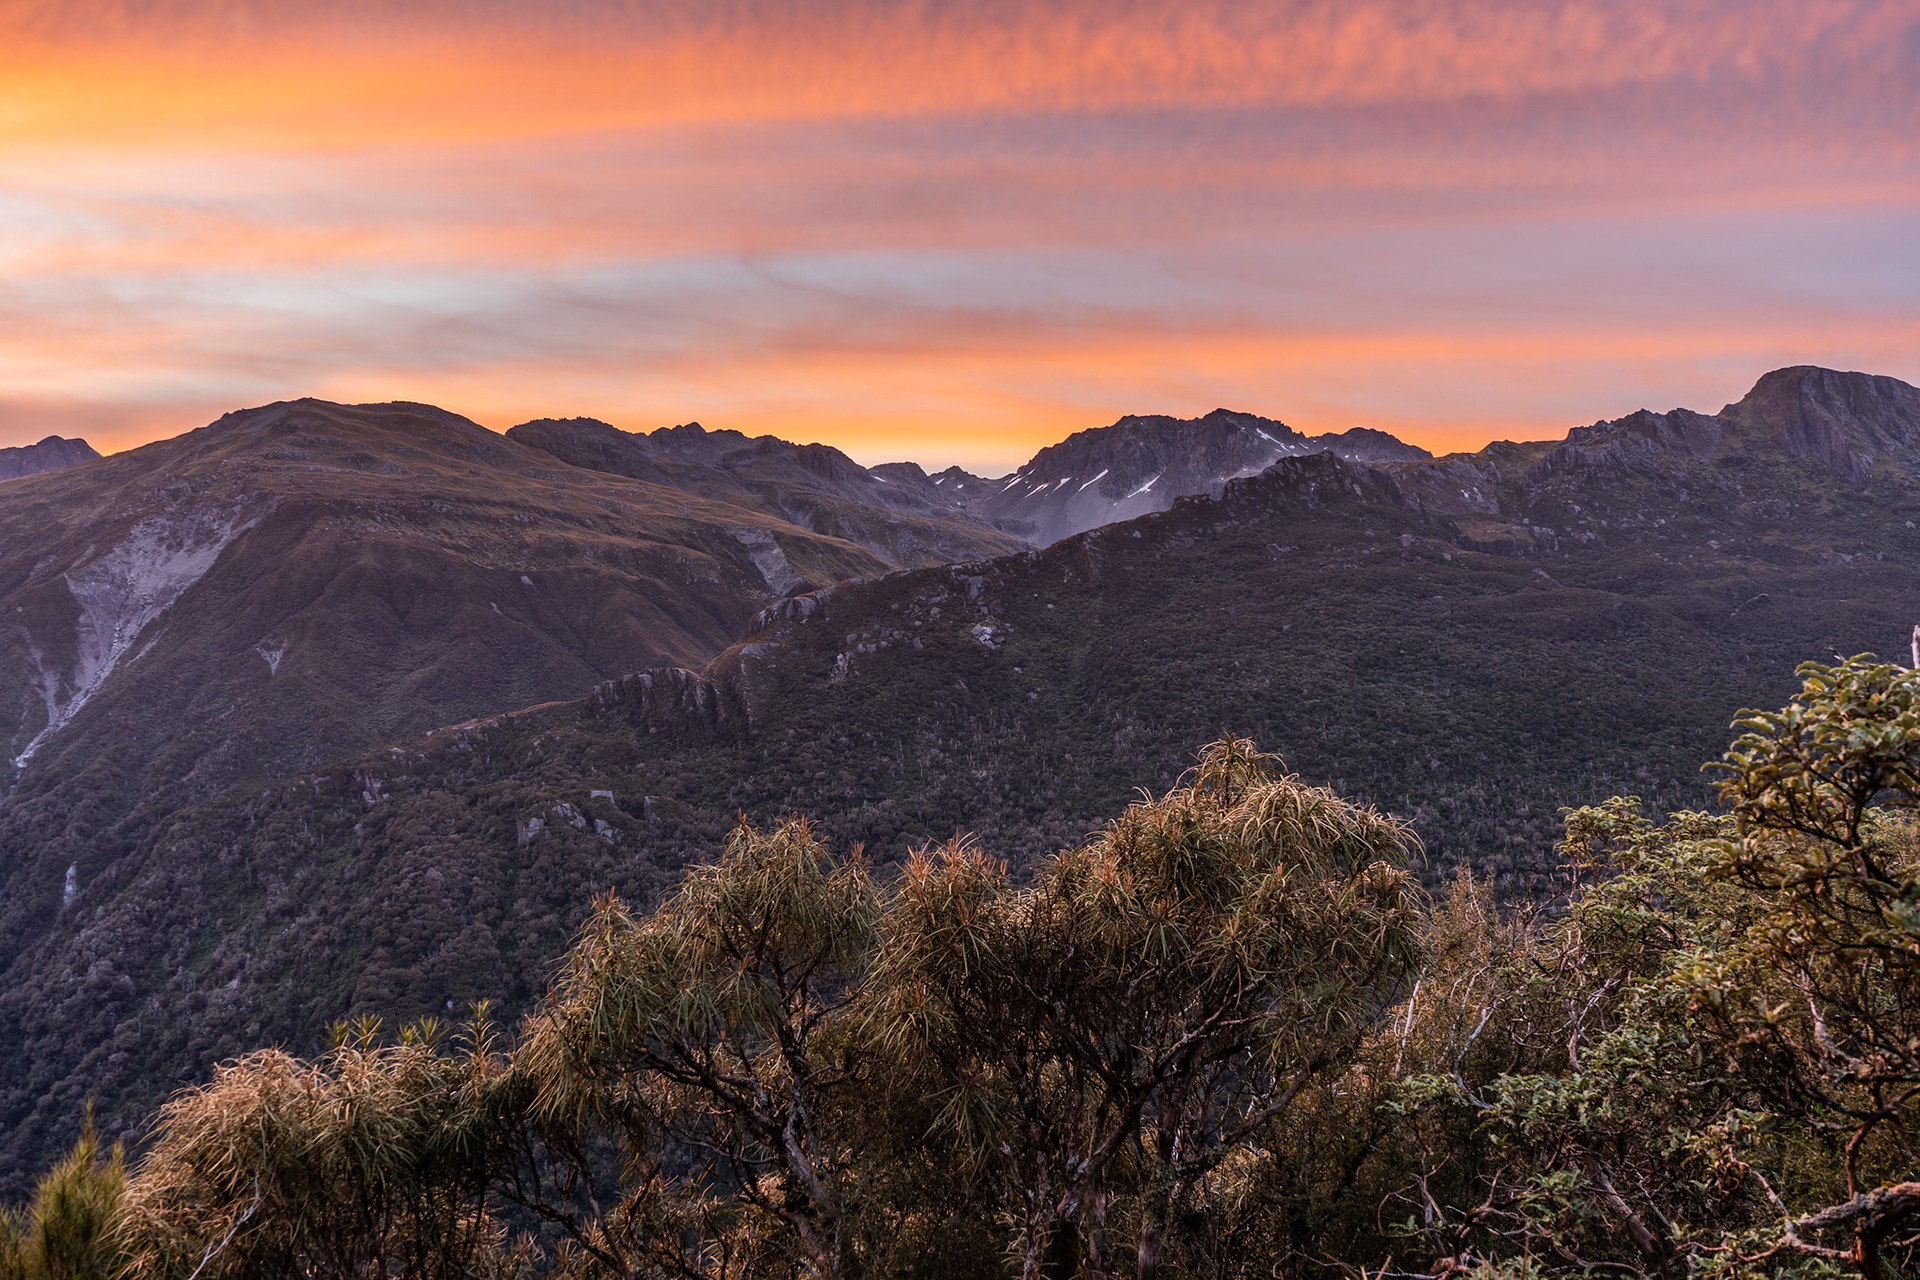
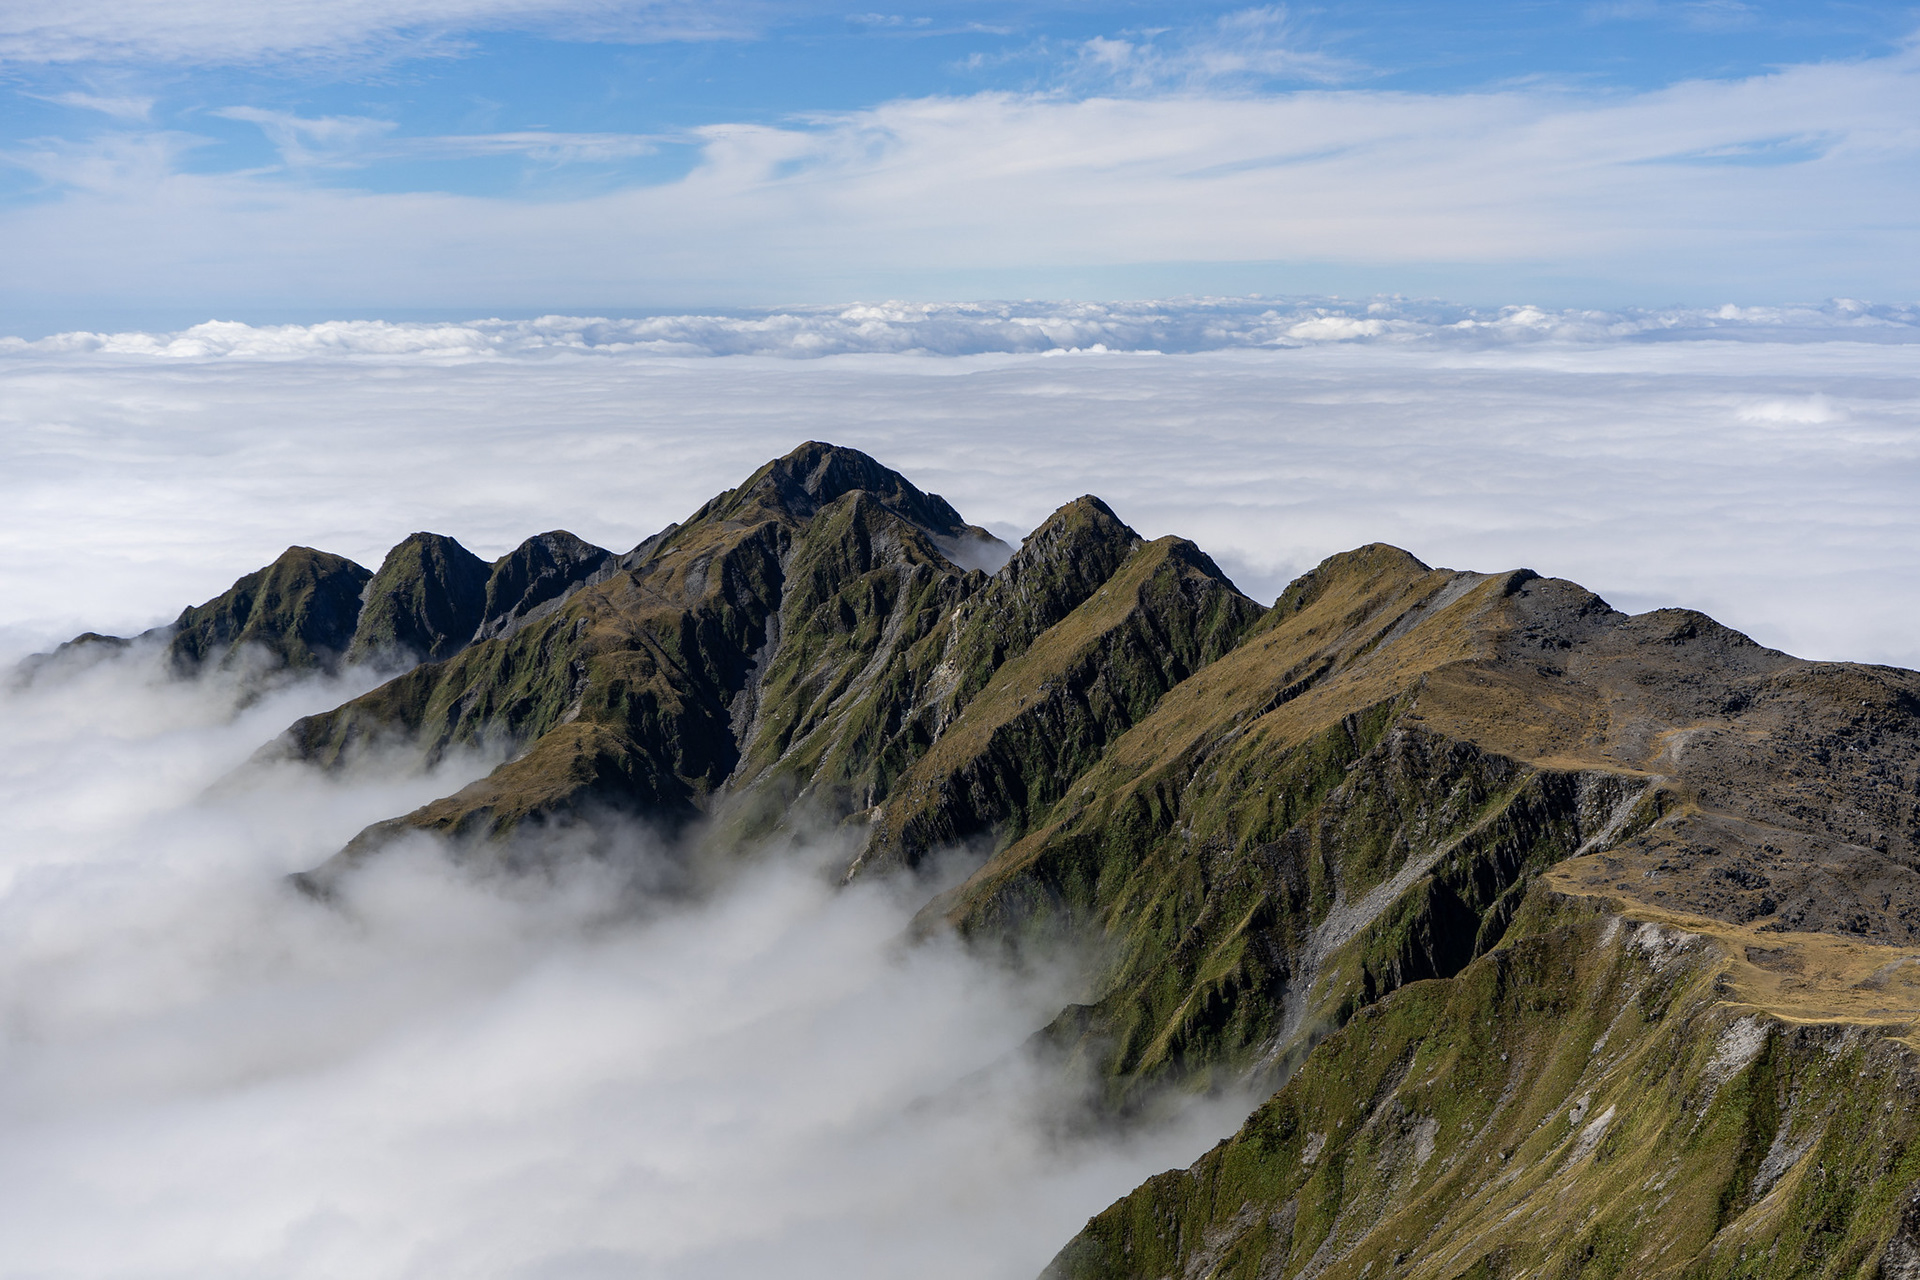
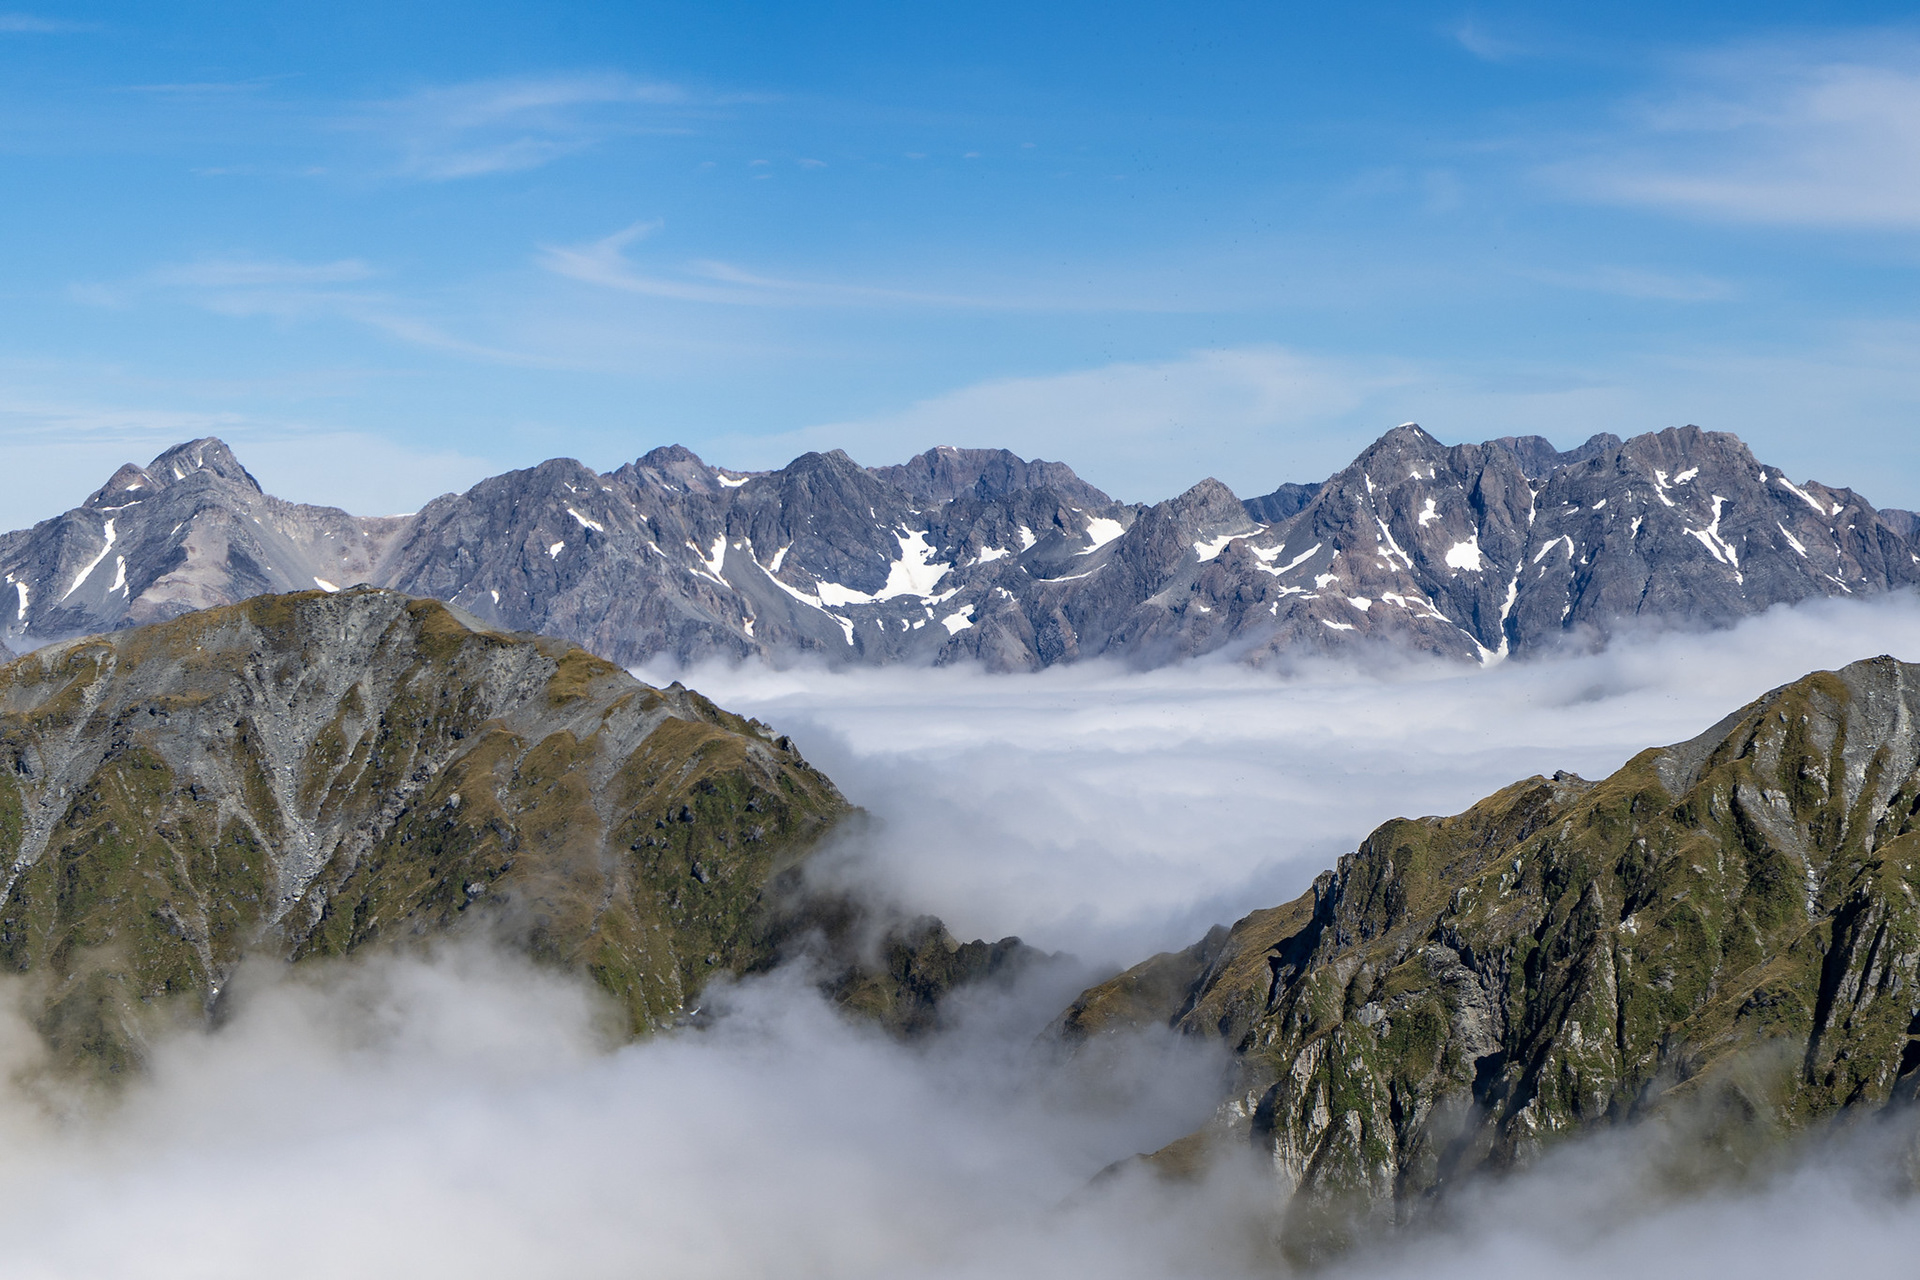
The last reliable views of the Main Divide before the cloud rolled in. 

From pt. 1510, there are good views across to Mt Whitcombe and the Bracken Snowfield but more pressingly, a view of the route ahead over pt. 1718. With the face coming in and out of view due to clag, it was a somewhat scary prospect. I'm not sure if it was the fatigue from the previous day, the fact I hadn't done much recent tramping or something else, but it compelled me to wait for half an hour to try and get a clean view of the route ahead.

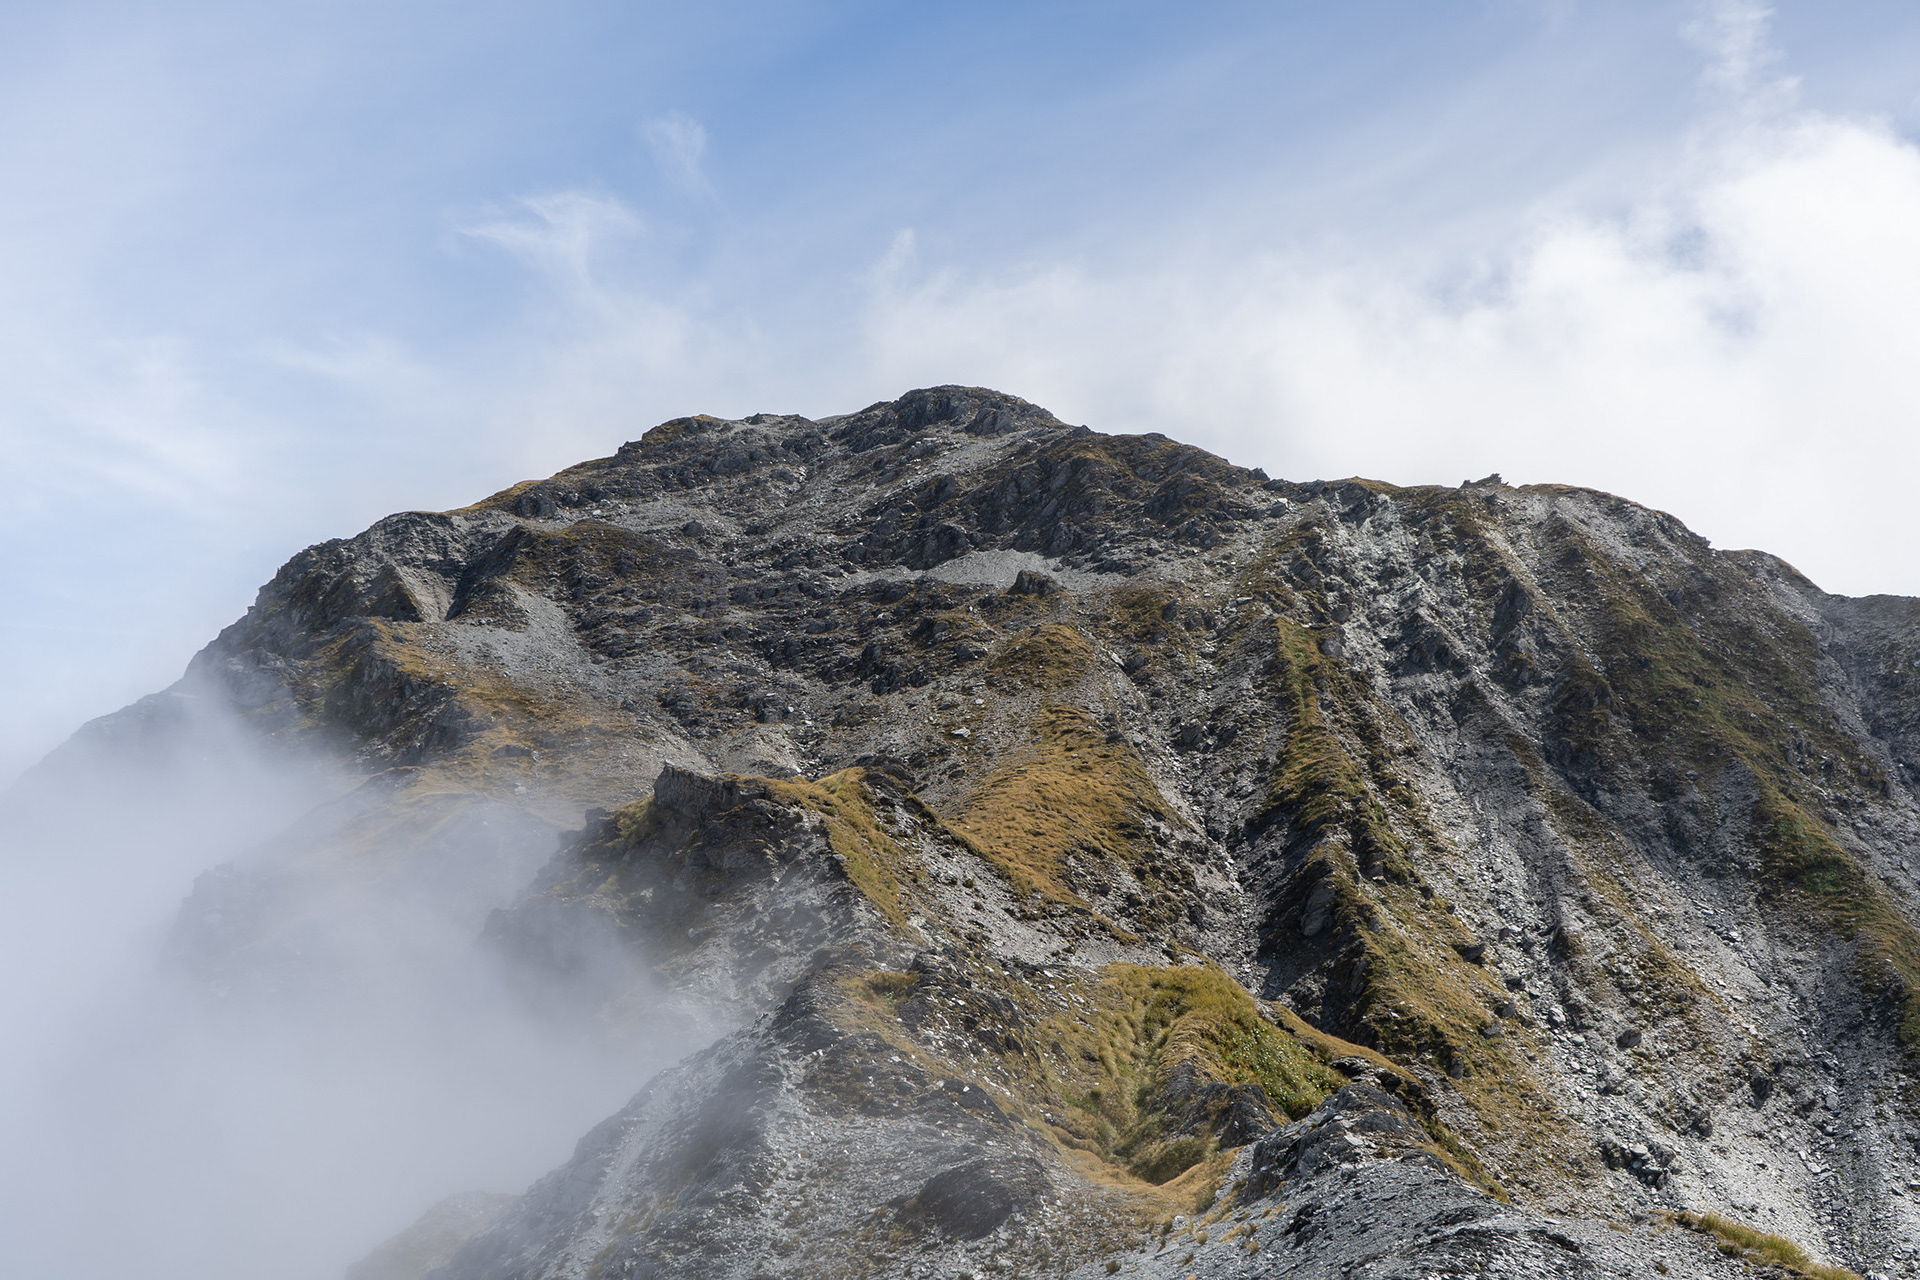
The southern face of pt. 1718, the route through is actually reasonably easy and largely hugs the left hand side of the ridge.

My uncertainty led me to decide to divert to Mullins Hut via Mt Ross, which on paper is a much worse choice and would have stymied my exit timing. Fortunately I recognised this after descending 100m into the Darby basin, so I reclimbed and ultimately pushed onwards to pt . 1718. Despite its appearance, it's actually easy travel right through and simply involves staying on the left-hand edge of the pt. 1510 / pt. 1718 dividing ridge.
By this point, the tussock had given way to shattered rock and smatterings of views between the long patches of blanketing cloud. There was a section around 1680m where the otherwise broad and eroded ridge comes to a sharp edge, and in the whiteout conditions I wasn't keen to commit to the ridge without knowing what was beyond. I dropped down a slip to its right hoping to sidle under, but without much visibility it was an unproductive endeavour and only seemed to show the eastern aspect of the crest was cliffed for some distance.

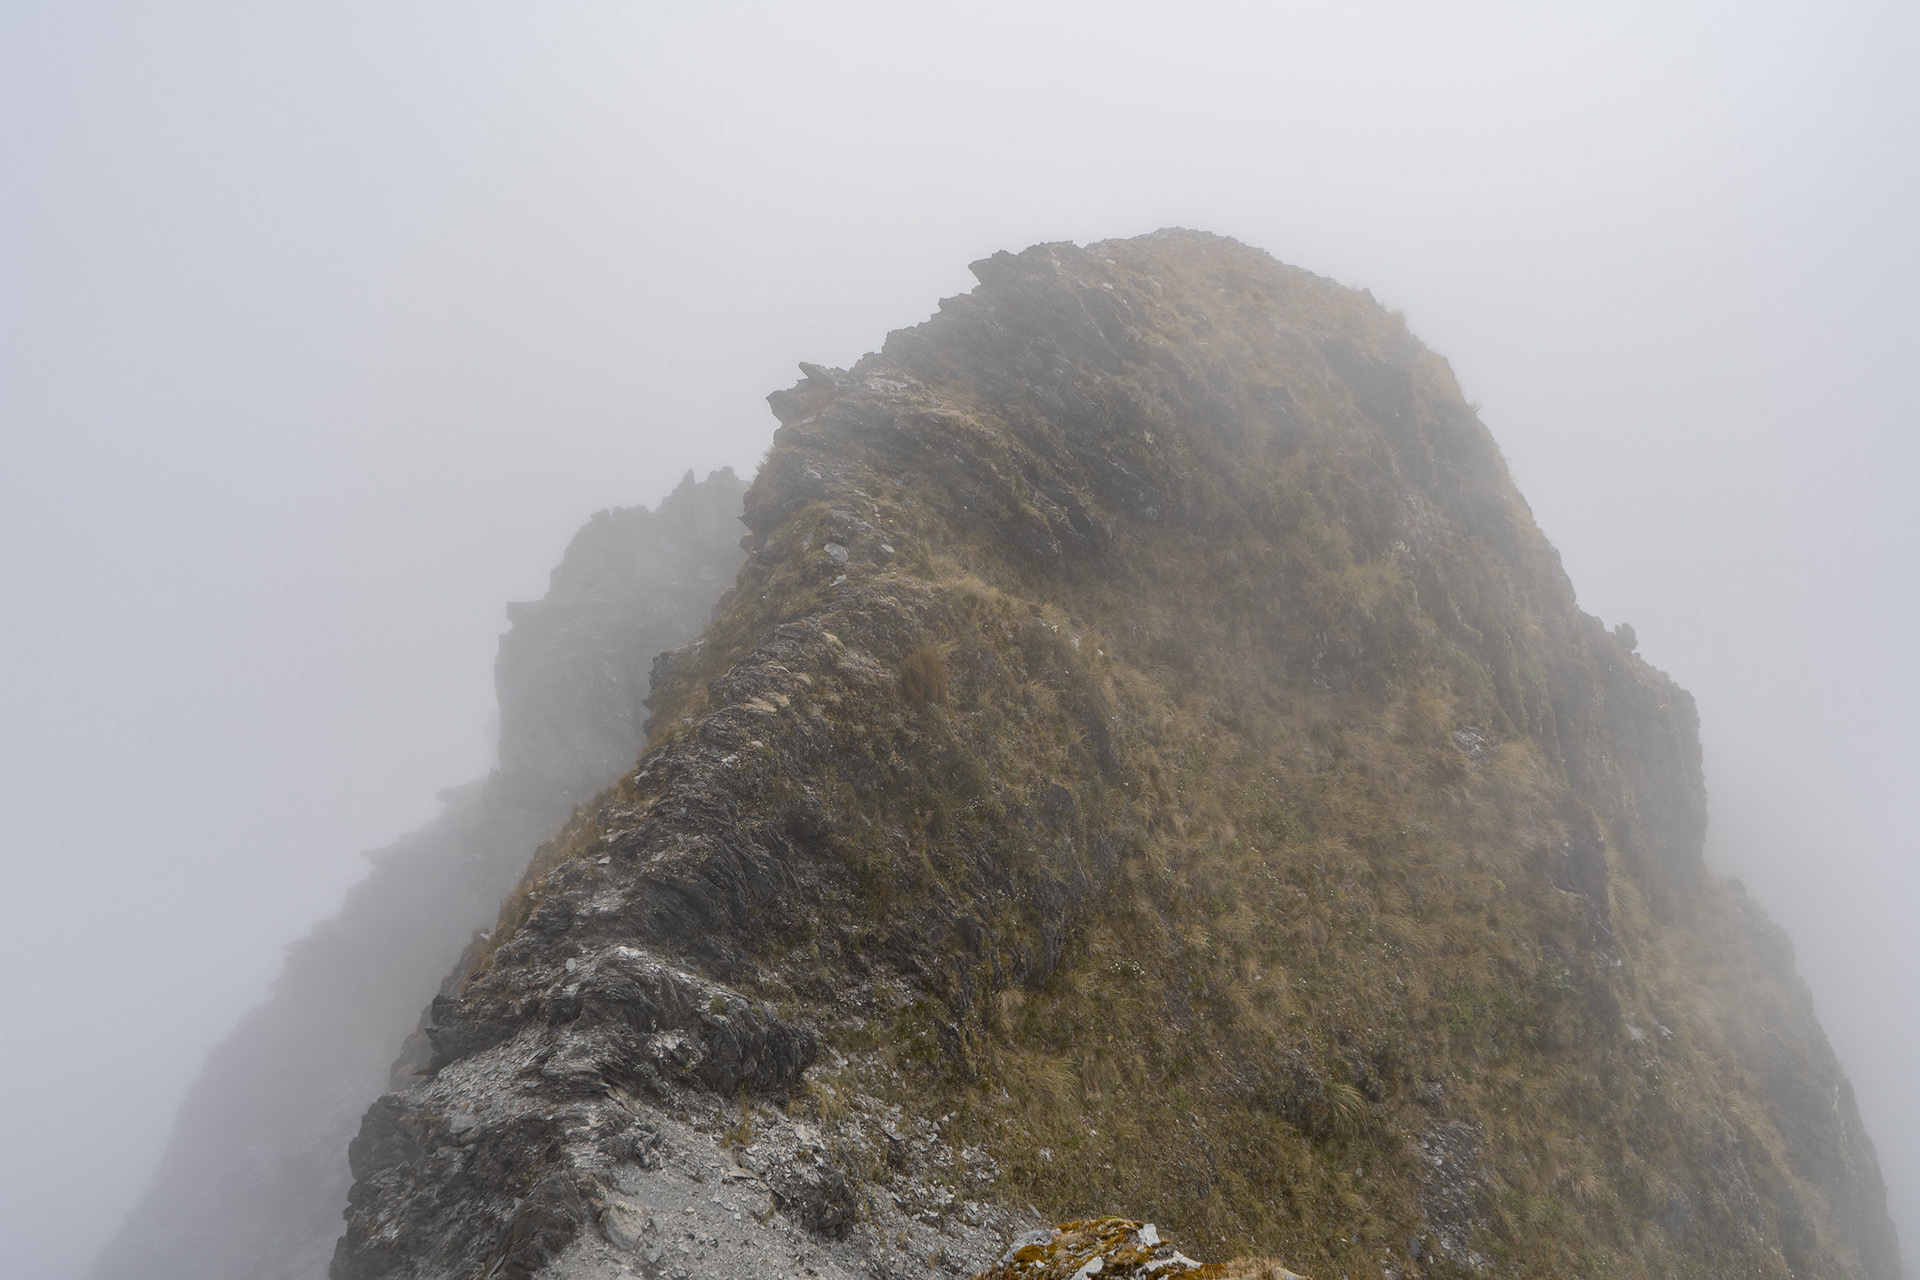
Neither the left or right hand sidles are great here, but fortunately this short section is the crux.

I returned to the crest and considered a drop to the west, down slipped flanks into the unknown. It all seemed like a lot of work simply because of the fear of what lay on the crest behind, so eventually I sucked it up and headed through the step in the ridge. It had been almost an hour lost on the slip exploration, and took all of 30 seconds to get through the narrow pinch and onto easy travel again - sometimes you can be too conservative to the point of it being counterproductive.
Beyond the next saddle, a short patch of climbing led to the broad faces under Mt O'Connor. Despite the shallowness of the terrain, it's not straightforward navigation due to the blocky rock interspersed with narrow slots of tussock. At this point, I was out of water and was rather keen for more. There was a marked tarn a few kilometres ahead, but fortunately the cloud was beginning to disperse and I could see a blessed snow patch ahead. A bit more travel and I was there with my gas cooker, restocking as much as my hydration reservoir would allow.

Approaching Mt O'Connor, my desired snowpatch in the distance.

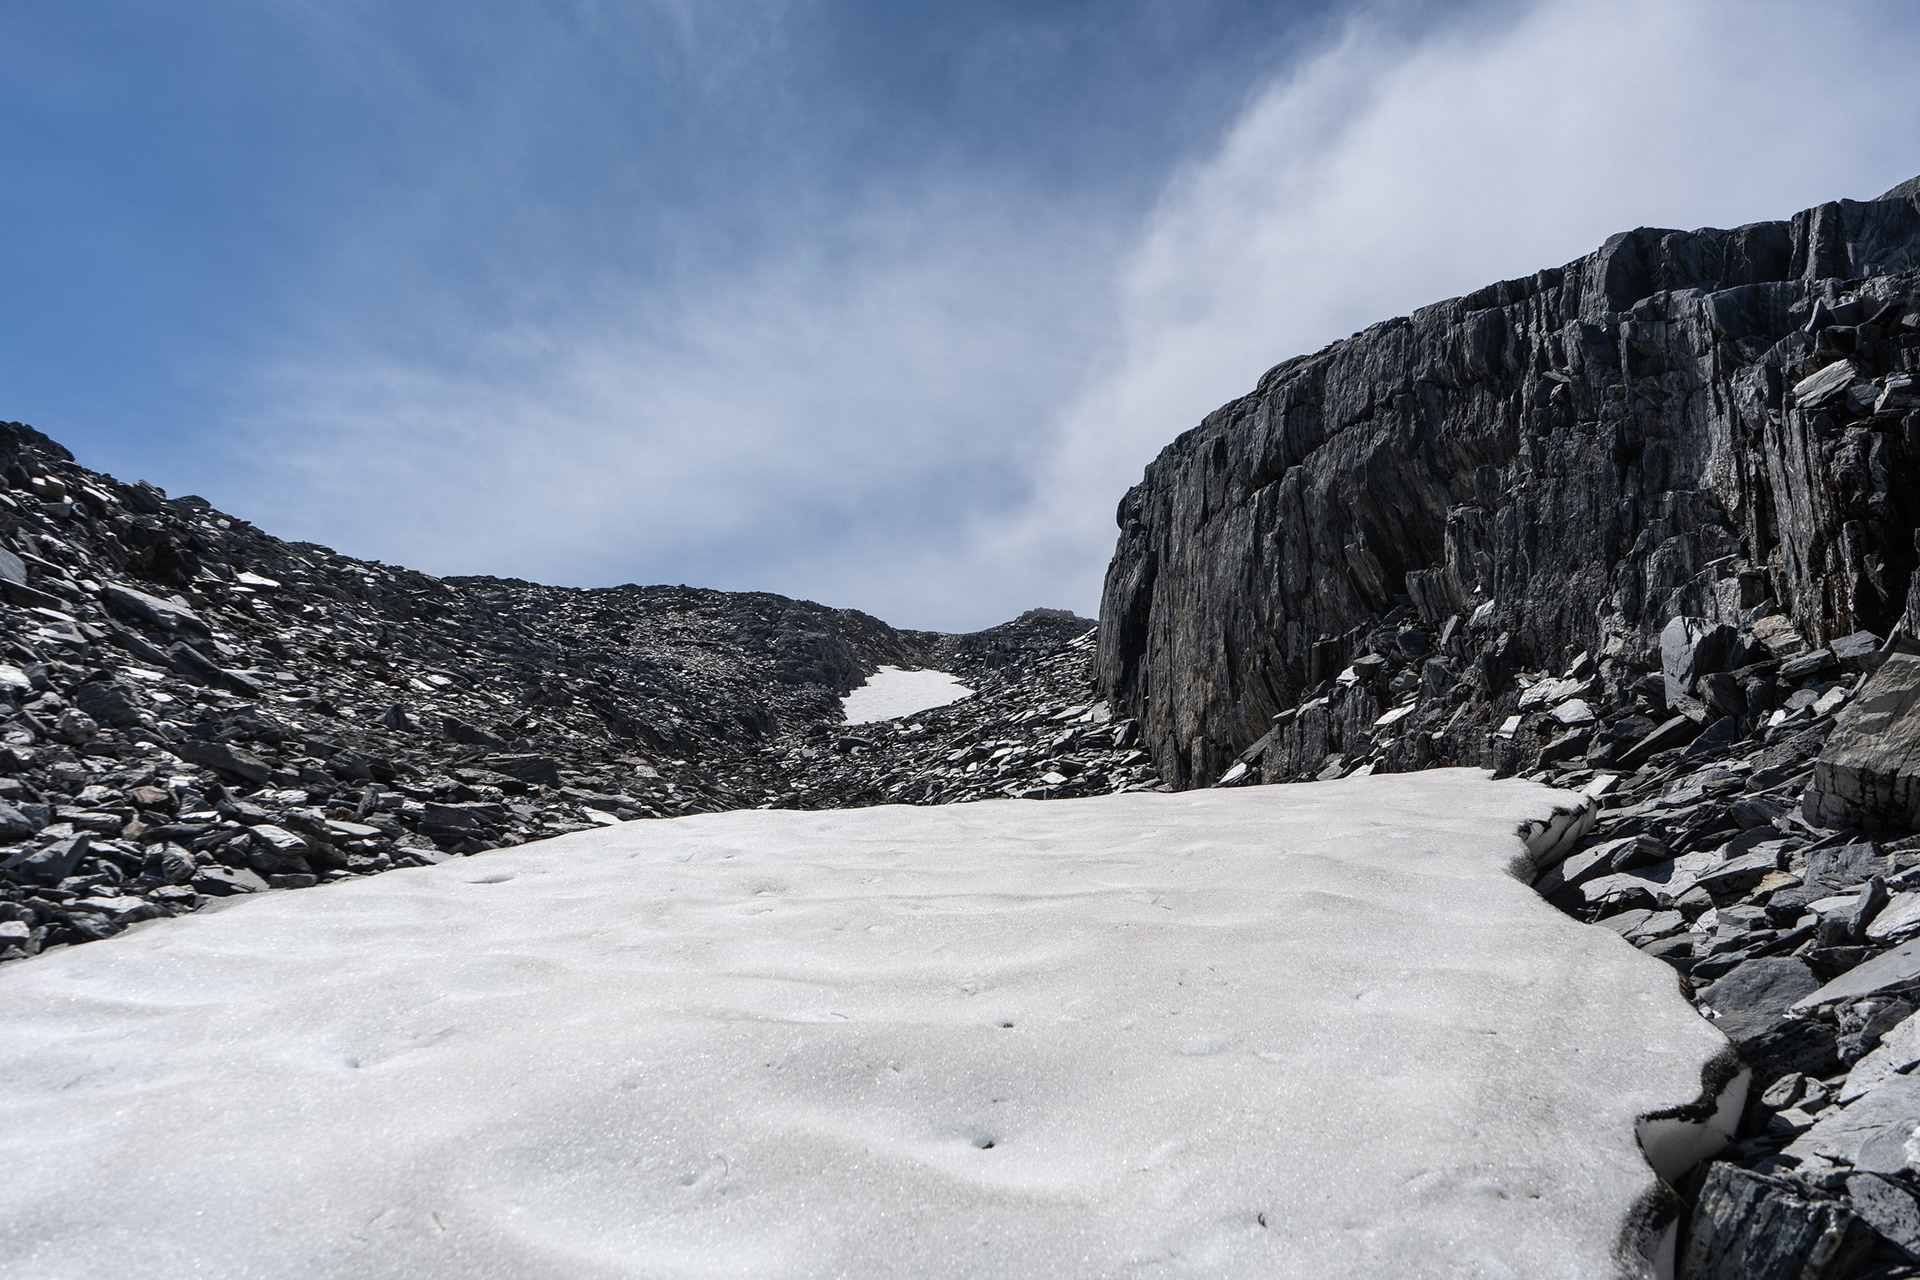
A wonderful water source, with my hydration situation sorted this felt like the first time I was really in control of the day's travel.

My thirst sated, I continued upwards. Permolat actually suggests traversing a bench at 1600m for this section, but I wasn't going to drop back into the cloud in search of this feature. It would be slightly more direct than cutting high, but much of a muchness in terms of elevation as one would still need to ascend towards pt. 1780 as cliffs block the sidle east of the point. The surrounds of the Mt O'Connor summit have lovely vertically-inclined blocks, though the summit trig itself has toppled. In my tired state, I decided it wasn't worth the 100m of travel and 30m of elevation gain to have a closer look.

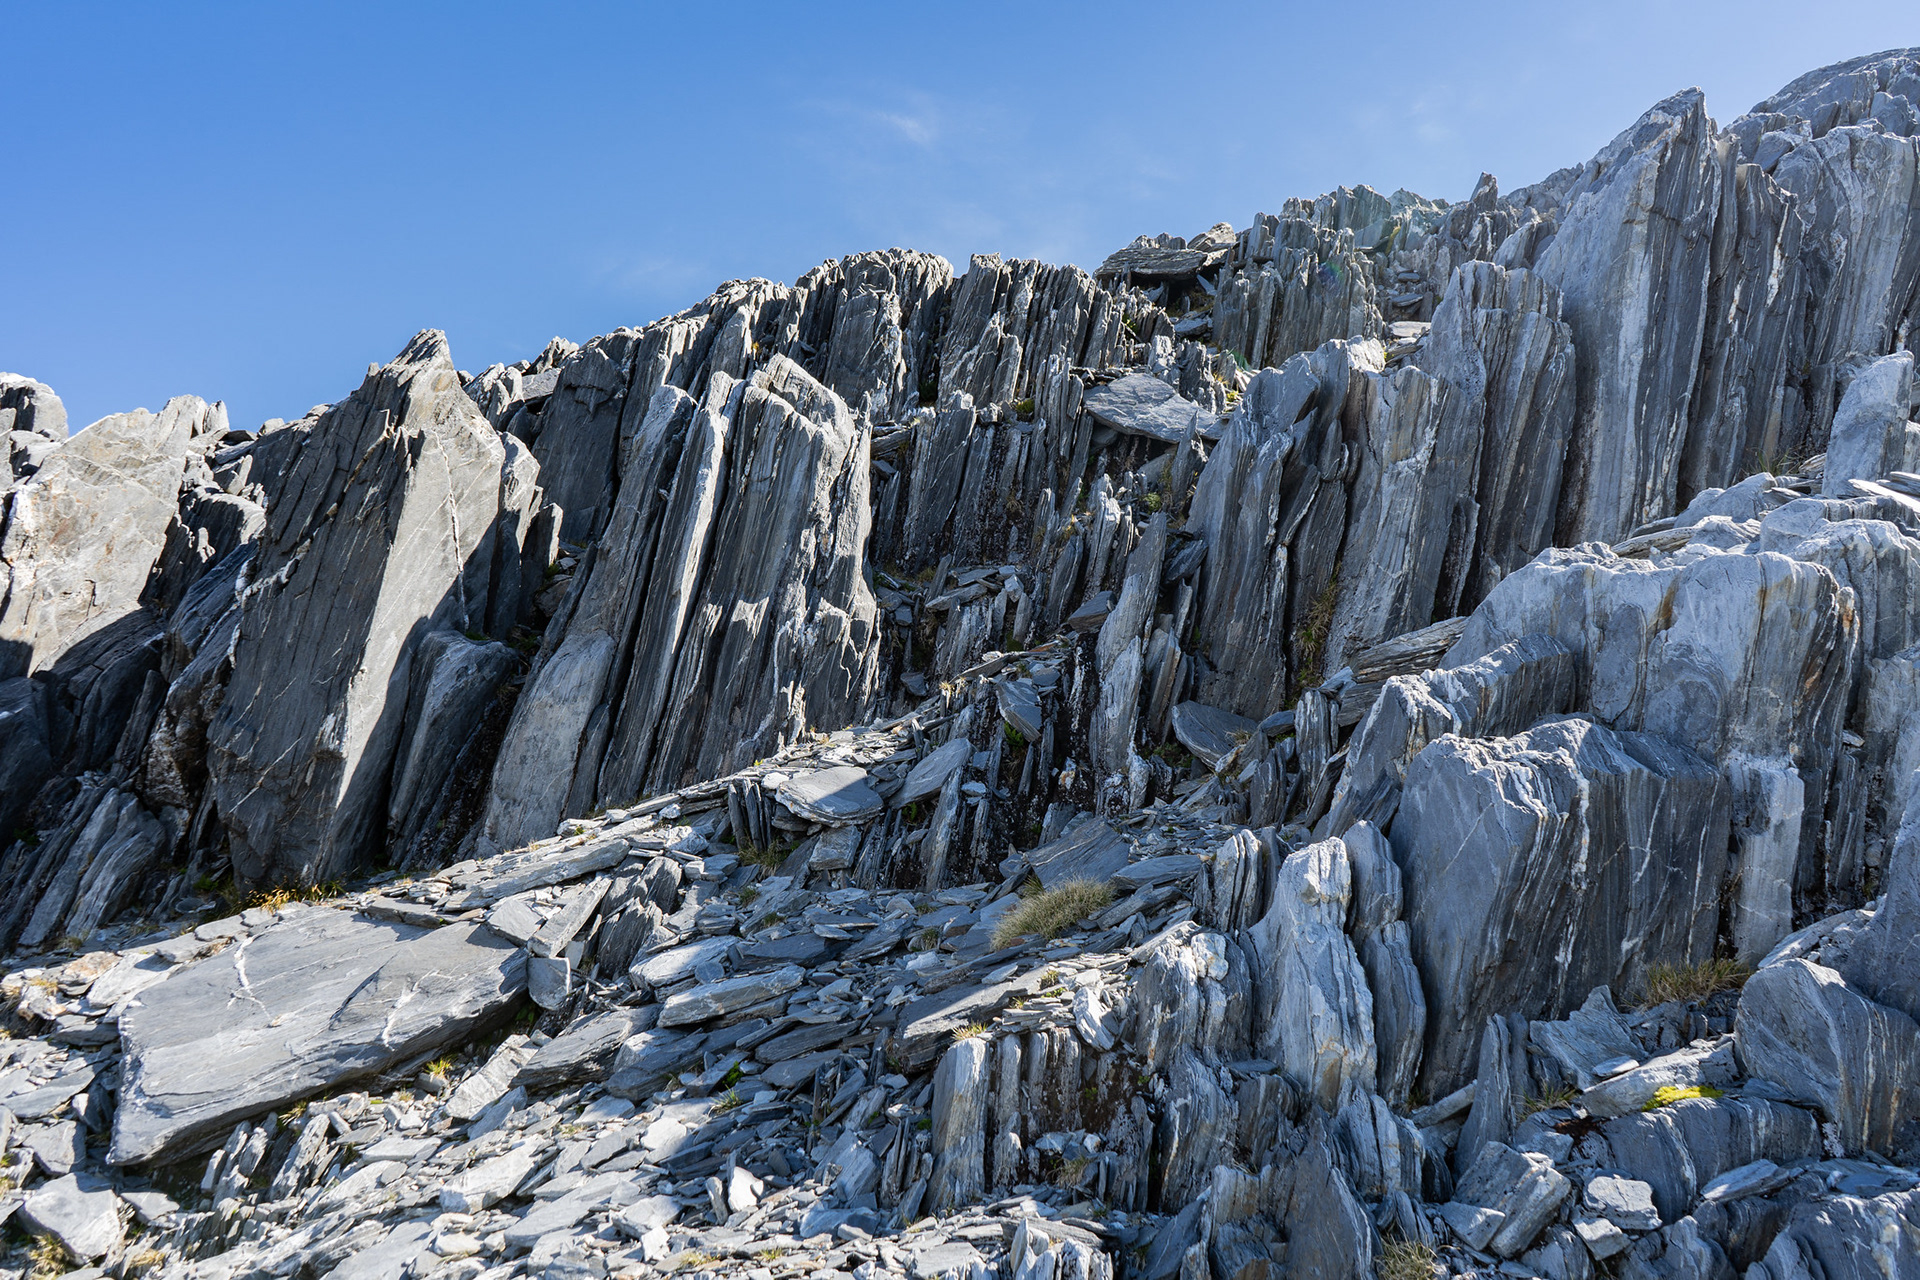
Rock formations near the summit of Mt O'Connor, amazing cleavage and orientation.

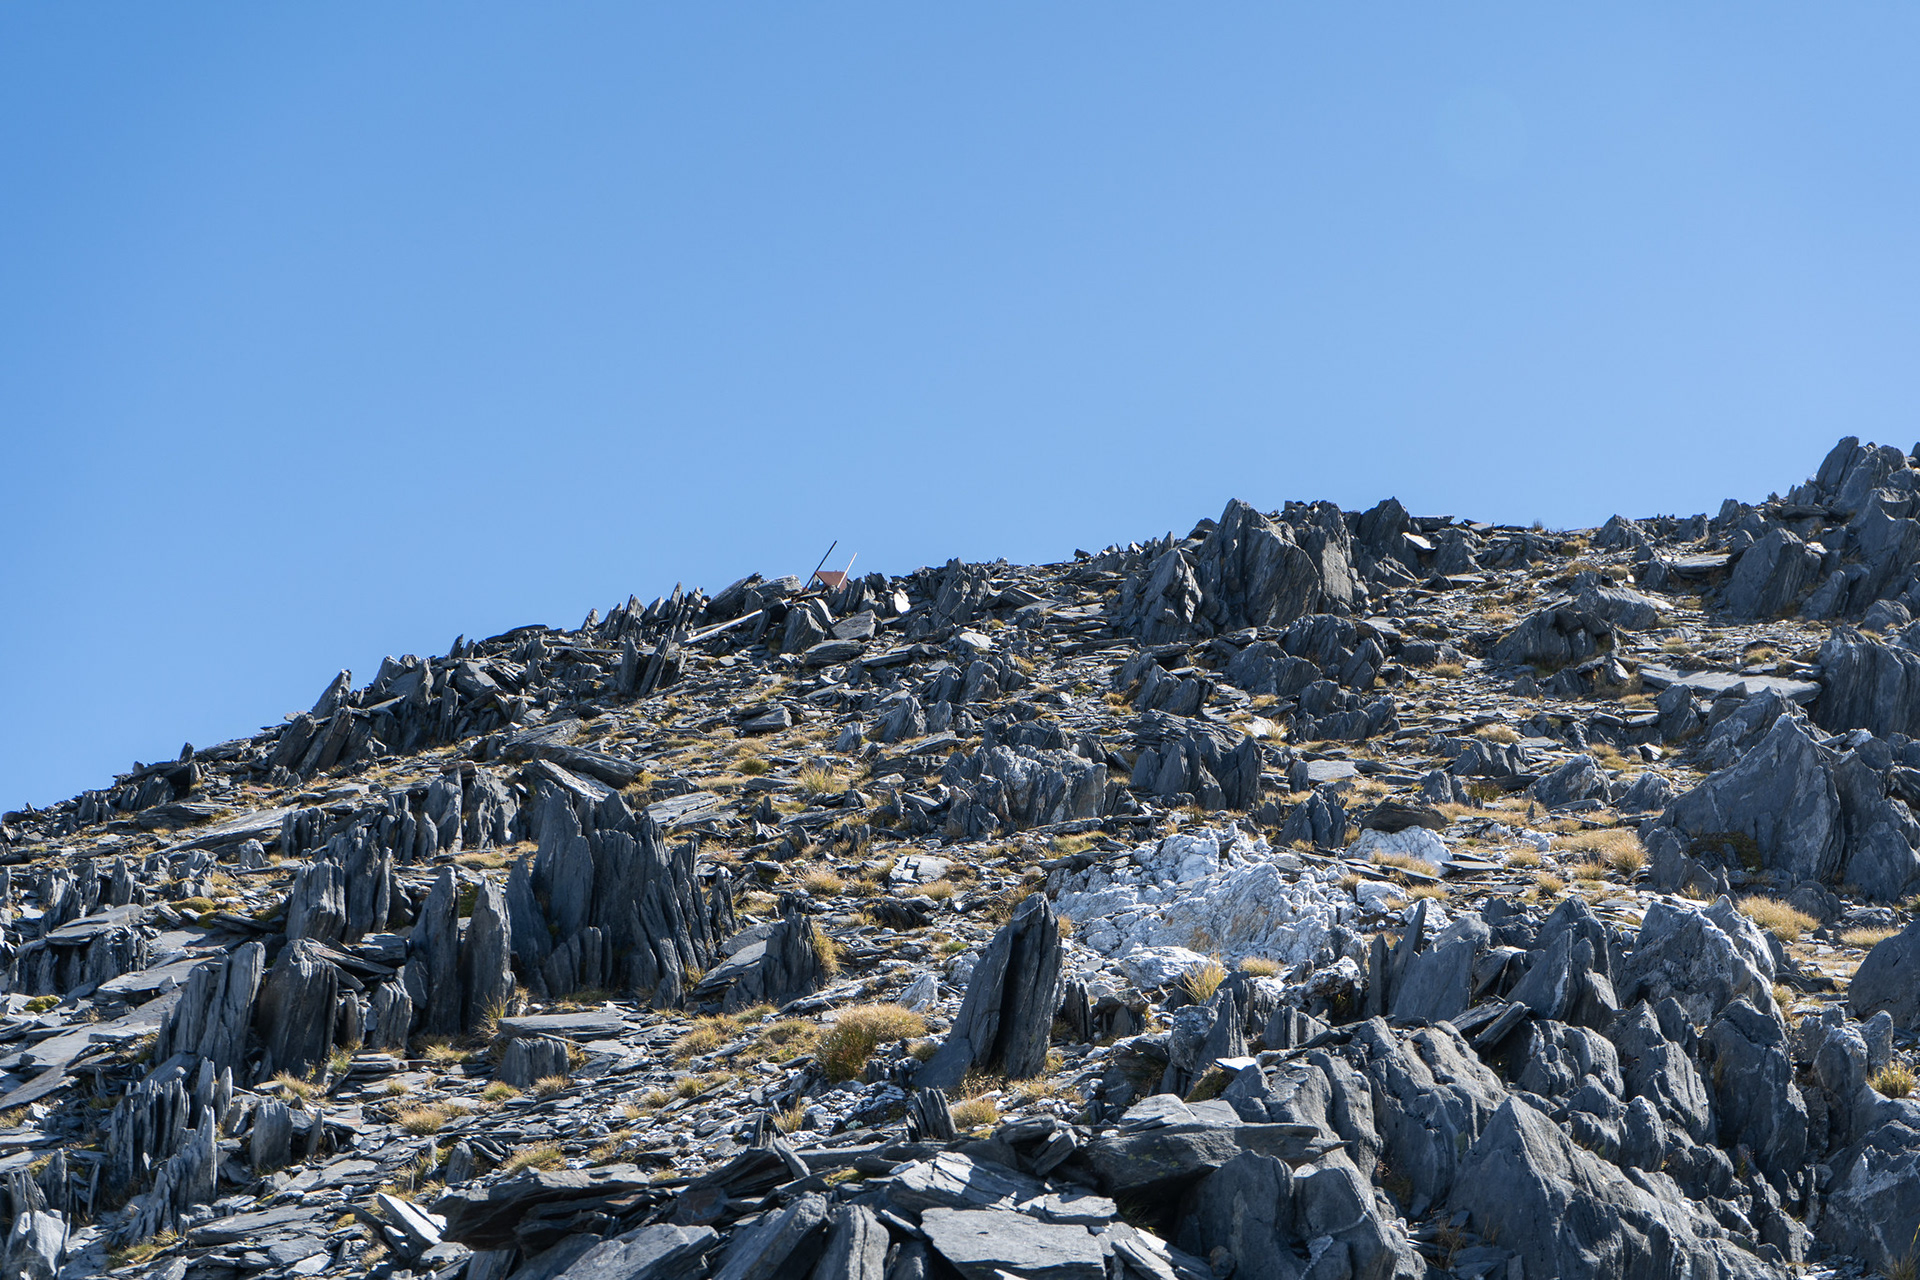
The true summit of Mt O'Connor, remnants of the trig visible.

If you do sidle high like I did, it's important to stay around 1760 - 1780m due to the presents of extensive small cliffs on the NE face of the peak. They're not easily discernible from above and would be awkward in clag, though the viable gut is obvious from below.

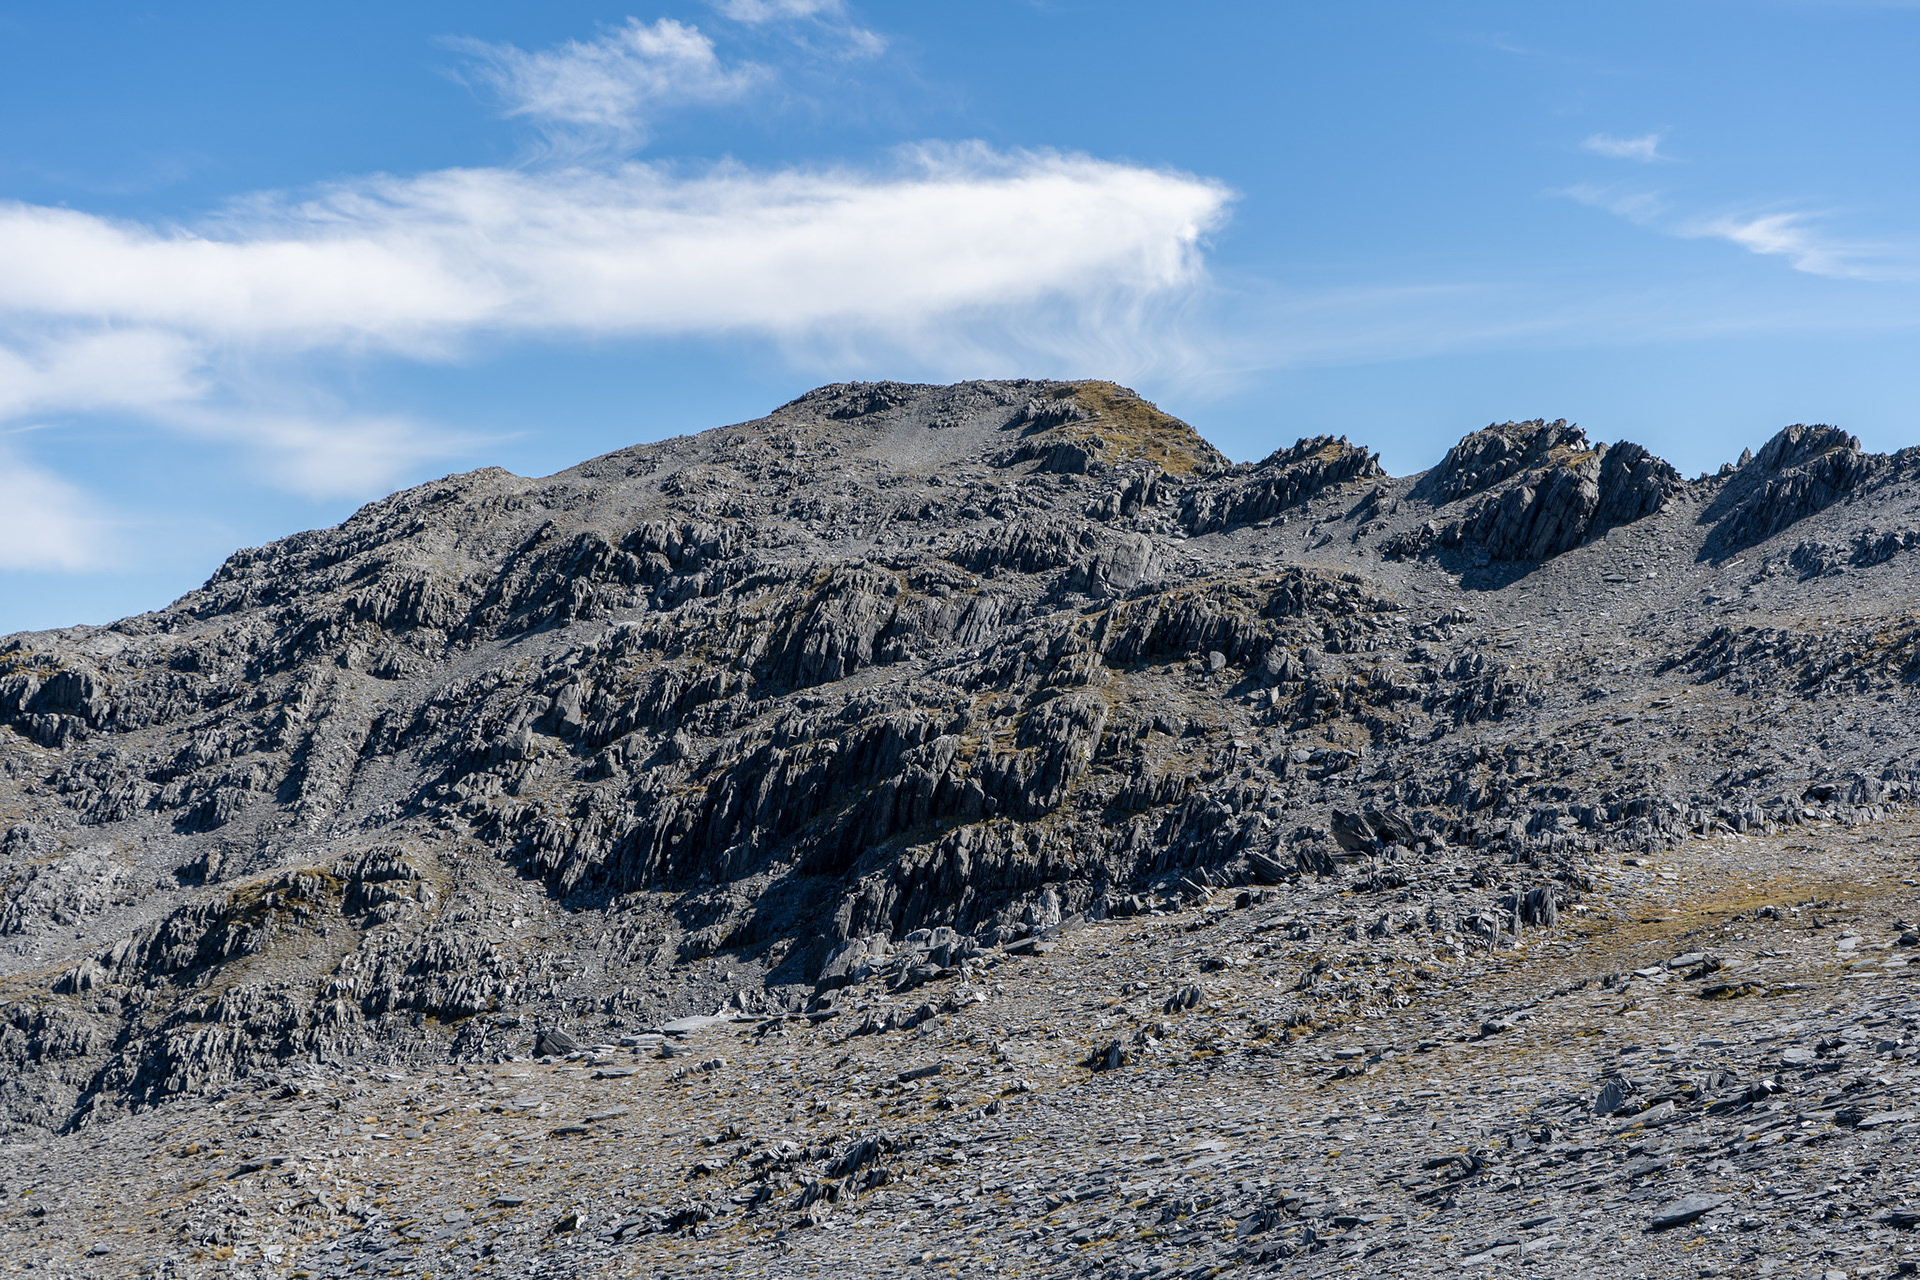
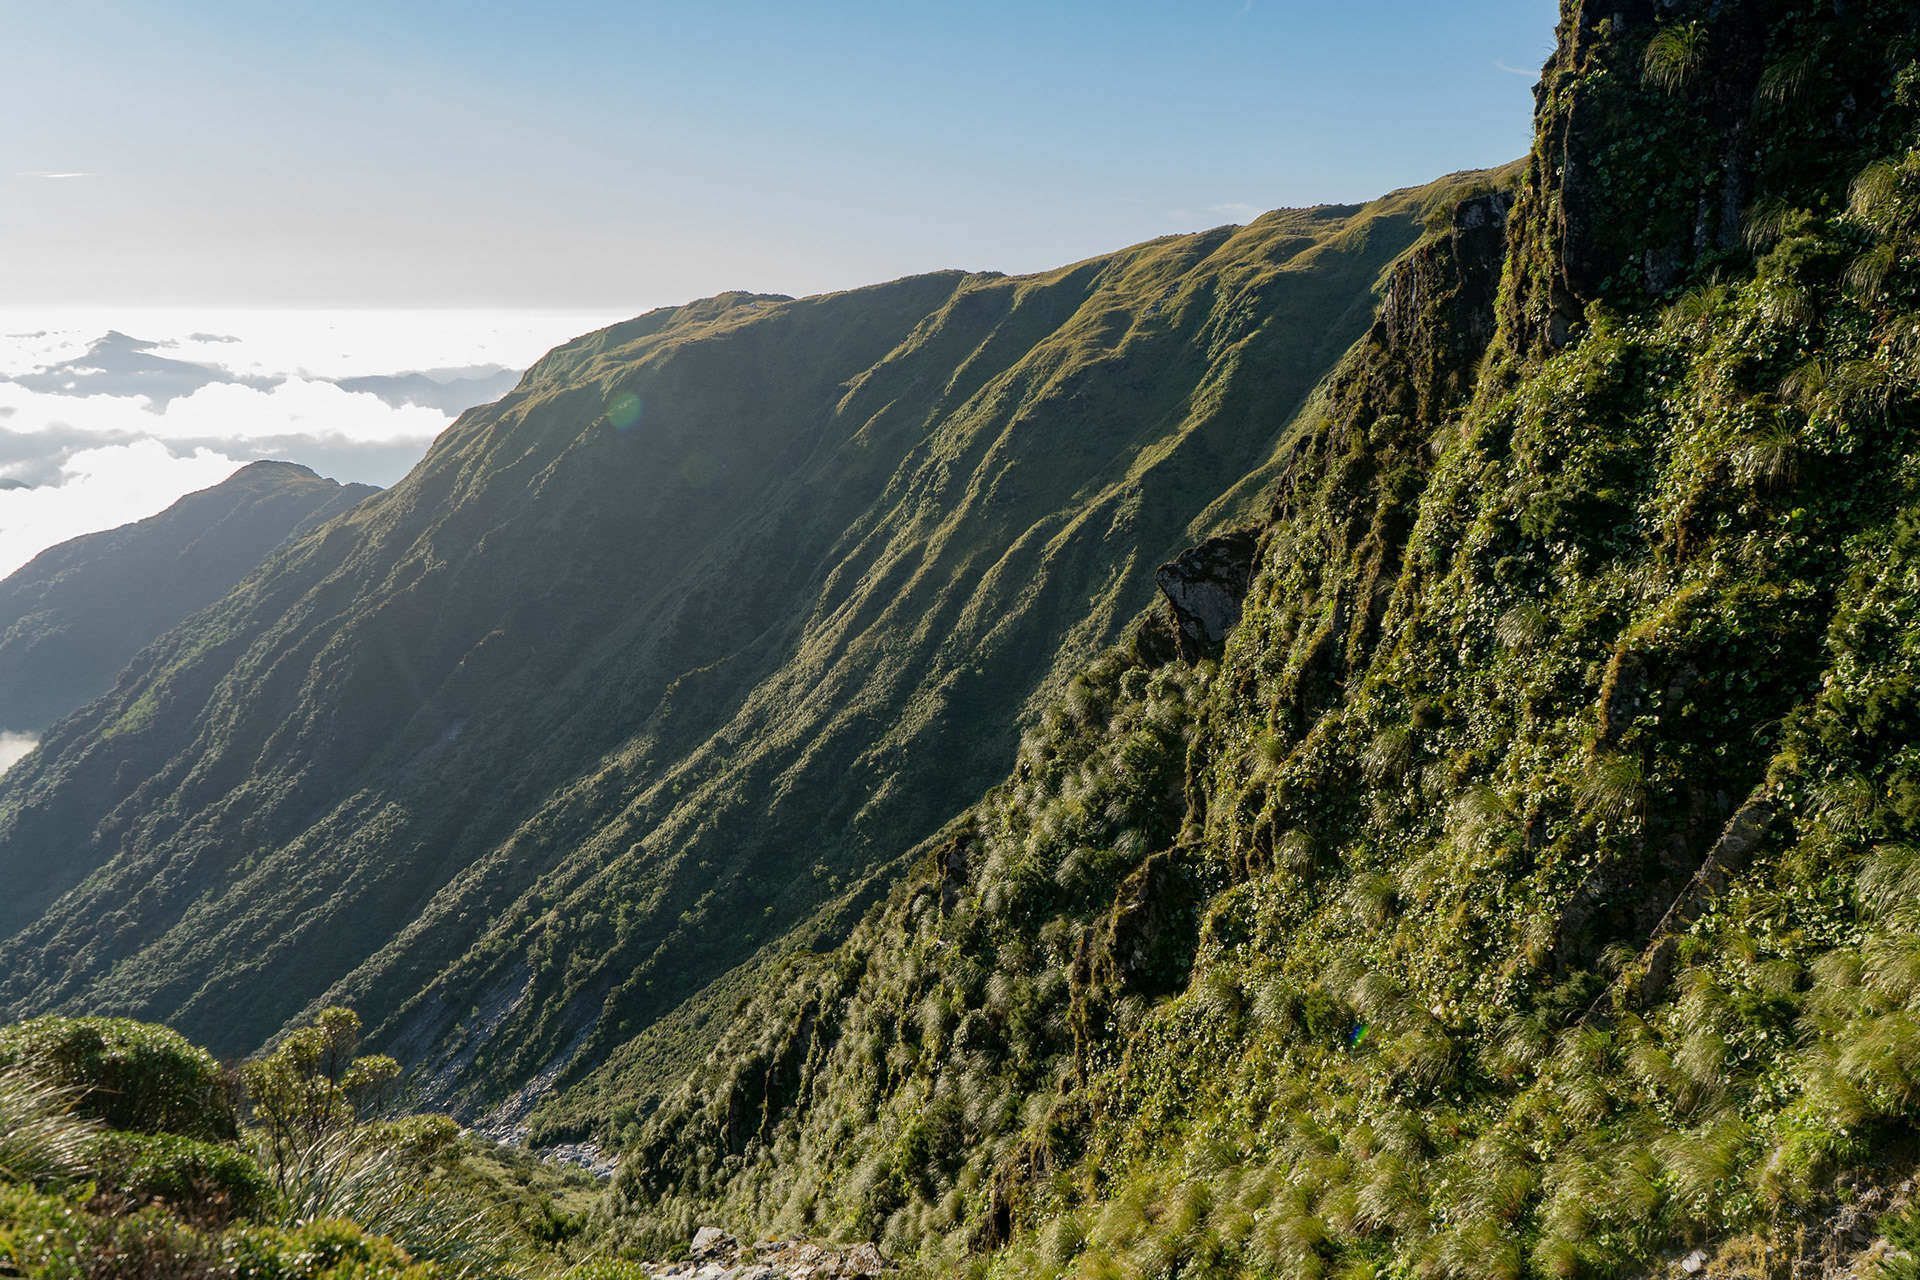
Looking back to Mt O'Connor, the cliffs are not severe but it would be a bit committing if you dropped into them.

Fortunately, most of the remainder of the range is broad and eroded and presents easy travel. I encountered a few guys hunting chamois, of which I had seen one in one of the scrub guts that impinge the range crest. I'm not sure if the hunters had flown in, but there's reasonably easy access onto the range via the Toaroha Valley. I was probably a bit incoherent in my tired state, but they were nice enough and we soon parted ways.

The beautiful flatter parts of Diedrichs Range, with Jumble Top in the distance.

Looking back to the saddle between Mt Ross and pt. 1718, with the Main Divide in the distance.
After plodding along the range for a bit longer, I had a decision to make. I needed to reach Gerhardt Spur Biv, whose namesake spur intersects with Diedrichs Range just south of Jumble Top. The main complexity here is that the small knob on the ridge at the head of Jumble Creek has an apparently difficult downclimb to its north, a section which has turned parties back previously. I have a mixed history with sections that Permolat describes as difficult, some of which I've breezed through and other ones which have forced detours. I decided that I would proactively avoid that section by dropping down the gully between pts. 1610 and 1612, which runs west into Diedrichs Creek. From the range crest, I could see the biv on its perch sitting tantalisingly amongst the clouds.

Gerhardt Spur, with the bivouac sitting on the lower plateau.

Despite Permolat describing the gully as scree, it's not - it's slaty loose rock, with a couple of boulder chokes which require scrub sidles. I actually quite rate it as a route as it's directly and mostly clear, but it will take close to an hour to get from the range crest to where the two small streams converge at 1140m. The quicker route is probably to cross pt. 1612 and then descend one of those nearby gullies, thus significantly reducing the amount of reclimbing necessary. The route I took required a reclimb of about 200m, which was hard going after the second long day in a row.

Apologies for the blown highlights, but this shows the face to be climbed and the biv.

Finding your way up to the range crest from the bottom of the gut I took is at your discretion. The shallower slopes are found a bit lower, but there are increasing amounts of scrub and spaniards in the same vein. I just turned right and bombed up the spur which hits the crest at about 1340m, which trades scrub for small cliff bands and terribly steep upper slopes. There is a lot of hanging off poorly bonded vegetation, along with a couple of exposed moves where a broken handhold might be scoring you a free helicopter ride. It's probably more prudent to drift left, keeping above the scrub bands.
It had been another long day, but as I pulled myself over the lip of the spur and onto a flat spot, I had a beautiful sensation awash over me. With trips like these, there is no promise that a route will go - it's quite different to a tracked route when you can have reasonable confidence the path will be viable. With trips like these, there's always a degree of uncertainty and so when the last of the difficulties is dispatched, that nervous sense of doubt can be dropped and you can fully prioritise enjoying the moment. Sitting amongst the tussock with the bivouac a few minutes away down easy slopes, it was time to savour the moment and watch the last of the twilight hues fade away behind the rich cloud inversion.

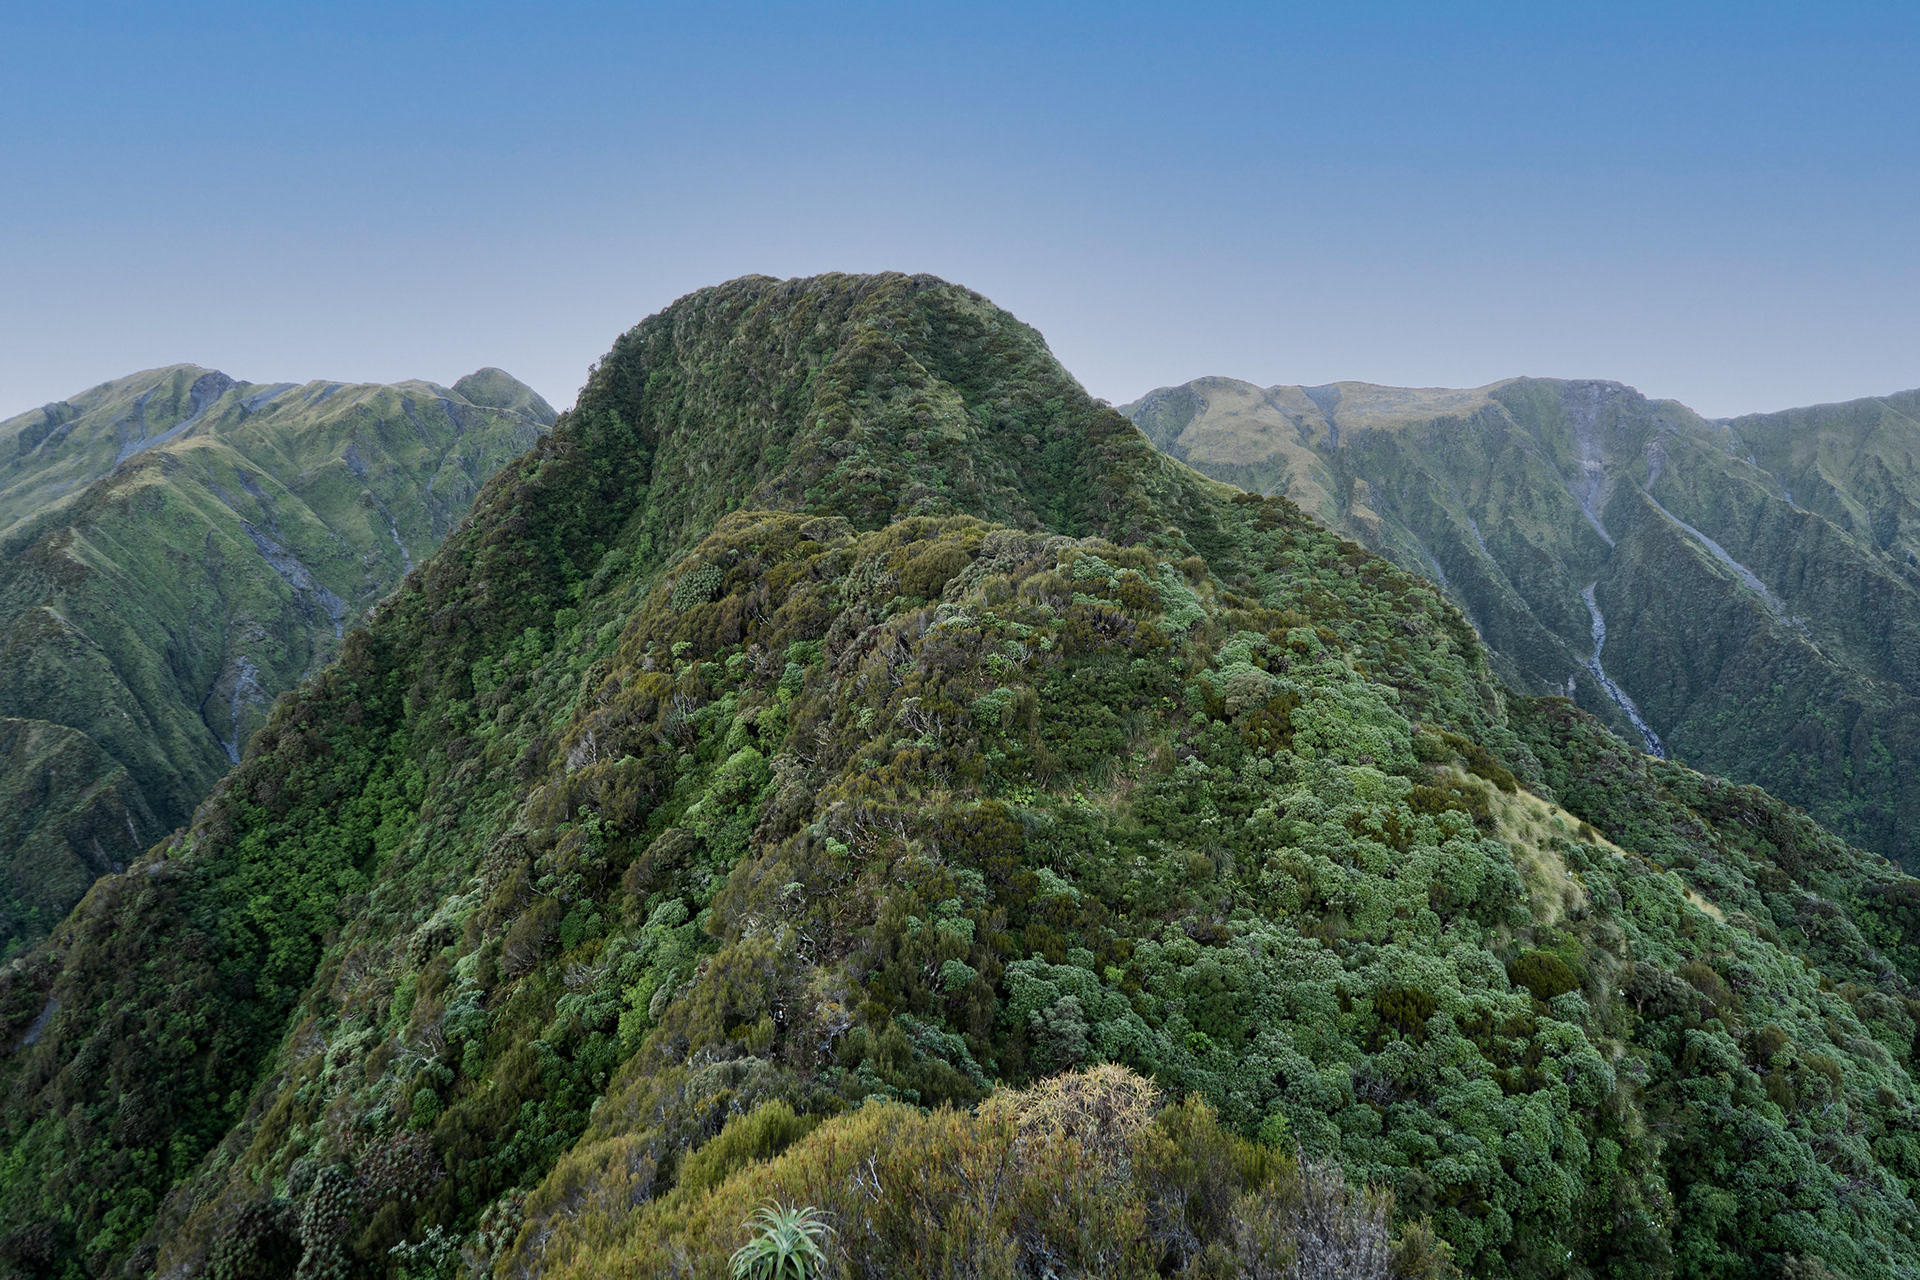
Looking down Gerhardt Spur as the last of the sun's warmth fades away.

A few minutes later, it was time to step through the front door of the biv to find another it was to be another solo occupancy. Despite it being well over the Permolat timings (i.e. 12h+), I had nothing but contentedness at the day's efforts. Perhaps surprisingly, I was in much better physical shape than the night before and found time to eat, choose a mattress and settle in for a well-deserved sleep.

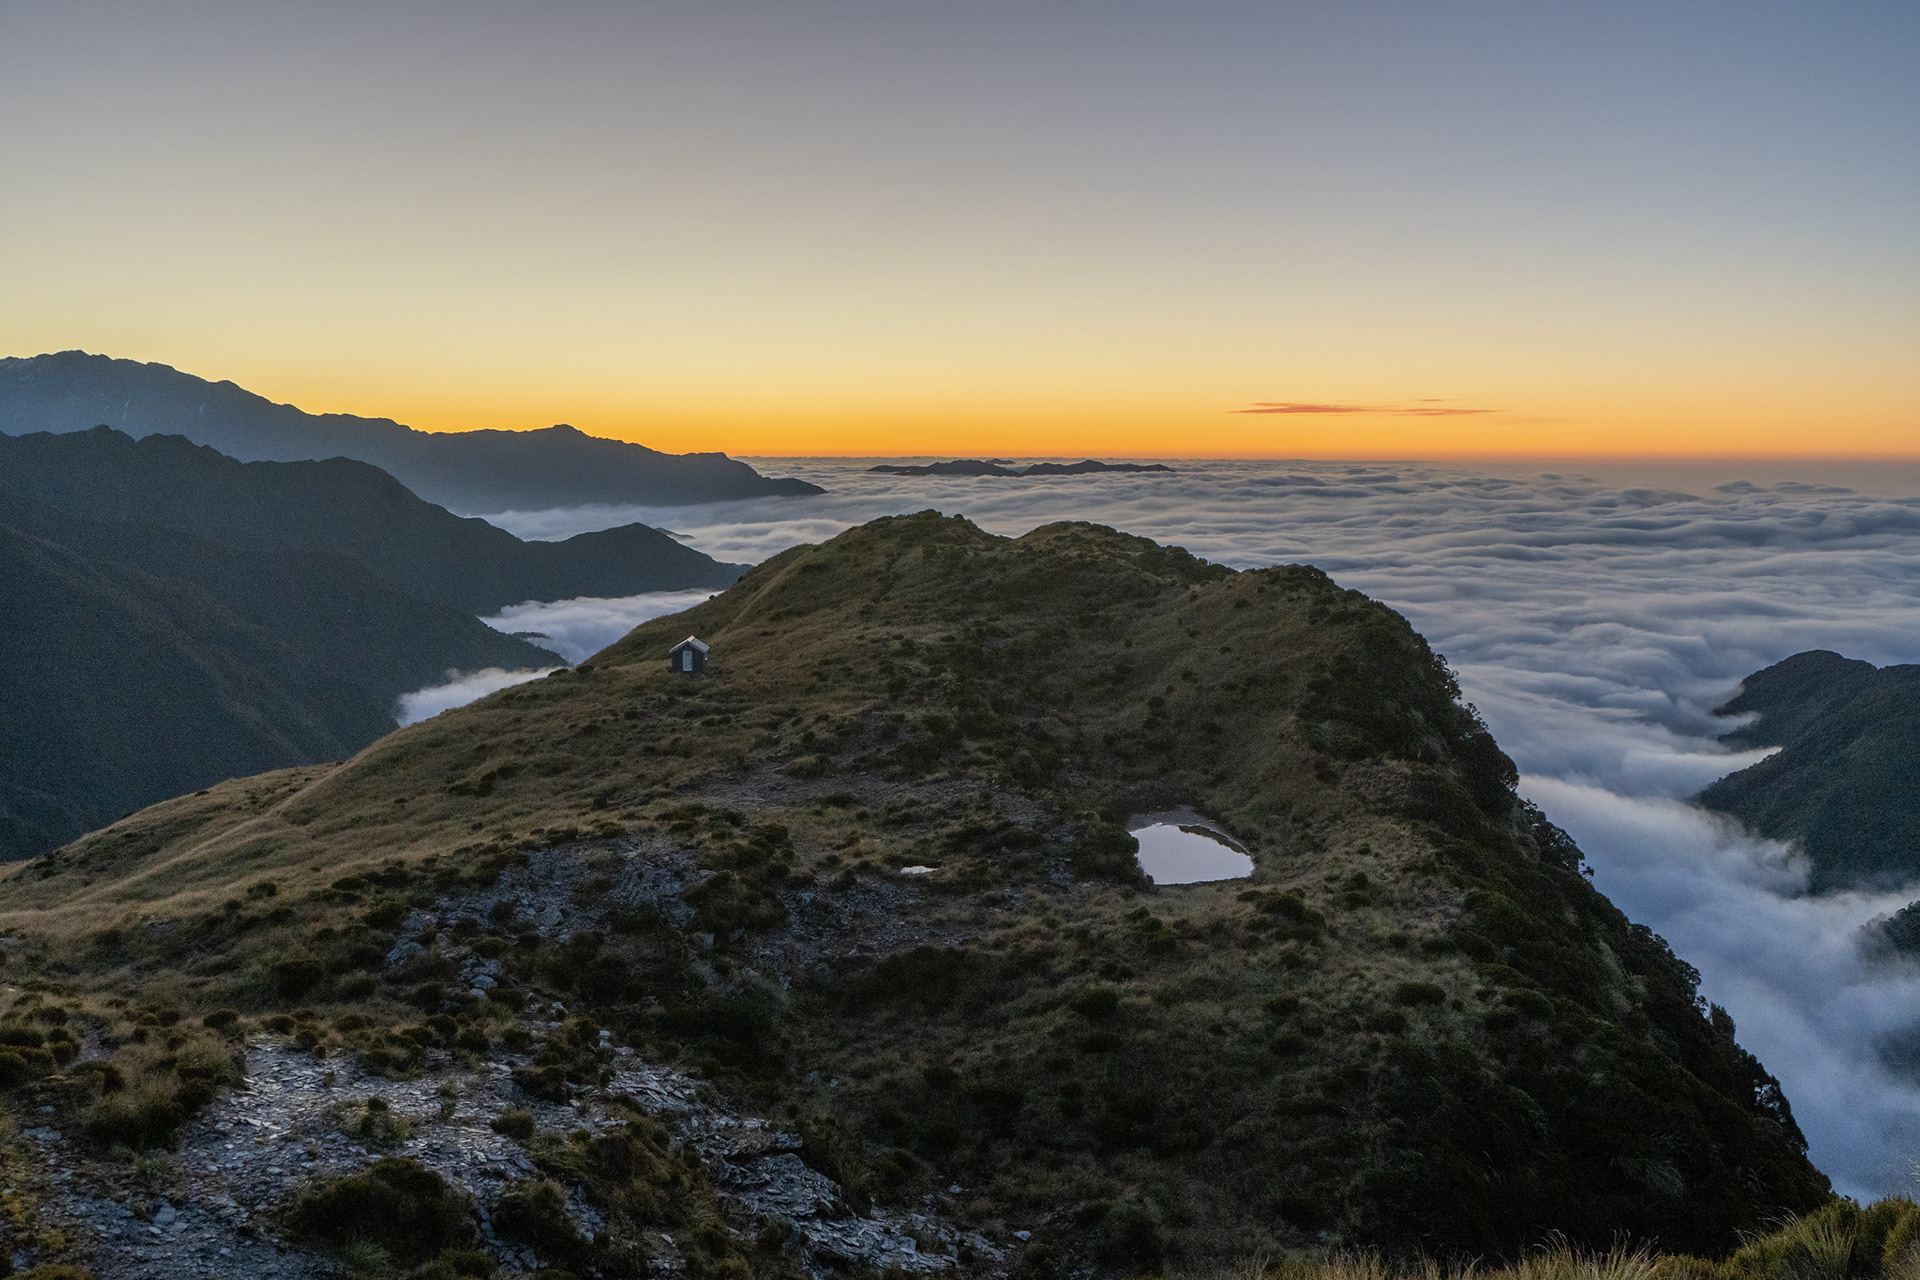
About to reach Gerhardt Spur Biv, with its lovely adjacent tarn.

I woke early the following morning, I needed to so that I could reach home in time to catch up with my in-laws. Heading out yielded more blue skies, a nice view up to the range crest and a chance to poke around the surroundings.

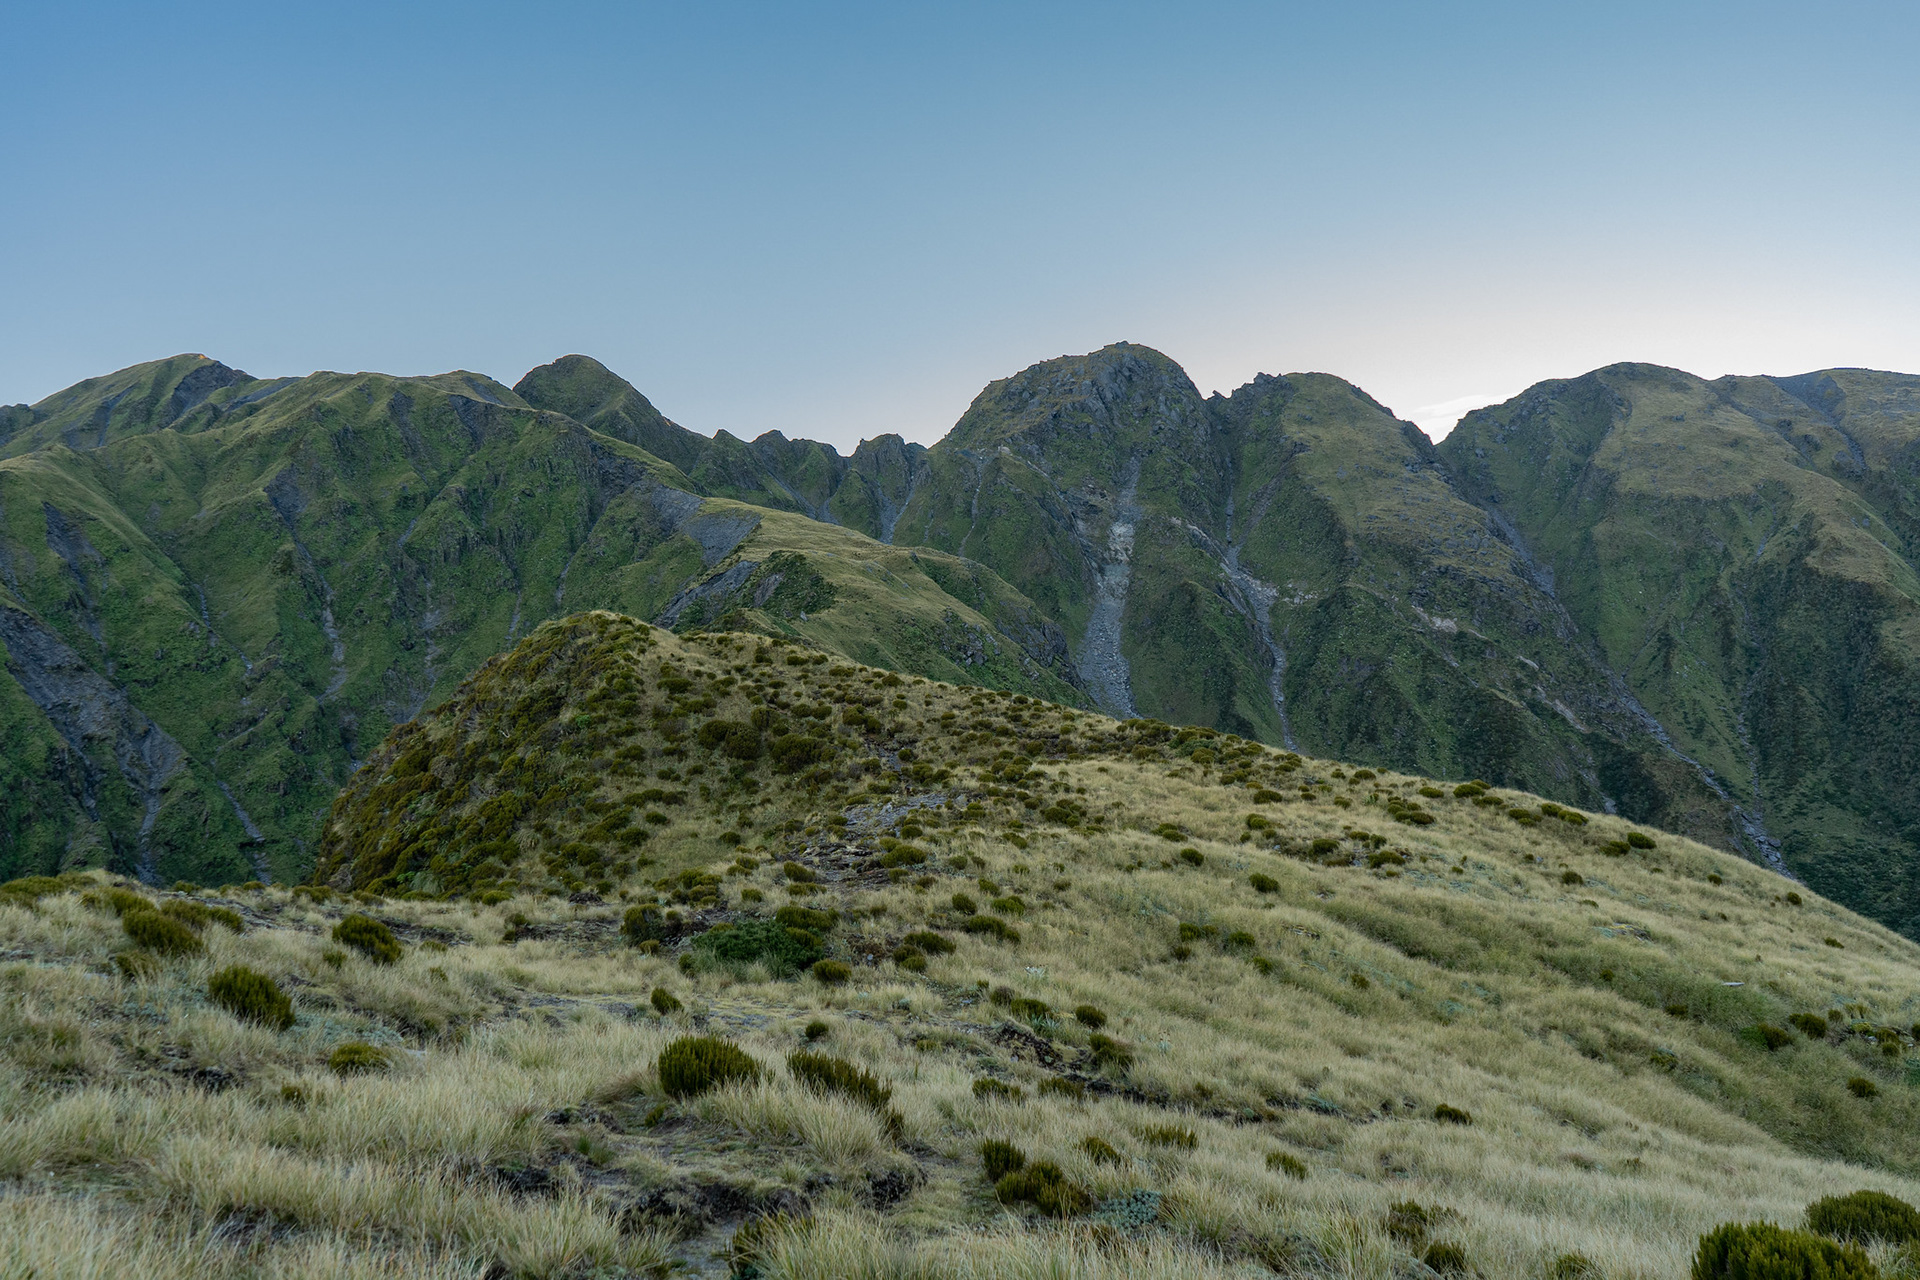
Looking back up Gerhardt Spur towards Diedrichs Range, the access gully I used the night before is visible on the right.

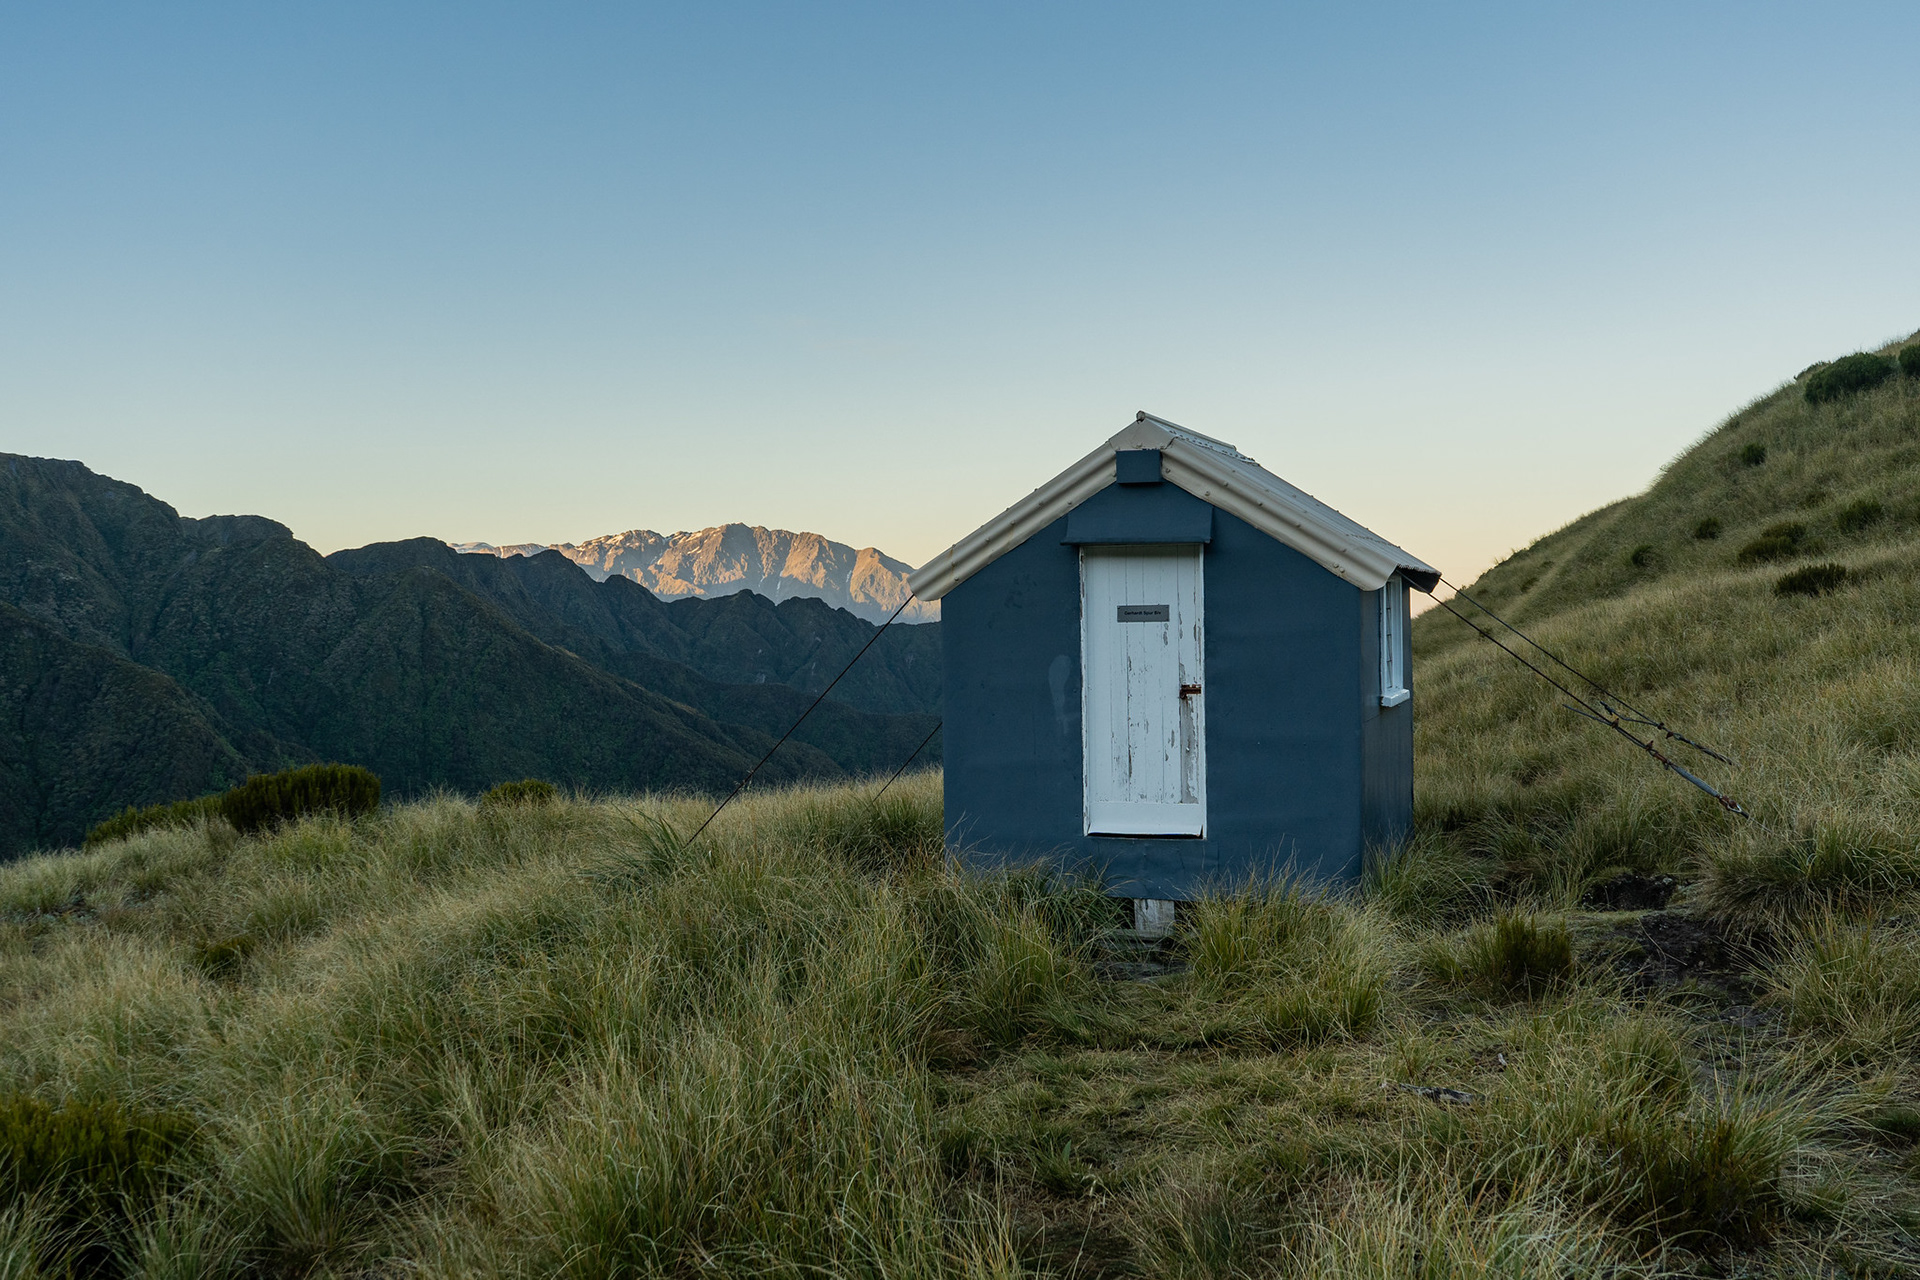
Gerhardt Spur Biv in the morning light, Mt Bowen in the distance.

Heading off from the biv, I was very fortunate in that a Permolat crew had recut the track down the lower spur earlier that year. The spur has quite a protracted scrub band, and one or two sections are quite narrow which has forced the trackline south. 

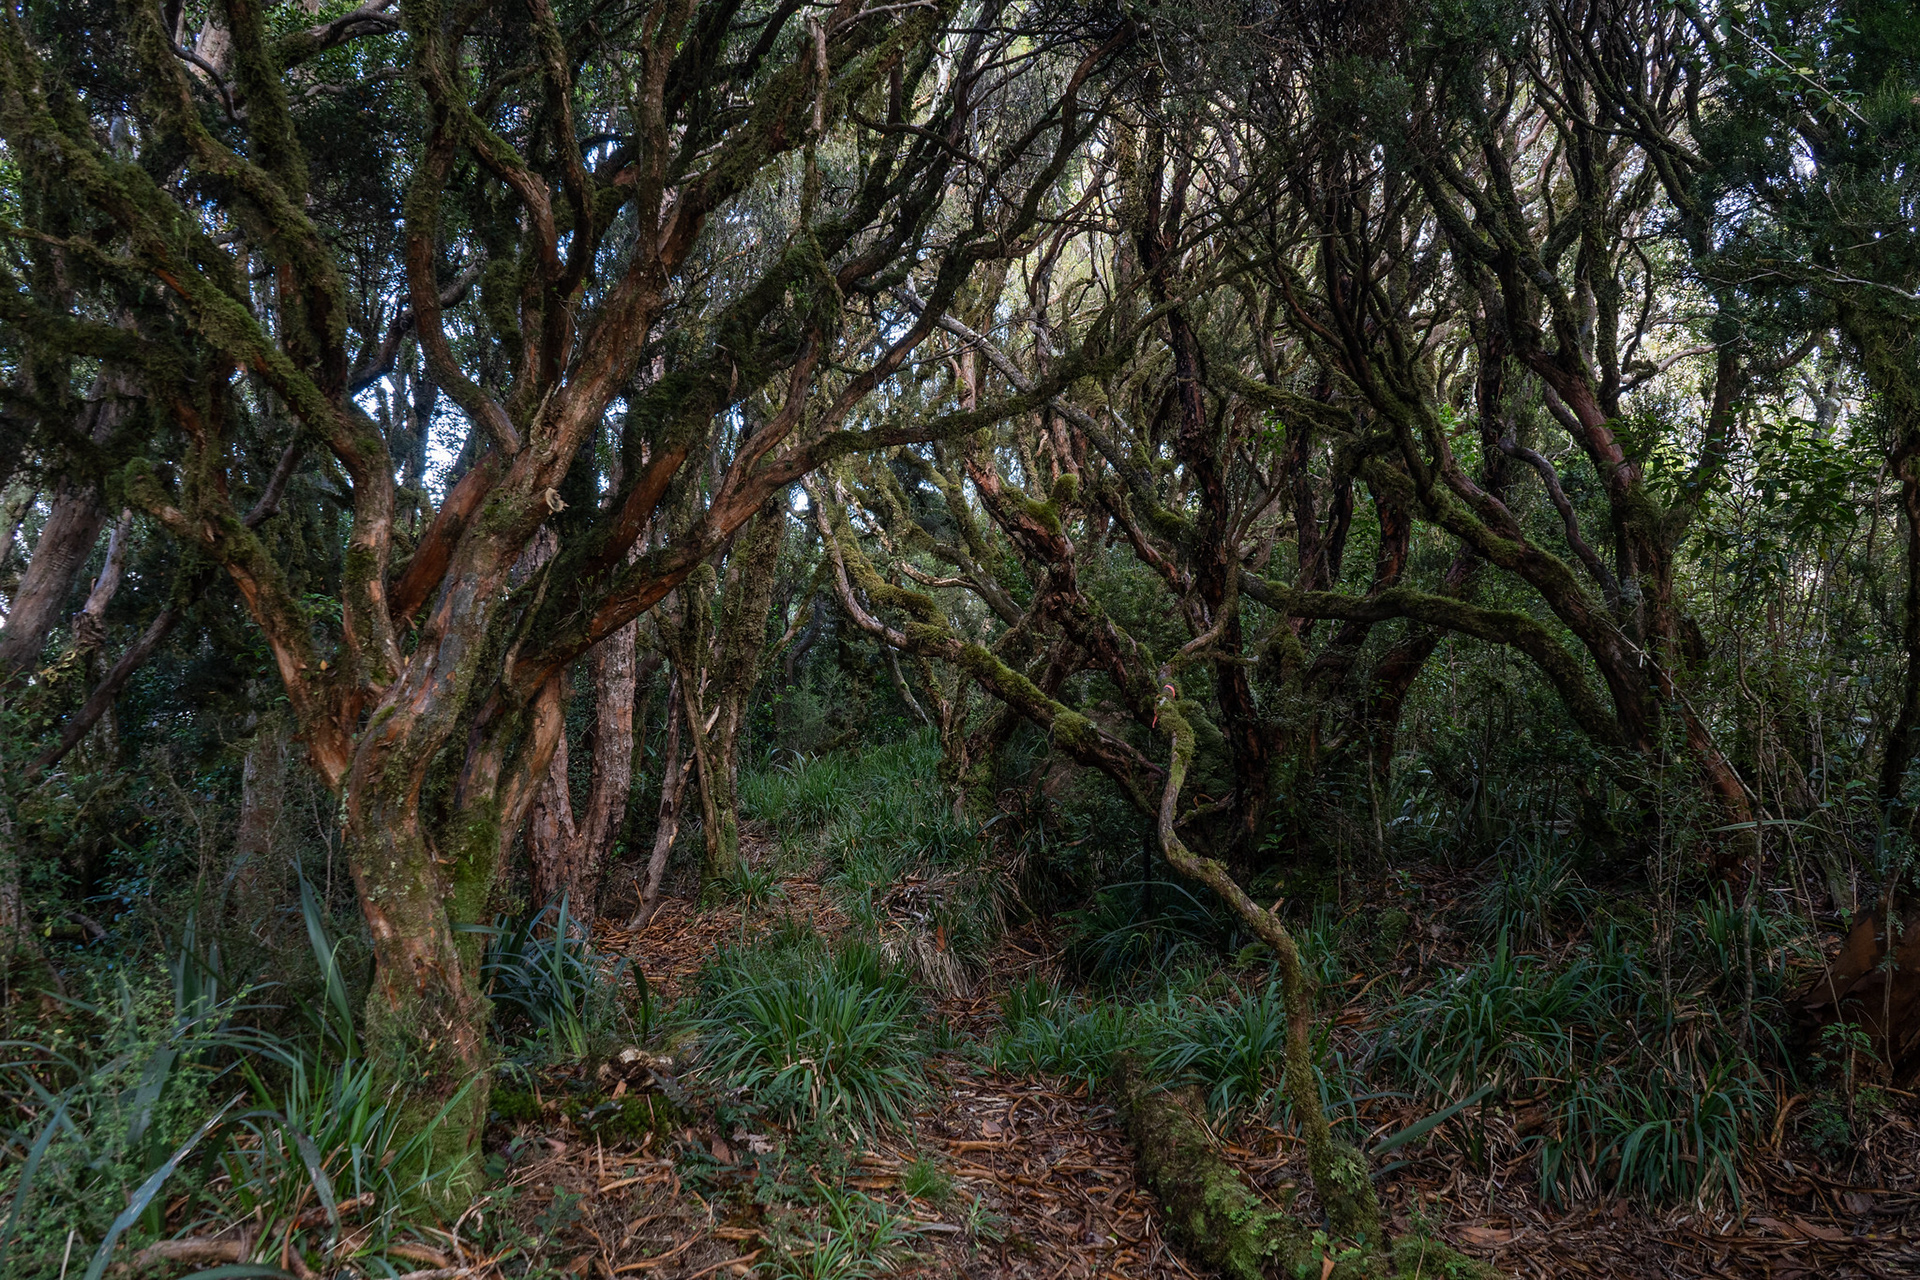
Travelling through scrub on Gerhardt Spur.

The spur does eventually breach canopy, and is mostly easy and meandering travel until it steepens again at around 650m. Nevertheless, it's been cut cleverly and there is nothing particularly technical.

Descending Gerhardt Spur soon after exiting the scrub zone.

In the few hours it took to reach Diedrichs Creek, the sunshine had given way to heavy cloud. There's every chance it was remnant cloud inversion and I had passed through it, but it felt like a omen that the time was right to be exiting the hills. The creek was comfortably crossable, which it needs to be done at least twice to avoid a bluff line and then get back onto the paper road on the true right. Muriel Creek also needs to be crossed, though this is normally trivial. Travel is then along farm tracks, I imagine the farmer sees a lot of thoroughfare as she was not bothered by me waiting behind her herd for 10 minutes as she moved them between paddocks.

Diedrichs Creek, roughly where the track hits the river.

The farm tracks hit the main road adjacent to the single lane bridge, and then it's another 3 or 4km back to the carpark to complete what is an undeniably stunning loop.

You may also like

Back to Top